Copyright 2017 MakerBot Industries, LLC. All rights reserved. MakerBot.com
|
|
|
- Norah Evans
- 6 years ago
- Views:
Transcription
1
2 Copyright 2017 MakerBot Industries, LLC. All rights reserved. MakerBot.com Unless otherwise stated herein, no part of this publication may be reproduced, distributed, or transmitted in any form or by any means, including photocopying, recording, or other electronic or mechanical methods, without the prior written permission of the publisher, except in the case of brief quotations embodied in critical reviews and certain other noncommercial uses permitted by copyright law. Specific questions on the capabilities of non-makerbot products and services referenced in this publication should be addressed to the suppliers of those products or services. ISBN: Printed in the United States of America First Edition
3 MAKERBOT EDUCATORS GUIDEBOOK The Definitive Guide to 3D Printing in the Classroom
4 MAKERBOT EDUCATORS GUIDEBOOK WHY WE WROTE THIS BOOK PAGE 4 WHY WE WROTE THIS BOOK In 2008, while we were still building our first 3D printer, MakerBot founded Thingiverse a 3D file library and community. Over the years, as we engineered more and more printers, we watched Thingiverse grow into a massive, indispensable resource for teachers, designers, and makers. From that moment on, educators were hungry for guidance on how to introduce 3D printing into their classrooms. So in 2014 we wrote the industry s first how-to, MakerBot in the Classroom. By then, the 3D printing movement in education had exploded and showed no signs of slowing; by 2016 MakerBot 3D printers could be found in over 5,000 schools worldwide. After years of talking to and learning from teachers, we knew that our first book and a few Thingiverse forums were a good start but would not be enough. The community was calling for high quality lesson plans and tips on best practices from their peers. So we tapped industry- leading educators to help us build Thingiverse Education, the largest collection of classroom-ready 3D printing lesson plans, created by teachers and vetted by MakerBot s education experts. We were thrilled to share what we had learned in the process and set out to write a new book with the help of the education community. MakerBot combined this new class of educators unique wisdom with our decade of experience building printers to bring you this; the definitive guide to 3D printing in the classroom. Introducing, the MakerBot Educators Guidebook.
5 HOW TO USE THIS BOOK PAGE 5 START WITH THE GUIDEBOOK PRIVACY AND YOUR STUDENTS Part 1: The basics on how 3D printers work and how to use them, including a crash course on 3D design. Part 2: Nine teacher-tested 3D printing lesson plans to integrate the technology into the classroom, bringing STEM and project based learning to a variety of subjects and grades. Part 3: Next steps for building your own lesson plans and going further with prints. EXPLORE MAKERBOT S THINGIVERSE EDUCATION The nine projects here are just a few of the hundreds available at thingiverse.com/ education, where you can filter by subject, grade, or standard to find the perfect project. Use Thingiverse Education and the MakerBot Educators Guidebook as inspiration to remix existing lesson plans, create your own, and explore new subjects and applications for 3D printing. Think outside the box! BECOME A MAKERBOT EDUCATOR Are you already using MakerBot 3D printers in your classroom? Join the growing MakerBot Educators community and connect to other teachers, participate in exclusive classroom challenges, and get special gear, discounts, and training. Apply to become a member at makerbot.com/educators Have questions or suggestions? Please reach out to the MakerBot Education team: guidebook@makerbot.com MakerBot takes the privacy of our educator community very seriously. Therefore, we want to be as transparent as possible. By using some of the online resources referenced in this Guidebook, you are consenting to provide MakerBot with a wide range of personal information, as we stipulate in the MakerBot Privacy Policy, which can be found at makerbot.com/legal/privacy Please make sure that your use of this Guidebook and the online resources referenced inside comply with the privacy standards of your school and school district for students under the age of 13. For more information, the Federal Trade Commissions (FTC) has set forth very helpful best practices and guidelines for educators with respect to online student privacy; please see ftc.gov/tips-advice/businesscenter/guidance/complying-coppafrequently-asked-questions#sc MAKERBOT EDUCATORS GUIDEBOOK HOW TO USE THIS BOOK
6 MAKERBOT EDUCATORS GUIDEBOOK TABLE OF CONTENTS TABLE OF CONTENTS P 10. Part 01: All About 3D Printing Chapter One INTRODUCTION TO 3D PRINTING P 48. Part 02: 3D Printing Projects Project 01 CLOUD TYPES AND DISPLAY STANDS P 20. Chapter Two 3D PRINTING IN THE CLASSROOM P 60. Project 02 3D MUSICAL SHAPES P 32. Chapter Three THINGIVERSE AND 3D MODELING P 68. Project 03 GO FROM CODE TO CAD P 80. Project 04 3D PRINTED MINECRAFT CASTLE TEACHES PERIMETER AND AREA PAGE 6
7 PAGE 7 P 90. P 106. P 118. P 128. P 140. Project 05 THE SPEEDY ARCHITECT Project 06 H 2 MAKE IT G0 Project 07 WEATHER SURVIVIAL CHALLENGE Project 08 RUBBER BAND GLIDERS Project 09 ARCHIMEDES SCREW BONANZA P 162. P 166. P 172. P 178. P 188. Part 03: Going Further Post-Processing SANDING 3D PRINTS Post-Processing GLUING 3D PRINTS Post-Processing PAINTING 3D PRINTS Post-Processing SILICONE MOLDING WITH 3D PRINTED MASTERS Post-Processing MAKERBOT EDUCATORS GUIDEBOOK TABLE OF CONTENTS SILICONE MOLDING WITH 3D PRINTED MOLDS
8 MAKERBOT EDUCATORS GUIDEBOOK PROJECT 01: CLOUD TYPES AND DISPLAY STANDS PAGE 8
9 PART 01: ALL ABOUT 3D PRINTING MAKERBOT EDUCATORS GUIDEBOOK PROJECT 01: CLOUD TYPES AND DISPLAY STANDS PAGE 9

10 MAKERBOT EDUCATORS GUIDEBOOK CHAPTER ONE: INTRODUCTION TO 3D PRINTING CHAPTER ONE INTRODUCTION TO 3D PRINTING PAGE 10 MAKERBOT REPLICATOR+ 3D PRINTER
11 There are several kinds of 3D printing technology. Throughout this book we will focus on the most common type, found in all MakerBot 3D Printers. Let s dive in and learn the basics. PAGE 11 TERMINOLOGY FDM : Fused Deposition Modeling, the 3D printing technology used by MakerBot Slicing: Turning a 3D model into 2D layers used for 3D printing Filament: Material used to build 3D printed parts Extruder: The hot glue gun of your 3D printer; it uses filament to draw out the layers of 3D printed parts Build Plate: Surface on which 3D prints are built Gantry: Moves the carriage in the x-axis and y-axis Carriage: Carries the extruder HOW DOES IT WORK? There are several types of 3D printing technology in use today. The additive manufacturing technology that MakerBot 3D Printers use is called Fused Deposition Modeling, or FDM for short : FDM printing starts with 02: The 3D model is sliced 03: On the printer, filament is fed into an a digital 3D model, most into 2D layers using a slicing extruder that draws out each slice, layer often generated from a software and then sent to by layer, onto the build plate. Over time, 3D modeling program. the printer. these 2D layers stack on top of each other to build a 3D print. MAKERBOT EDUCATORS GUIDEBOOK CHAPTER ONE: INTRODUCTION TO 3D PRINTING
12 MAKERBOT EDUCATORS GUIDEBOOK CHAPTER ONE: GET TO KNOW YOUR 3D PRINTER GET TO KNOW YOUR 3D PRINTER CONTROL PANEL You can operate the printer directly using the control panel; change filament, calibrate the printer, access printer settings, view wifi status, and more. The following diagrams detail the main components of each of the MakerBot Replicator 3D printers. Refer to the diagrams for guidance on major printer components like the build plate, gantry, extruder, and more. BACK BUTTON PAGE 12 LCD SCREEN MENU BUTTON DIAL USB DRIVE PORT
13 MAKERBOT REPLICATOR+ A favorite amongst educators! The build volume is large enough to print multiple student projects at once and the printer fits nicely on a table or desk. PAGE 13 FILAMENT DRAWER CARRIAGE CONTROL PANEL BUILD PLATE TECHNICAL SPECIFICATIONS BUILD PLATFORM Factory-Leveled Flex Build Plate with Grip Surface BUILD VOLUME 29.5 L X 19.5 W X 16.5 H cm 11.6 L x 7.6 W x 6.5 H in MIN. LAYER HEIGHT 100 microns (0.1 mm) USB CABLE PORT FILAMENT SPINDLE GANTRY ETHERNET PORT POWER INPUT PORT MAKERBOT EDUCATORS GUIDEBOOK CHAPTER ONE: GET TO KNOW YOUR 3D PRINTER
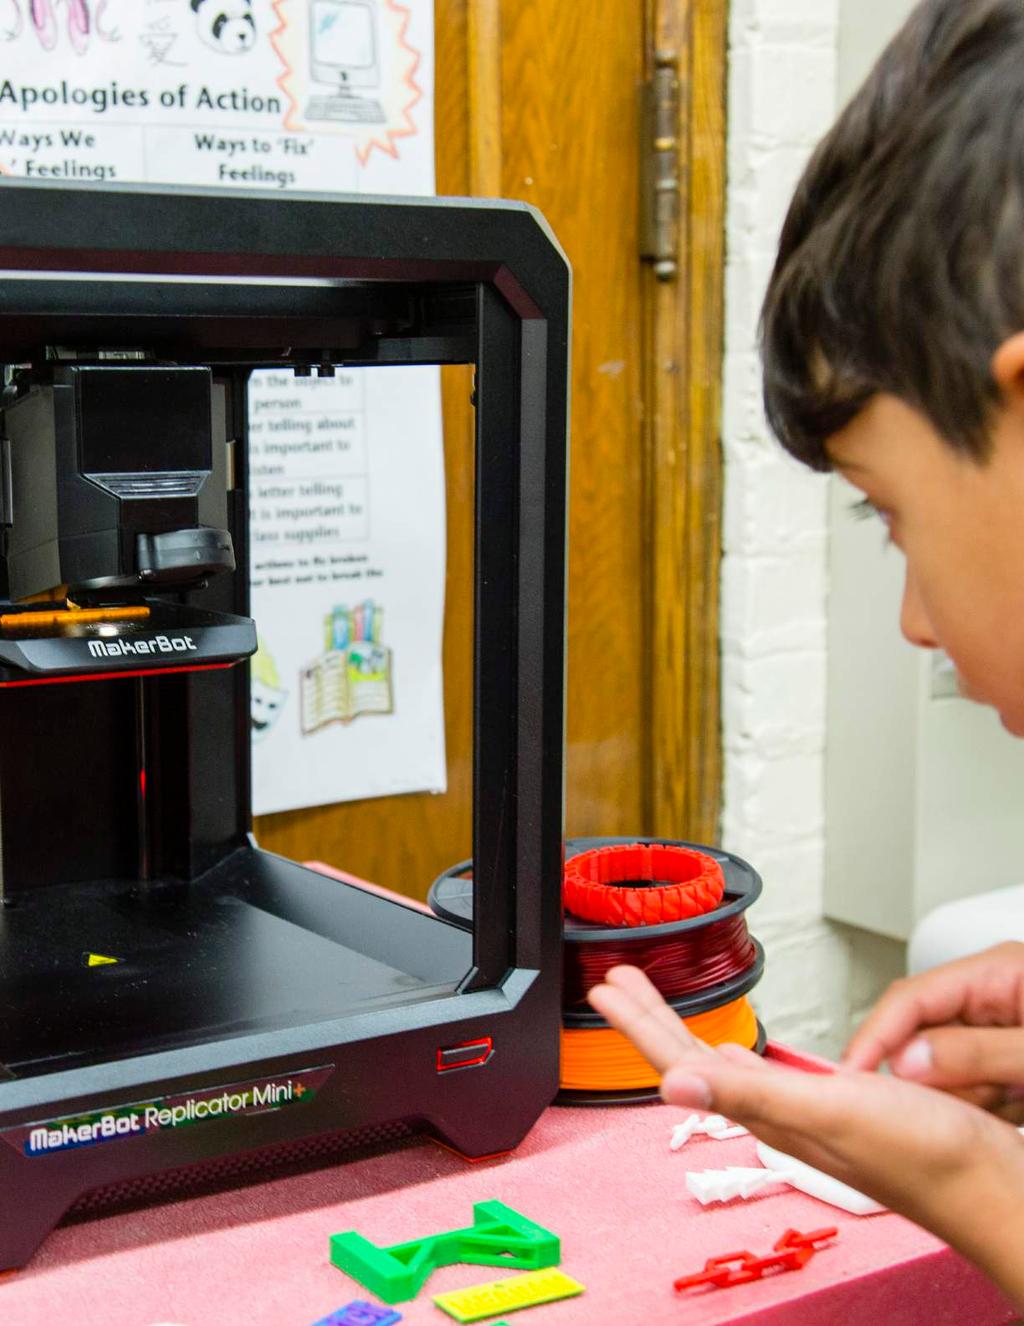
14 MAKERBOT EDUCATORS GUIDEBOOK CHAPTER ONE: GET TO KNOW YOUR 3D PRINTER MAKERBOT REPLICATOR MINI+ Small but mighty! The MakerBot Replicator Mini+ can be easily moved from classroom to classroom. GANTRY CARRIAGE TECHNICAL SPECIFICATIONS EXTRUDER FILAMENT SPOOL POCKET BUILD PLATE ACTION BUTTON BUILD PLATFORM Factory-Leveled Build Plate with Grip Surface POWER SWITCH POWER INPUT PORT PAGE 14 BUILD VOLUME 10.1 L X 12.6 W X 12.6 H cm 4 L x 5 W x 5 H in MIN. LAYER HEIGHT 100 microns (0.1 mm) USB CABLE PORT
15 MAKERBOT REPLICATOR Z18 The big one! The MakerBot Replicator Z18 is capable of printing parts up to 18 tall, great for large scale projects. PAGE 15 GANTRY BUILD PLATE CONTROL PANEL TECHNICAL SPECIFICATIONS BUILD PLATFORM Powder-Coated Steel with PC-ABS and Aluminum Composite Material BUILD VOLUME 30.0 L x 30.5 W x 45.7 H cm 11.8 L x 12.0 W x 18.0 H in MIN. LAYER HEIGHT 100 microns (0.1 mm) POWER INPUT PORT FILAMENT WASTE BIN BUILD PLATE LATCHES USB CABLE PORT FILAMENT DRAWER ETHERNET PORT USB CABLE PORT MAKERBOT EDUCATORS GUIDEBOOK CHAPTER ONE: GET TO KNOW YOUR 3D PRINTER


16 MAKERBOT EDUCATORS GUIDEBOOK CHAPTER ONE: WHO USES 3D PRINTING? WHO USES 3D PRINTING? 3D printing is used to solve problems in a variety of industries including engineering, product design, technology, medical, architecture, and even entertainment. Some of our favorite examples include: Engineering: Engineers at Lockheed Martin Product Design: Canary develops, tests, use MakerBot 3D printers to fundamentally and refines smart security systems redesign space telescopes. using 3D printing. Technology: Designers at Peloton use Medical: Open source 3D printable MakerBot 3D printers to prototype their prosthetics allow people all over the world cutting edge indoor bikes. to print low-cost assistive devices. PAGE 16 Architecture: Perkins + Will, an architecture firm in New York City, uses 3D printing to test new building ideas. Entertainment: The Legacy Effects team created a full-scale, detailed alien suit using 3D printing.
 program.")

 into a language the 3D printer can understand.")
17 HOW TO USE A 3D PRINTER These are the 3 basic steps to print on a MakerBot 3D printer. PAGE 17 1: Design. In order to 3D print, you must start with a 3D file. Here are a few ways to get one: Design a model to print in a 3D design software or computer-aided design (CAD) program. Scan an existing physical object with a 3D scanner. Find a model online from websites like thingiverse.com or grabcad.com 3: Print. Send your sliced file to your MakerBot 3D printer for printing. TINKERCAD.COM The print time will depend on many factors, including: 2: Slice. Before printing a model, prepare the file in MakerBot Print. Follow these steps: Edit the print settings. Decide if you want to print more than one part. Slice the model to prepare for printing, which translates the model(s) into a language the 3D printer can understand. Your print settings The size and complexity of the model MAKERBOT PRINT MAKERBOT EDUCATORS GUIDEBOOK CHAPTER ONE: HOW TO USE A 3D PRINTER
18 To learn what 3D printer is right for you or to speak directly to an implementation expert, visit: MakerBot.com/learnmore
19

20 MAKERBOT EDUCATORS GUIDEBOOK CHAPTER TWO: 3D PRINTING IN THE CLASSROOM CHAPTER TWO 3D PRINTING IN THE CLASSROOM PAGE 20 CYPRESS HILLS COMMUNITY SCHOOL Brooklyn, New York

21 Now that we ve explored how others are using their 3D printers, it s time for you to get started. This section will provide advice for setting up 3D printers in your school, classroom, library, or makerspace. PAGE 21 TERMINOLOGY SCHOOLS WITH MAKERBOT Smart Extruder+: Extrudes filament to draw out the layers of your 3D prints. The hot glue gun of your 3D printer Purge Line: Straight line drawn across the front of the build plate at the start of every print MakerBot Print : MakerBot s free software for managing and preparing your 3D print files Print Preview: Gives important time and material estimates Raft: Flat surface that provides a large foundation for print adhesion Support Material: Removable scaffolding structure that is built underneath overhangs (unsupported sections) of your printed parts Infill: Support structure built inside of the printed parts, measured in density Shells: Outside walls that make up the perimeter of printed parts Layer Height: The height of each layer of a printed part HOW OFTEN DO YOU USE YOUR PRINTER? 45% Weekly Daily Monthly 17% 1% 37% Never Less than once per month 5,000 NATIONWIDE MakerBot printers are reliable, safe and easy to use within the classroom. They are the #1 choice amongst educators in over 5,000 schools nationwide. MakerBot products helps to prepare students for meaningful careers by opening up a world of design thinking and student innovation. WHAT SUBJECTS DO YOU USE YOUR 3D PRINTERS WITH? 80% 60% 40% 20% 0% Technology Science Math Engineering History MakerBot Thingiverse Education provides teachers with easyto-implement lesson plans written by our growing community of MakerBot Educators. These lessons contain detailed STEM projects aligned to Next Generation Science Standards (NGSS) and Common Core State Standards (CCSS). Art English Other Foreign Lang. Special Edu. MAKERBOT EDUCATORS GUIDEBOOK CHAPTER TWO: 3D PRINTING IN THE CLASSROOM

 can have an impact")


22 MAKERBOT EDUCATORS GUIDEBOOK CHAPTER TWO: PREPARE YOUR CLASSROOM PREPARE YOUR CLASSROOM Your MakerBot Replicator+ is versatile and can be used almost anywhere in the classroom. With that in mind, the placement of your printer(s) can have an impact on its use as well as its performance. 3D printers are best used in a relatively temperature stable environment, where there are no frequent gusts of wind, dust, water, or temperature changes. MakerSpace Setup: Students work side by side with their printers and peers for enhanced collaborative learning. SUGGESTED 3D PRINTING TOOLS AND SUPPLIES General Printing Area: Offers students a dedicated space to house communal printers. Instructor s Printer: Allow students to follow detailed instructions as they prepare for their printing experience. PAGE 22 USB STICK stores and organizes print files and documents FLUSH CUTTERS removes support material NEEDLE NOSE PLIERS removes support material CRAFT SPATULA removes prints from the build plate

23 MAKERBOT EDUCATORS GUIDEBOOK CHAPTER TWO: PREPARE YOUR CLASSROOM PAGE 23 GENERAL PRINTING AREA MAKERSPACE INSTRUCTOR S PRINTER PROS AND CONS OF PRINTER PLACEMENT IN YOUR SCHOOL IN THE CLASSROOM: Pros: Allows for lots of student interaction, hands-on time, and printing in class Cons: Lessens access to the rest of the school IN A COMMUNAL SPACE: Pros: Ensures visibility, encourages more student, faculty, and staff use Cons: Makes it more difficult to print during class DO S Place your 3D printer on a stable surface Have a small workspace near your printer Keep print tools handy Store filament in a cool, dry location, ideally in its original packaging DON TS Place your 3D printer near air conditioning Store filament and extra Smart Extruder+ s in unsecure areas


24 MAKERBOT EDUCATORS GUIDEBOOK CHAPTER TWO: PRINTER UNBOXING AND SETUP PRINTER UNBOXING AND SETUP When your printer arrives, the first thing you ll need to do is unbox it and begin the setup. You ll be guided to connect to WiFi, attach your Smart Extruder+, calibrate, load filament, and begin a test print. The setup process should take minutes and then you re ready to set off your first 3D Print! For a comprehensive guide on how to unbox your MakerBot 3D printer, visit makerbot.com/getstarted WiFi and Remote Monitoring During the setup you ll be asked to connect your printer to a WiFi network. Connecting to WiFi allows you to start and monitor prints remotely from your printer s on-board camera. TIP: Save all your packing materials. You might need to move or ship your printer at a later date. PAGE 24 If your school has restricted or inconsistent WiFi access, you can skip this step. You ll still be able to connect to the printer via USB cable, USB stick, or Ethernet cable.


25 RUNNING A TEST PRINT The last step in the guided setup process is to select a test print from the printer s internal storage. Here are some things to look for when printing: PAGE 25 Purge line: Your MakerBot Replicator+ draws a straight line across the front of the build plate at the start of every print. If you have a MakerBot Replicator Mini+, this Mr. Jaws Thing: Licensed under CC BY-SA 3.0 will be on the side. First layer: The first layer of your print is the most important. If you notice that parts of the first layer are not adhering to the build plate, cancel the print and consider leveling your build plate. Test Print: Each of the test prints on your printer take between minutes to print. Once the test is complete, you re ready to move on and begin printing! MAKERBOT EDUCATORS GUIDEBOOK CHAPTER 02: UNBOXING AND SETUP


 using the arrange, orient, and scale menus.")


26 MAKERBOT EDUCATORS GUIDEBOOK CHAPTER TWO: PREPARE FILES WITH MAKERBOT PRINT PREPARE FILES FOR PRINTING WITH MAKERBOT PRINT MAKERBOT PRINT Select Printer: Click on the printer menu to view your active printers. Select add a printer to add a new printer to your list. Add a network printer to browse from printers already on your network via WiFi or Ethernet. Connect via IP address to add a printer using its IP, this can be found on the MakerBot Replicator+ onscreen menu. Add an unconnected printer if you plan on transferring files to your printer via USB stick. MAKERBOT PRINT Layout: Arrange models on your build plate(s) using the arrange, orient, and scale menus. Rotate your models so that the largest flat surface is touching the build plate. Try using place face on build plate in the orient menu to help. MAKERBOT PRINT Insert Files: Open the project panel and select add models. Alternatively, you can drag and drop files directly into MakerBot Print s main window from your computer. File Types: Both Mac and PC users can import.stl files. PC users can import native CAD files from programs like SolidWorks and Autodesk Inventor. MAKERBOT PRINT Settings: Select your print mode, extruder type, and toggle support material on/off. Print settings will affect the strength, surface quality, weight, print time, and other properties of your printed parts. We recommend always printing with rafts on. PAGE 26 TIP: Place models as close to the center of the build plate as possible. Group models as close together as possible without overlapping, arrange build plate is useful for arranging lots of models. TIP: Print modes are a set of recommended print settings. For more advanced control, select the add a custom setting button to create your own custom print modes.


. TIPS: Use the scroll bar on the left to show students how parts will be printed.")

27 Once you have your printer set up, it s time to learn how to prepare files for printing. MakerBot Print is the software you ll use to take 3D designs and convert them to 3D printable files. Download it for free at makerbot.com/print PAGE 27 MAKERBOT PRINT MAKERBOT PRINT Print Preview: Once you have your models set and have selected your print settings, click the estimates and print preview button to see how your models will be printed and to estimate print time and material usage. MAKERBOT PRINT Print: Use the print button to print directly to connected printers or to export files for offline printers (this will appear as export if you ve selected an unconnected printer). TIPS: Use the scroll bar on the left to show students how parts will be printed. Some models with large overhangs and bridges will need supports. Toggle supports on and off then preview to learn where supports are generated. MAKERBOT PRINT Monitor your print progress by navigating to the printer menu and watching the live camera feed. You can also monitor via the MakerBot Mobile app. MAKERBOT EDUCATORS GUIDEBOOK CHAPTER TWO: PREPARE FILES WITH MAKERBOT PRINT

 to 100% (solid).")


28 MAKERBOT EDUCATORS GUIDEBOOK CHAPTER TWO: SHELLS, INFILL, SUPPORTS AND RAFTS SHELLS AND INFILL Print settings can dramatically change the strength, appearance, print time, and other properties of your printed parts. Shells are the perimeter on each layer; they make up the walls of your part. Infill is the internal structure of your part. You can set the infill of your part to be anywhere from 0% (hollow) to 100% (solid). Increasing the infill and number of shells will make your parts stronger, but will increase print time and filament use. PRINTED PYRAMID 10% Infill / 02 Shells without supports SUPPORTS AND RAFTS PRINTED PYRAMID 0% Infill 08 Shells PRINTED PYRAMID 02% Infill 02 Shells PRINTED PYRAMID 25% Infill 02 Shells PRINTED PYRAMID 50% Infill 02 Shells Supports are printed scaffolding for overhangs. If your model has overhangs greater than 68 degrees (measured from the vertical axis) then you will need to print with supports. A raft helps the part adhere to the build plate by laying down an even, flat foundation to print on. PAGE 28 3D Model: The T model has overhangs greater than 68 degrees and needs support material. The Y model does not need support material. Supports: After printing, the T will needs support material removed. Both printed with rafts. Final Print: Final parts after removing supports and rafts.
29 PRE-PRINT CHECKLIST SOFTWARE 01. Add Files: Click File > Insert File or drag and drop right onto the build plate HARDWARE 05. Install Build Plate: Load your build plate onto the Z-stage and confirm it s snug PAGE Arrange: Organize objects by dragging or using Arrange Build Plate 06. Attach MakerBot Smart Extruder+: Confirm that the Smart Extruder+ is attached properly 03. Print Settings: Adjust your print settings to change print speed and quality 04. Print Estimates and Preview: Double check print time and material usage by checking Print Preview. POST-PRINT CHECKLIST 09. Remove Build Plate: Slide 10. Remove Parts from Build the build plate toward you to Plate: Gently flex the build plate remove it from the Z-stage or use a thin craft spatula to remove parts 07. Calibrate MakerBot Smart Extruder+: If you ve just attached a Smart Extruder+, run a Z Calibration. On the printer, select Settings > Calibration > Calibrate Z Offset 08. Load Filament: Select Filament > Load Filament. Then, ensure that the filament is seated in the drawer, fed through the guide tube, and securely inserted into the Smart Extruder+ when prompted. 11. Discard Rafts and Support: Use your hands or tools to gently remove the raft and support materials from parts MAKERBOT EDUCATORS GUIDEBOOK CHAPTER TWO: PRINTING CHECKLIST
30 MAKERBOT EDUCATORS GUIDEBOOK CHAPTER TWO: ADVICE FROM EDUCATORS ADVICE FROM MAKERBOT EDUCATORS WHAT TO KNOW BEFORE YOU START We asked educators to tell us one thing they wish they knew before they started using a 3D printer in the classroom: Combine student projects: I wish I knew that you could combine multiple student projects into one large print file. This has saved me loads of time printing. Understand your printer: Using a printer is very straightforward, but you should allot sufficient time to print some models yourself to really test the abilities and limitations of 3D printing. That way, you ll be better able to look at models and determine if they re printable and whether or not they ll need supports. Learn how to 3D design: At first I relied heavily on Thingiverse, which was fun and informative, but it wasn t until I felt comfortable designing alongside my students that I felt like I truly unlocked the teaching potential of my MakerBot 3D printer. Be open to ideas from students: Letting them have the ah-ha moment is meaningful. Mind your filament: Make sure you have enough filament before starting a project. When storing filament, keep the end tucked into the spool to prevent tangling, and keep the spools in a cool, dry place. HOW DO YOU ANALYZE AND GRADE STUDENT PROJECTS? Our educators shared how they assess student success: PAGE 30 Clear, fair requirements: Your students will all be at different 3D design skill levels, so set requirements that focus on problem solving, collaboration, creative thinking, etc. that are mutually attainable for all students. Look for the basics: Grade on basic 3D printing best practices, like ensuring that models are flat against the build plate and that parts have no obvious weak points. Allow for mistakes: Create a rubric that allows for mistakes. Overcoming flaws in design is when the real learning occurs; even if their designs fail, if a student can accurately explain why, they ve done well.
31 PAGE 31 HOW DO YOU MANAGE STUDENT FILES? MAKERBOT EDUCATORS GUIDEBOOK CHAPTER TWO: ADVICE FROM EDUCATORS Managing multiple student files can be tricky. Here are some tips from teachers for dealing with student files in your classroom: Establish a naming convention: Have students name their files with their Project Name, Student Name, Date, and Version (if applicable). i.e: Clouds_ StudentName_ _V1.stl Set up student accounts ahead of time: Create MakerBot and 3D software accounts on behalf of students prior to beginning a project and log in on each computer in advance. Create communal storage: There are a variety of options available to manage student files online, including Google Classroom, Google Drive, Dropbox, and more. When WiFi isn t available, use a shared USB stick to keep all student files in one location. If you have one printer, print in bulk: Add multiple student models onto one build plate in MakerBot Print and print during after-school hours and weekends. (Just make sure to watch the first layers before leaving.) Review student files before printing: Schedule time to review students work in the design program, and help them export their models as.stl files. Then, help them import into MakerBot Print, check their settings, and begin printing. Students can also upload their files to Thingiverse. WHERE THE MAGIC HAPPENS Grow your own 3D printing skills and inspire your students: Don t be afraid to try: I taught myself how to use our 3D printer during class. The kids watched me make mistakes and I think it really taught them a lot about the learning process. Be a model: Becoming a 3D designer and printer yourself is the best way to inspire students to do the same. Don t be afraid to play and make mistakes while learning how to design and print. We expect our students to be brave, lifelong learners, and we must reach for that same goal!

32 MAKERBOT EDUCATORS GUIDEBOOK CHAPTER THREE: THNGIVERSE AND 3D MODELING CHAPTER THREE THINGIVERSE AND 3D MODELING PAGE 32
33 When exploring how to best use your 3D printer, you don t have to go it alone. There s a massive online community of millions of 3D printing educators and makers that actively offer advice, answer questions, and contribute their designs for others to use freely. This community is Thingiverse. Thingiverse is built on the principles of sharing, learning, and making. It s a community where users from all over the world can download free 3D models and 3D printing lesson plans for any age group or subject. MakerBot founded Thingiverse in 2008 while developing the first desktop 3D printers, and several years later it s grown to an enormous size and stands in support of the entire 3D printing industry. TERMINOLOGY Thingiverse : The largest online 3D printing community and library of printable files, accessible at thingiverse.com Thing: A 3D model uploaded to Thingiverse, this can be a single object or several, and typically comes with pictures and printing instructions Thingiverse Education : 3D printing projects and lesson plans for different grades and subjects Remix: A cornerstone of Thingiverse. This is when a user edits or builds upon a Thing to customize it in some way while providing attribution to the original designer Licensing: Describes how a designer permits the community to use his/her creation (i.e. whether it can be remixed or sold commercially) Makes: When a user downloads and prints another designer s model, then uploads a picture of it to demonstrate its appearance and printability Collection: A curated folder of Things by users, and a great way to organize Things for your class THINGIVERSE, A UNIVERSE OF THINGS Thingiverse is a great place to go for inspiration when creating your own 3D models. Instead of designing a hinge or spring from scratch, there are plenty of Things you can look to for guidance, or download and modify to suit your own project. Several designers use Thingiverse the way photographers use Instagram; designers upload 3D models to share with others and get feedback and recognition for their work. Take some time to explore the more active users portfolios you re sure to find some amazing and inspirational Things! Be mindful of the licensing features that the original designer has chosen when downloading and printing 3D models. In some cases, you are free to use the model however you d like. However in others, you may not be allowed to remix or use the model commercially, such as selling prints of the model. In all cases, you must provide attribution to the designer, especially when you remix another designer s model. THING BADGES When searching Thingiverse, keep an eye out for these icons to help you identify standout Things: Verified Thing: 3D model has been print tested and verified to print successfully. Challenge Winner: This Thing was the winning entry in a Thingiverse Challenge. Featured Thing: This Thing has been featured on the Thingiverse homepage. Thingiverse Education: This Thing is an educational project. PAGE 33 MAKERBOT EDUCATORS GUIDEBOOK CHAPTER THREE: THNGIVERSE AND 3D MODELING


34 MAKERBOT EDUCATORS GUIDEBOOK CHAPTER THREE : EXAMPLE THINGIVERSE THINGS EXAMPLE THINGS Subaru WRX EJ20 Boxer Engine Model Thing: Licensed under CC BY-NC 3.0 WALLY - Wall Plate Thing: Licensed under CC BY-SA 3.0 Vases Thing: Licensed under CC BY-SA 3.0 Go-Go AirBoat Thing: Licensed under CC BY-SA 3.0 Mars Rover Thing: Licensed under CC BY-SA 3.0 Pip Boxes Thing: Licensed under CC BY-NC 3.0 Forest Dragon Tide the Fish Fascinator Hat Thing: #87458 Thing: # @Yesquab PAGE 34 Licensed under CC BY-SA 3.0 Licensed under CC BY-SA 3.0 Licensed under CC BY-NC 3.0

35 THINGIVERSE EDUCATION Thingiverse Education is a collection of 3D printing projects for the classroom. It s where educators go to find lesson plans, remix them to suit their subjects or grade levels, and share best practices on how to incorporate the technology into their classrooms. PAGE 35 3D printing projects use 3D design and printing in different ways to reinforce core learning objectives in several subjects from clear STEM applications in engineering and physics, to blended activities in history, music, or foreign languages. Most projects on Thingiverse Education prompt students to plan, design, and print their own solutions to a given problem. Thingiverse Education organizes projects by grade level, subject, and standards (including Next Generation Science Standards, NGSS and Common Core State Standards, CCSS.) Projects can range in length from a single class period to week-long projects with multiple assignments and objectives. MAKERBOT EDUCATORS GUIDEBOOK CHAPTER THREE: THINGIVERSE EDUCATION
. There are some great projects out there, look at existing ones for examples of how to build your own.")
36 MAKERBOT EDUCATORS GUIDEBOOK CHAPTER THREE : CREATE A PROJECT CREATE A PROJECT ON THINGIVERSE EDUCATION Whether you design your own 3D model or remix someone else s, every Thingiverse Education project starts with a 3D printable file (.STL). There are some great projects out there, look at existing ones for examples of how to build your own. The projects featured in the second half of this guidebook can all be found on Thingiverse Education. Here are the steps to create your own Thingiverse Education project for sharing with other teachers. PAGE 36
: This could be a starter model, an example of the project s output, a challenge, a tutorial, a demonstration, etc.")
37 01. Create a new Thing: Navigate to Thingiverse.com Click Create then upload a Thing PAGE Upload your files:.stl file(s): This could be a starter model, an example of the project s output, a challenge, a tutorial, a demonstration, etc. Cloud Types and Display Stands Designed Photo(s): This should be a photo of the printed model, or of the project in action. The more photos the better. Other files like handouts, rubrics, etc. Grades: 1-4 Subject: Science This project prompts students to design and print models for each of the ten different cloud formations. SAMPLE PROJECT FROM Thingiverse.com/Education 03. Complete the Basic Information section: Complete the required fields Check the box to submit to Thingiverse Education for approval 04. Complete the Thing Information sections: Summary: Short description of the 3D model and the project involved Grade: Select the recommended grade level for the project Subject: Include any relevant subjects i.e. science or math Standards: Select the standards that your project meets Overview and Background: Give an intro to what students will learn by completing this project Activity / Lesson Plan: The meat of your project. Be sure to list every step. Remember, a picture is worth 1,000 words Materials Needed: Itemize the materials for this project 05. Add more information to help other educators: Skills Learned: List what skills will be gained by completing this project and include specific standards here Duration: Estimate how long it will take to complete Preparation: List anything that students should already know or that the teacher needs to do before starting this project Handouts and Assets: If there are any documents that accompany your project, attach them to the Thing s files and include a brief description here Rubric and Assessment: Describe what students should have designed, made, printed, or achieved at the end of your project, and any guidelines you have for assessment References: Include links to valuable resources 06. Publish Thing MAKERBOT EDUCATORS GUIDEBOOK CHAPTER THREE : CREATE A PROJECT
38 The world s largest 3D printing file library and community. Discover. Share. Create. Thingiverse.com


39 MAKERBOT EDUCATORS GUIDEBOOK PROJECT 01: CLOUD TYPES AND DISPLAY STANDS PAGE 39
40 MAKERBOT EDUCATORS GUIDEBOOK CHAPTER THREE: 3D DESIGN SOFTWARE 3D DESIGN SOFTWARE Learning how to design in 3D is essential to creating custom 3D printable models. The broad capabilities of the printer will push you to design increasingly complex objects. Once you begin to experiment, you ll discover the unique advantages that different 3D design programs offer for different applications. We recommend starting with easy solid modeling programs before branching out to digital sculpting or parametric modeling as you become more comfortable. No single program is right for everyone, and it may take a few tries before you find one that you re comfortable with. There are a lot of 3D design programs available, all with different strengths and weaknesses. When looking at 3D modeling programs, you ll find that all of them fall into three major categories; solid modeling, digital sculpting, or polygon modeling. The projects in this guidebook focus mainly on free programs. TERMINOLOGY Solid Modeling: Define and Mesh: The collection of vertices, construct solid objects with edges, and faces that make up real world dimensions the surface of a 3D model Digital Sculpting: Simulate clay Watertight: A continuous outer sculpting. Push and pull surfaces surface with no holes in it, necessary to create detail and texture for successful 3D printing Polygon Modeling: Define outer Perspective View: Objects surfaces like edges and corners further away appear smaller than to create intricate models objects closer to the viewpoint Parametric Modeling: A feature in 3D design programs, use dynamic variables for object parameters so that entire designs can be easily altered or scaled Orthographic View: Fixes the point of view to a single perspective, where similarly sized objects appear the same size regardless of their distance from the viewpoint PAGE 40
41 SOLID MODELING PAGE 41 QUADCOPTER DRONE: Created in Rhinoceros Solid modeling programs work well for creating models with real-world dimensions and are used to make functional parts. In some of the advanced programs you can form complex assemblies of objects and run simulations. Industries: Engineering, industrial design, architecture Free software: Autodesk Tinkercad, Autodesk Fusion 360, Onshape and more Paid software: SolidWorks, Autodesk Inventor, Rhinoceros + - STRENGTHS Creating mechanical structures with dimensions Building assemblies Simulating realworld conditions Access to material property libraries WEAKNESSES Poor organic shape creation Difficult to create detailed surface textures and patterns MAKERBOT EDUCATORS GUIDEBOOK CHAPTER THREE: 3D DESIGN SOFTWARE

42 MAKERBOT EDUCATORS GUIDEBOOK CHAPTER THREE: 3D DESIGN SOFTWARE DIGITAL SCULPTING ROSE: Created in Sculptris Digital sculpting simulates the process of sculpting with physical clay. Users can push and pull digital clay to create organic, highly detailed and textured models. Industries: Film, video games, art Free software: Sculptris, SculptGL Paid software: ZBrush, Mudbox, 3D-Coat + - STRENGTHS Highly detailed models Organic shapes Digital painting WEAKNESSES Creating functional parts is difficult Often requires additional hardware like a drawing tablet Difficult to design for manufacturing PAGE 42

43 POLYGON MODELING PAGE 43 RUNNING SHOE: Created in Blender Polygon modeling gives users direct control of the mesh, faces, vertices, or edges of a model. This allows for the creation of highly detailed and intricate 3D models. These models can be organic or inorganic. Industries: Animation, visualization, film, video games Free software: Blender, Wings 3D Paid software: Maya, 3DS Max, Cinema 4D + - STRENGTHS Highly detailed, intricate models Direct control of the mesh WEAKNESSES Steep learning curve Models aren t always watertight MAKERBOT EDUCATORS GUIDEBOOK CHAPTER THREE: 3D DESIGN SOFTWARE
44 MAKERBOT EDUCATORS GUIDEBOOK CHAPTER THREE: 3D MODELING APPLICATIONS 3D MODELING APPLICATIONS BR BLENDER Difficulty: Advanced Type: Polygon Modeling, Digital Sculpting Platform: Mac, Windows, Linux Price: Free Supports modeling, rigging, animation, simulation and even video editing and game creation. MO MORPHI Difficulty: Easy Type: Solid Modeling Platform: Mac, ios, Windows Price: Free/$ Create 3D designs on mobile devices with this simple and intuitive program. If you re just getting started, here are some recommended free 3D Design program options to try out. AF AM AUTODESK FUSION 360 AUTODESK MESHMIXER Difficulty: Intermediate Difficulty: Intermediate Type: Solid Modeling Type: Polygon Modeling, Digital Sculpting Platform: Mac, Windows Platform: Mac, Windows Price: Free/$ Price: Free Powerful software for creating Manipulate meshed objects and analyzing complex in preparation for 3D printing. geometries and assemblies. Create custom supports, fix mesh errors, and add detail. ON OS ONSHAPE OPENSCAD Difficulty: Advanced Difficulty: Intermediate Type: Solid Modeling Type: Solid Modeling Platform: Online Platform: Mac, Windows, Linux Price: Free/$ Price: Free Browser-based software for Use code to define object creating and analyzing complex dimensions and dynamic geometries and assemblies. variables for easy resizing and alteration. PAGE 44
45 STUDENT PRIVACY PAGE 45 The projects in Section 2 of this book involve student usage of many 3D design programs. For any program that requires SC SCULPTRIS Difficulty: Easy Type: Digital Sculpting Platform: Mac, Windows Price: Free Push and pull object surfaces. Great for organic, high-detail models. Use SculptGL for a browser-based version. TC TINKERCAD Difficulty: Easy Type: Solid Modeling Platform: Online Price: Free Design in-browser by combining and resizing simple shapes and holes. SK SKETCHUP Difficulty: Easy Type: Solid Modeling Platform: Mac, Windows, Online Price: Free/$ Draw objects with dimensions. Good for accurate, geometric forms, especially architectural models. MC MINECRAFT Difficulty: Easy Type: Solid Modeling Platform: Mac, Windows Price: $ Though not a traditional 3D modeling program, Minecraft helps to teach core 3D modeling skills. user information and/ or account creation, be sure to consult the Terms associated with each program before beginning the project. Students under 13 years of age often are restricted from creating accounts or entering personal information in these programs without explicit consent from their parent/guardian. Here are some suggestions to keep your students information safe: DO S Create a generic MakerBot account for students under 13 to use Use only school computer and equipment for students under 13 DON TS Allow or require students under 13 to create their own MakerBot account Require students under 13 to use their own laptop or mobile devices MAKERBOT EDUCATORS GUIDEBOOK CHAPTER THREE: 3D MODELING APPLICATIONS
46 MAKERBOT EDUCATORS GUIDEBOOK PROJECT 01: CLOUD TYPES AND DISPLAY STANDS PAGE 46
47 PART 02: 3D PRINTING PROJECTS MAKERBOT EDUCATORS GUIDEBOOK PROJECT 01: CLOUD TYPES AND DISPLAY STANDS PAGE 47

48 MAKERBOT EDUCATORS GUIDEBOOK PROJECT 01: CLOUD TYPES AND DISPLAY STANDS PROJECT ONE CLOUD TYPES AND DISPLAY STANDS PAGE 48 LINK: thingiverse.com/thing: for access to handouts, videos and other materials associated with this project.
49 PROJECT INFO AUTHOR Danielle SUBJECT Science AUDIENCE Grade Levels 1 4 DIFFICULT Y Beginner SKILLS NEEDED Basic Tinkercad software experience DURATION 3 4 Class Periods GROUPS 8 Groups 3 4 Students / Group MATERIALS 10 No.2 Pencils Paper and Markers Index Cards Camera or Scanner SOFTWARE Tinkercad (web app) PRINTERS Works with all MakerBot Replicator 3D printers PRINT TIME Prep: 5 hrs / Cloud Base Lesson: 1 3 hrs / Cloud FILAMENT USED 1 1 ½ Large Spools This project enables kids to do more than design something on the computer. They get to take something they ve drawn by hand and turn it into a 3D object. Then, as a bonus, they use their 3D-printed object to show what they know! It s a great, un-scary way of getting kids to make in the classroom. LESSON SUMMARY Cloud types differ not only in appearance, but in water content, altitude, and as signals for future weather conditions. Learning about the clouds helps students understand the atmosphere and the interconnectedness between the systems of the planet. This project prompts students to work in groups to design and print models for each of the ten different cloud formations. The cloud prints are designed to fit on the end of a standard pencil, which can sit in a base that has the name of the cloud formation. The base also has space for flash cards, pictures of clouds, or additional study aids. This is a great science project and can be used to create a display area for teachers who like to use learning stations. LEARNING OBJECTIVES After completing this project, students will be able to: Identify cloud types based on characteristics, appearance, and altitude. Convert a hand drawing to a 3D model using Tinkercad software. Manipulate models in Tinkercad using the group, hole, and ruler tools. NGSS STANDARDS 3-ESS2-1 Earth s Systems Represent data in tables and graphical displays to describe typical weather conditions expected during a particular season. 5-ESS2-1 Earth s Systems Develop a model using an example to describe ways the geosphere, biosphere, hydrosphere, and/or atmosphere interact. MS-ESS2-4 Earth s Systems Develop a model to describe the cycling of water through Earth s systems driven by energy from the sun and the force of gravity. 3-5-ETS1-1 Engineering Design Define a simple design problem reflecting a need or a want that includes specified criteria for success and constraints on materials, time, or cost. This project can be extended to meet the following Standards: 5-PS1-1 Matter and Its Interactions Develop a model to describe that matter is made of particles too small to be seen. 5-ESS2-2 Earth s Systems Describe and graph the amounts and percentages of water and fresh water in various reservoirs to provide evidence about the distribution of water on Earth. MS-ESS2-5 Earth s Systems Collect data to provide evidence for how the motions and complex interactions of air masses results in changes in weather conditions. Danielle Evansic MS-LS2-3 Ecosystems: Interactions, Energy, and Dynamics Develop a model to describe the cycling of matter and flow of energy among living and nonliving parts of an ecosystem. PAGE 49 MAKERBOT EDUCATORS GUIDEBOOK PROJECT 01: CLOUD TYPES AND DISPLAY STANDS
.")


50 MAKERBOT EDUCATORS GUIDEBOOK PROJECT 01: CLOUD TYPES AND DISPLAY STANDS TEACHER PREPARATION A. Print cloud bases: 3D print each of the cloud bases included in the Thingiverse Education post (thingiverse.com/thing: ). Leave yourself some time for this, as each cloud base will take 4-5 hours to print. B. Research cloud formations: Have students research and discuss different cloud formations. NOVA, NASA, and ABCTeach offer great resources. You can find these links in the Thingiverse Education post. C. Make index cards: Have students make index cards for each of the following types of clouds: High-Level Clouds - Cirrus, Cirrostratus, Cirrocumulus Mid-Level Clouds - Altostratus, Altocumulus Low-Level Clouds - Stratus, Stratocumulus Multi-Level/Vertical Clouds - Cumulus, Cumulonimbus, Nimbostratus PAGE 50
.")
51 STUDENT ACTIVITY STEP 01: DRAW CLOUDS PAGE 51 It s pretty easy to go from a simple drawing to a 3D printed part. In this project, your group will create a 3D printed model based on your drawing of one cloud type. A. Choose one of the cloud types (make sure each group selects a different cloud type to work on). B. Draw and color your clouds. Use dark colors so they show up as solid when designing in Tinkercad software. If you re crafty, leave some blank spots for detail. TIP: Make sure the cloud names are spaced far enough away from the cloud drawings to allow for easier removal in the Tinkercad software. MAKERBOT EDUCATORS GUIDEBOOK PROJECT 01: CLOUD TYPES AND DISPLAY STANDS


 will save you a lot of time. E. Click download image. svg.")
52 MAKERBOT EDUCATORS GUIDEBOOK PROJECT 01: CLOUD TYPES AND DISPLAY STANDS STEP 02: CONVERT DRAWING TO.SVG FILE C. Go to picsvg.com and click upload picture. D. Navigate to where the picture is stored on your computer and click open. A. Take clear, welllit photos of your drawings. B. Import the photos to your computer by either ing them or uploading the photos to a cloud drive like Dropbox, and save them to your computer. TIP: Establishing a method to transfer files back and forth between teacher and students (i.e. USB drives, Google Classroom, etc.) will save you a lot of time. E. Click download image. svg. If the image appears in your browser, right-click the image and select save as to save the new.svg file. Do this for each cloud. PAGE 52 TIP: Use the filter drop down menu to ensure your cloud is filled in.
 or dimensions (length, width, height) of the 3D model.")
53 STEP 03: IMPORT.SVG FILE INTO TINKERCAD PAGE 53 A. Open a browser and navigate to Tinkercad.com. Click create a new design, and click import in the top right of your screen. B. Select the correct.svg file, you ll need to choose the scale (size) or dimensions (length, width, height) of the 3D model. Because they can be pretty large, Tinkercad software will give you a suggested size reduction to make your drawing manageable. The cloud files shown in this example were imported at 50% scale. TIPS: If your import is too big, don t worry, just delete the one you imported, change the numbers, and click import again. When re-sizing, be mindful of your build plate size. When your drawing is imported, only dark colored parts will be visible. If they aren t connected, they will be separate parts when printed. We will have to put in connectors later so that they stay together when printed. MAKERBOT EDUCATORS GUIDEBOOK PROJECT 01: CLOUD TYPES AND DISPLAY STANDS

 To do this, go to the basic shapes menu, select a box and make sure it s big enough to cover. D.")

54 MAKERBOT EDUCATORS GUIDEBOOK PROJECT 01: CLOUD TYPES AND DISPLAY STANDS C. Remove anything extra that came in from the drawing (names, extra lines, etc.) To do this, go to the basic shapes menu, select a box and make sure it s big enough to cover. D. Turn the box into a hole by selecting the box, then clicking hole in the dialogue window near the top right corner. E. Select the cloud and hole by holding shift while clicking on both, and use group to combine them. This will remove both the box and everything it covers. PAGE 54


55 STEP 04: ADD CLOUD CONNECTORS PAGE 55 Now that all that clutter is hidden, add some connectors to the clouds. You might be able to skip this step if your cloud is already one single part. A. Drag a new box onto your workplane and position it between two cloud pieces. TIP: Use the right click on your mouse to orbit your view to make sure everything is in the correct place. B. Click and drag the white corner handles to change the size and shape of the box. Then click and drag the central white handle to change the height down to 2 mm (just enough to hold the clouds together). Make sure all of the connectors are at least 1 mm thick so they won t break after printing. C. Repeat this process to make as many connectors as you need. For some connectors, you ll need to use the rotate handles to get them into the correct position. TIP: Make sure all connectors lay flat on the workplane and are not floating in the air. They should share the same bottom surface as the clouds. Use the hotkey D to drop a selected item to the workplane MAKERBOT EDUCATORS GUIDEBOOK PROJECT 01: CLOUD TYPES AND DISPLAY STANDS


.")

56 MAKERBOT EDUCATORS GUIDEBOOK PROJECT 01: CLOUD TYPES AND DISPLAY STANDS STEP 05: MAKE PENCIL TOPPER Most pencils are a little less than 8 mm in diameter. Add a couple of cylinders to make the topper for the pencil. A. Drag a new box over from the basic shapes menu, then drag a ruler to help you out. Click on the cylinder to apply the ruler to it. Change the diameter of the cylinder to 14 mm. TIP: With the ruler, you don t need to drag the corners of your object to resize. You can just click on the dimensions you want to change and type in the measurements you want. B. Make a cylinder hole for the pencil to fit into. Select the first cylinder and duplicate it by pressing ctrl-c then ctrl-v (cmd-c, cmd-v on Mac). Change the size of the second cylinder to 8 mm in diameter and select hole. This will be the cutout for the pencil to fit into. PAGE 56 C. Change the elevation of the hole so that it sits 3 mm above the workplane. You do this by clicking on the black cone at the top center of the cylinder and dragging it up 3 mm. D. Group the cylinders once you re done moving and resizing them. To do this, select both cylinders and click on the group icon at the top of the page.


57 STEP 06: MOVE AND GROUP THE PENCIL TOPPER PAGE 57 Now that you ve made your pencil topper, move it into position and group it to your cloud model. A. Rotate Topper by laying your pencil topper on its side using the rotate handle and rotate it 90 degrees. B. Place Topper by dragging your pencil topper over to the clouds and place it near the bottom center of your clouds. Make sure the pencil topper lays flat on the workplane. TIP: When rotating, hold shift to rotate in 45 degree increments. This will help make sure you rotate it to exactly 90 degrees. C. Group Topper by selecting all the parts of the model and clicking group. When you group the pencil topper to the clouds, everything you need is joined together to make one happy, printable part MAKERBOT EDUCATORS GUIDEBOOK PROJECT 01: CLOUD TYPES AND DISPLAY STANDS
 The download will start once you click on the desired file format. B.")
58 MAKERBOT EDUCATORS GUIDEBOOK PROJECT 01: CLOUD TYPES AND DISPLAY STANDS STEP 07: PRINT Now it s time to export the model so you can print it. A. Click export in the upper right side of the Tinkercad software window. Select the format that your printer uses. (MakerBot Print imports.stl files.) The download will start once you click on the desired file format. B. Import the files into MakerBot Print, select your print settings, and start printing. TIPS: The export window in the Tinkercad software window doesn t disappear until you close it, so be sure to check your downloads folder before you click export again (or you may end up with some extra copies). Print Settings: Rafts Supports Resolution Yes No 0.2 mm You can also name your file in the Tinkercad software, unless you like those waycool file names the program randomly assigns you. While they are entertaining, they re not always descriptive enough. PAGE 58 Infill 10%
. Nice job! You re ready to go! GOING FURTHER A.")


59 PROJECT COMPLETE: REACH FOR THE SKY! PAGE 59 Once printed, assemble the clouds onto the pencils and put them onto their respective bases. If you want, you can cut the pencils to different lengths to match the altitudes of the clouds (low, medium, high). Nice job! You re ready to go! GOING FURTHER A. After the project, the cloud models and bases can be used as a learning station that students will cycle through over a series of days. As they start the activities, students can be given puzzles and worksheets that encourage them to explore the models on their own, gathering information while they complete their assignments. B. Consider scaffolding activities, where students can match clouds with the bases where the pencils are attached, or sort the note cards into the bases with the clouds. Additionally, a summative activity could include having the models, pencils, and bases disassembled and asking the students to work together to place the components in the correct positions. C. Assess students with quizzes or performance tasks based on recall of the cloud names and characteristics. Or have them perform a puppet show with the clouds, where the characters in the show talk about what clouds they see and how those reflect the weather or anticipated weather changes. MAKERBOT EDUCATORS GUIDEBOOK PROJECT 01: CLOUD TYPES AND DISPLAY STANDS

60 MAKERBOT EDUCATORS GUIDEBOOK PROJECT 02: 3D MUSICAL SHAPES PROJECT TWO 3D MUSICAL SHAPES PAGE 60 LINK: thingiverse.com/thing: for access to handouts, videos and other materials associated with this project.

61 PROJECT INFO I love doing this project with my students because not only can you create a musical shape, but it also gives students the opportunity to learn about infill and the 3D printing process. PAGE 61 AUTHOR Karie SUBJECT Music, Math, Art AUDIENCE Grade Levels K 5 DIFFICULT Y Beginner SKILLS NEEDED None DURATION 1-2 Class Periods GROUPS 15 Groups 1 2 Students / Group MATERIALS ipad Translucent Filament (recommended) Seed Beads SOFTWARE Morphi for ipad (ios) Tinkercad (web app) PRINTERS Works with all MakerBot Replicator 3D printers PRINT TIME Approximately 1.5 hrs per instrument FILAMENT USED ½ Large Spool LESSON SUMMARY This lesson is an introduction to 3D shapes and creating music using the structure of a 3D print. Students will select a 3D shape to print, then pause the print and add beads to create a musical instrument. LEARNING OBJECTIVES After completing this project, students will be able to: Understand and create 3D shapes using Morphi. Resize 3D models using the ruler tool. Learn about 3D printing and print pausing. COMMON CORE MATH STANDARDS K.G.A.3 Geometry Identify shapes as two-dimensional (lying in a plane, flat ) or three-dimensional ( solid ). K.G.B.4 Geometry Analyze and compare two- and three-dimensional shapes, in different sizes and orientations, using informal language to describe their similarities, differences, parts (e.g., number of sides and vertices/ corners ) and other attributes (e.g., having sides of equal length). K.MD.A.1 Measurement & Data Describe measurable attributes of objects, such as length or weight. Describe several measurable attributes of a single object. Karie Huttner 1.G.A.2 Geometry Compose two-dimensional shapes (rectangles, squares, trapezoids, triangles, half-circles, and quarter-circles) or three-dimensional shapes (cubes, right rectangular prisms, right circular cones, and right circular cylinders) to create a composite shape, and compose new shapes from the composite shape. 2.MD.A.1 Measurement & Data Measure the length of an object by selecting and using appropriate tools such as rulers, yardsticks, meter sticks, and measuring tapes. MAKERBOT EDUCATORS GUIDEBOOK PROJECT 02: 3D MUSICAL SHAPES


62 MAKERBOT EDUCATORS GUIDEBOOK PROJECT 02: 3D MUSICAL SHAPES TEACHER PREPARATION A. Install the Morphi app on student ipad(s). TIP: If students don t have ipads, you could use the Morphi app for Windows or Mac. PAGE 62 B. Load your 3D printers with filament, translucent if you have it. C. Lay out beads for students to choose.


63 STUDENT ACTIVITY STEP 01: CREATE WITH THE MORPHI APP PAGE 63 MORPHI IOS APP A. Create new design. Tap on the plus symbol to begin a new design. MORPHI IOS APP MORPHI IOS APP MORPHI IOS APP B. Select shape: Select the shapes menu by clicking the cube on the right. Choose one shape that you want to create from the shape choices and tap to place it on the workplane. C. Practice: Spend some time getting used to the navigation panel on the lower left corner. You may need to delete and readd objects as you are learning. D. Adjust Size: Tap on your shape to select it. Tap on the ruler tool in the top panel and select inch. Then resize the shape to roughly 2 inches tall. Practice with the slider to adjust the size of your shape. MAKERBOT EDUCATORS GUIDEBOOK PROJECT 02: 3D MUSICAL SHAPES


64 MAKERBOT EDUCATORS GUIDEBOOK PROJECT 02: 3D MUSICAL SHAPES STEP 02: EXPORT THE DESIGN You will need to export the design for 3D printing from Morphi as an.stl file and share it with your teacher for final printing. MORPHI IOS APP PAGE 64 A. Save file: Tap the save button at the top of the screen to get back to the home screen. B. Export file: Tap on the small arrow on the bottom right of the project icon. Choose to the.stl file directly to your teacher or upload to Thingiverse.

65 STEP 03: PREPARE THE DESIGN IN MAKERBOT PRINT PAGE 65 A. Import into MakerBot Print to prepare for printing. TIP: Rotate the part to make sure there is a flat surface on the bottom for printing. Use the place face on build plate tool in MakerBot Print to help. Review print preview before printing to understand what infill will look like when paused. B. Adjust print settings: Decide what settings you d like for your instrument. Lower infill will allow more space for beads. Print Settings: Rafts Yes Supports Depends on Model. For spheres, supports are recommended. Resolution 0.2 mm Infill 10% MAKERBOT EDUCATORS GUIDEBOOK PROJECT 02: 3D MUSICAL SHAPES


66 MAKERBOT EDUCATORS GUIDEBOOK PROJECT 02: 3D MUSICAL SHAPES STEP 04: PRINT A. Start your print: Printing will take approximately hours per model depending on the shape. PAGE 66 B. Pause print: As the models are being printed, pause the print about halfway through to add beads. After adding the beads, resume the build. CAUTION: When the printer is paused, the extruder is still very hot. Carefully insert the beads through the top or side of the printer. Make sure the beads are not overflowing, otherwise they will knock into the extruder when the print resumes. The teacher should handle this part.

67 PROJECT COMPLETE: SHAKE IT UP! PAGE 67 GOING FURTHER A. Create more advanced shapes in Morphi and Tinkercad. B. Use the draw feature in Morphi to hand-draw shapes to be used as instruments. C. Compare the sounds made by the different printed objects based on different variables: Same shape, different sizes Same size, same shape, different amount of beads Same size, same shape, different infill density or pattern MAKERBOT EDUCATORS GUIDEBOOK PROJECT 02: 3D MUSICAL SHAPES

68 MAKERBOT EDUCATORS GUIDEBOOK PROJECT 03: CODE TO CAD PROJECT THREE GO FROM CODE TO CAD PAGE 68 LINK: thingiverse.com/thing: for access to handouts, videos and other materials associated with this project.

69 PROJECT INFO AUTHOR Ryan Coding has become a valuable skill both for its growing use in STEM jobs and for teaching computational thinking skills. This Code to CAD project allows my students to hold, interact with, and feel their coding skills, which brings a whole new level of interaction to their learning that they could never have without the use of a 3D printer. PAGE 69 SUBJECT Technology, Math, Geometry Ryan Erickson AUDIENCE Grade Levels 3 9 DIFFICULT Y Beginner SKILLS NEEDED None DURATION 1 2 Class Periods GROUPS 15 Groups 1 2 Students / Group MATERIALS Sketchbook Ruler SOFTWARE Turtle Blocks Tinkercad (web apps) PRINTERS Works with all MakerBot Replicator 3D printers PRINT TIME Prep: 0 hrs Lesson: 1 hr / Shape FILAMENT USED ½ Large Spool LESSON SUMMARY Learning the basic logic that governs code can be easy and visually stimulating. In this project, you ll use an in-browser, block-based coding program called Turtle Blocks to create a geometric shape. Without needing to learn a specific coding language, you can intuitively string together command blocks that instruct a cursor (in this case, a turtle) to draw the object you want on the screen. By asking students to create a shape that meets certain requirements, this part of the project is easily scalable from a simple perimeter demonstration to a more advanced proof of triangle relationships. After completing the coding and geometry task, students can export their shape and import it into Tinkercad software to easily create a 3D printable file. Being able to hold an object you created using code, then CAD, is an especially powerful moment one that will inspire students to practice computational thinking and dramatically advance their understanding of technology. LEARNING OBJECTIVES After completing this project, students will be able to: Code with Turtle Blocks to create a single shape, figure, or pattern Use their knowledge of geometry to create complex shapes with code Manipulate that shape in Tinkercad software and prepare it for 3D printing NGSS STANDARDS 3-5-ETS1-3: Engineering and Design Plan and carry out fair tests in which variables are controlled and failure points are considered to identify aspects of a model or prototype that can be improved. COMMON CORE STANDARDS 4.MD.2: Measurement and Data Use the four operations to solve word problems involving distances, intervals of time, liquid volumes, masses of objects, and money, including problems involving simple fractions or decimals, and problems that require expressing measurements given in a larger unit in terms of a smaller unit. 4.MD.3 Measurement and Data Apply the area and perimeter formulas for rectangles in real world and mathematical problems. 4.G.A.1 Geometry Draw points, lines, line segments, rays, angles (right, acute, obtuse), and perpendicular and parallel lines. Identify these in two-dimensional figures. MAKERBOT EDUCATORS GUIDEBOOK PROJECT 03: CODE TO CAD


70 MAKERBOT EDUCATORS GUIDEBOOK PROJECT 03: CODE TO CAD TEACHER PREPARATION A. Open a browser and go to turtle.sugarlabs.org B. Explore the different functions for moving and drawing. For an extensive tutorial and activities for Turtle Blocks, or for links to similar programs, check out the Thingiverse Education post (thingiverse.com/thing: ). C. Experiment until you ve learned to prepare a shape that validates principles of perimeter, fractions, spirographs, trigonometry, vectors, or coordinate geometry. PAGE 70 D. Run a demonstration of Turtle Blocks for your students. Prompt them with these questions to guide their understanding: How does the turtle know what to do on the screen? How does block coding work? What can you design using the blocks provided?

71 MAKERBOT EDUCATORS GUIDEBOOK PROJECT 03: CODE TO CAD PAGE 71 E. Create a Tinkercad account


72 MAKERBOT EDUCATORS GUIDEBOOK PROJECT 03: CODE TO CAD STUDENT ACTIVITY A. Pick a geometric shape to create with code. Choose a simple one to start with; you can try for more advanced shapes later on. B. Open Turtle Blocks and begin experimenting with the different commands under the turtle, pen, and flow menu options. C. Experiment with the following basic functions: forward / back left / right pen up / down repeat STEP 01: PICK A SHAPE PAGE 72


73 STEP 02: CODE YOUR SHAPE PAGE 73 A. Drag commands like forward and right onto the screen, then connect them under the yellow start block to create an operation. TIP: Use the eraser to clear your canvas if you need to restart. B. Create simple objects by using this drawing function until you ve created your desired shape. C. Practice making shapes requiring multiple different moves. Try using the repeat command to simplify your code. MAKERBOT EDUCATORS GUIDEBOOK PROJECT 03: CODE TO CAD


74 MAKERBOT EDUCATORS GUIDEBOOK PROJECT 03: CODE TO CAD D. Make your final shape using the commands you practiced. Check your shape to make sure it meets your original goal. Do the lines connect to create a single object? Does it have the correct perimeter and angles? E. Use the download button on the right side of the screen to save project. Select.SVG and name your file. Now you re ready to import this file into Tinkercad! PAGE 74

75 STEP 03: IMPORT YOUR SHAPE INTO TINKERCAD PAGE 75 A. Open Tinkercad and start a new design. Click the import button in the top right and select choose a file to import your.svg file. MAKERBOT EDUCATORS GUIDEBOOK PROJECT 03: CODE TO CAD


76 MAKERBOT EDUCATORS GUIDEBOOK PROJECT 03: CODE TO CAD B. Alter your shape or scale however you want. Make sure you check the size with your teacher before exporting. PAGE 76


77 STEP 04: PRINT YOUR SHAPE PAGE 77 A. In Tinkercad, click export in the top right to export your file. Make sure to select the.stl option. B. Import your file into MakerBot Print and prepare for printing. You can resize models using the scale menu, or change some of the print settings to reduce print time. Print Settings: Rafts Yes Supports No Resolution 0.2mm Infill 10% MAKERBOT EDUCATORS GUIDEBOOK PROJECT 03: CODE TO CAD

78 MAKERBOT EDUCATORS GUIDEBOOK PROJECT 03: CODE TO CAD PAGE 78

79 PROJECT COMPLETE: RECODE, REPRINT, REPEAT PAGE 79 GOING FURTHER A. For more advanced students, challenge them to recreate some of the complex shapes shown in the Thingiverse post. B. For students learning trigonometry, try providing a right triangle with only 1 side length and 2 angles defined, and have students solve for the unknown angle and side lengths before creating their shape. MAKERBOT EDUCATORS GUIDEBOOK PROJECT 03: CODE TO CAD

80 MAKERBOT EDUCATORS GUIDEBOOK PROJECT 04: 3D PRINTED MINECRAFT CASTLE PROJECT FOUR 3D PRINTED MINECRAFT CASTLE TEACHES PERIMETER AND AREA PAGE 80 LINK: thingiverse.com/thing: for access to handouts, videos and other materials associated with this project.

81 PROJECT INFO 3D printing is great for teaching spacial reasoning skills, especially for perimeter and area: two major concepts in math. Given the popularity of Minecraft, this is a great lesson to bridge the gap between playing and learning. I found that my students were really interested in this lesson because they got to take their castle home! PAGE 81 AUTHOR Carlos SUBJECT Math, Technology, History AUDIENCE Grade Levels 3 5 DIFFICULT Y Beginner SKILLS NEEDED Basic Minecraft game experience DURATION 5 7 Class Periods GROUPS 15 Groups 1 2 Students / Group MATERIALS Graph Paper Pencil Ruler SOFTWARE Minecraft (PC, Mac) Mineways (PC, Mac) PRINTERS Works with all MakerBot Replicator 3D printers PRINT TIME 2 3 hrs / per Castle FILAMENT USED 1 2 Large Spools Carlos Varas LESSON SUMMARY In this project, students will learn the conceptual foundation of perimeter and area by constructing their own castle in Minecraft. The learning begins with basic design principles applied in Minecraft using a medieval theme. As students plan and design their castles, they will consider concepts such as perimeter (castle moat) and area. Once printed, students can make a real connection to the difference between perimeter and area. LEARNING OBJECTIVES After completing this project, students will be able to: Understand the difference between perimeter and area. Plan, design, and print a 3D model using Minecraft. Understand the fundamental concept of a unit when measuring. COMMON CORE MATH STANDARDS 3.MD.D.8. Measurement & Data Solve real world problems involving perimeters of polygons, including finding the perimeter given the side lengths, finding an unknown side length, and exhibiting rectangles with the same perimeter and different areas or with the same area and different perimeters. 4.MD.A.2. Measurement & Data Use the four operations to solve word problems involving distances, intervals of time, liquid volumes, masses of objects, and money, including problems involving simple fractions or decimals, and problems that require expressing measurements given in a larger unit in terms of a smaller unit. Represent measurement quantities using diagrams such as number line diagrams that feature a measurement scale. 4.MD.A.3. Measurement & Data Apply the area and perimeter formulas for rectangles in real world and mathematical problems. 5.MD.C.5. Measurement & Data Relate volume to the operations of multiplication and addition and solve real world and mathematical problems involving volume. MAKERBOT EDUCATORS GUIDEBOOK PROJECT 04: 3D PRINTED MINECRAFT CASTLE


82 MAKERBOT EDUCATORS GUIDEBOOK PROJECT 04: 3D PRINTED MINECRAFT CASTLE PAGE 82 TEACHER PREPARATION A. Download and install Minecraft on student computers. Make sure you have enough computers for each student or group. TIP: Begin with a Minecraft Edu license if you can. You can buy a server license and a certain number of workstation licenses. If you can t do that, a regular Minecraft license will work. If you aren t using the EDU license, students will need to use the same computer each class period. B. Download and install Mineways on each computer. This program allows you to export.stl files from Minecraft for 3D printing. It s free and pretty easy to use. TIP: There s a tutorial video included in the Thingiverse Education post: thingiverse.com/thing:
, and things in Minecraft are built using the same basic block shape. YouTube is a great resource for getting started.")

83 PAGE 83 C. Students should be given time to explore Minecraft and how to use it. Teach your students that Minecraft uses a basic block system (1 block = 1 unit), and things in Minecraft are built using the same basic block shape. YouTube is a great resource for getting started. TIP: Maps are available from the Minecraft Edu Library that allow students to teleport into their own workspace so that no one can enter but them. D. Discuss perimeter and area with students What is the difference between perimeter and area? Why would you want to know both the perimeter and area of an object? Show a few geometric shapes and point out the area and perimeter. Show a picture of an example Minecraft castle. Ask students to point out the castle s area and perimeter. Discuss the concept of a moat. How does the moat of a castle relate to the perimeter MAKERBOT EDUCATORS GUIDEBOOK PROJECT 04: 3D PRINTED MINECRAFT CASTLE of a castle?

84 MAKERBOT EDUCATORS GUIDEBOOK PROJECT 04: 3D PRINTED MINECRAFT CASTLE STUDENT ACTIVITY STEP 01: PLAN YOUR CASTLE PAGE 84 A. Research common castle layouts for inspiration on what to include in your group s castle. You can also search the Minecraft Gallery for sample Minecraft castle designs, or use the pictures from this project to help get started. B. Plan your castle using graph paper to draw out the basic shape of your castle from an overhead view. C. Count the unit blocks that make up the perimeter of your castle design for reference when building in Minecraft.


85 STEP 02: BUILD A CASTLE IN MINECRAFT PAGE 85 MINECRAFT MINECRAFT A. Scout location: Open Minecraft Creative Mode and find a place to build your castle. B. Start building: Be sure to build your castle with the same number of unit blocks as planned in Step 1. STEP 03: REVIEW YOUR CASTLE DESIGN MINECRAFT C. Save your work: Save your world before leaving each class. Make sure to give your world a name so it will be easy to find later. A. Review your castle design with your teacher to make sure the walls are tall enough and the moat is deep enough to come out when you print them. B. Remove any small details such as torches or water for easier printing. MAKERBOT EDUCATORS GUIDEBOOK PROJECT 04: 3D PRINTED MINECRAFT CASTLE


86 MAKERBOT EDUCATORS GUIDEBOOK PROJECT 04: 3D PRINTED MINECRAFT CASTLE STEP 04: OPEN MINEWAYS AND LOCATE CASTLE MINEWAYS MINEWAYS A. Open Mineways and click File and then click Open World and choose the correct world. B. Find your castle: Once open, you ll see a bird s eye view of your world. Navigate around until you find the castle and zoom in. PAGE 86 C. Select your castle: Right click and drag to select the castle. Include 1 block around it to ensure a good printing base. Your selection will be highlighted in pink.


87 STEP 05: EXPORT YOUR CASTLE FROM MINEWAYS PAGE 87 MINEWAYS MINEWAYS A. Export.STL: With your castle selected, click File and then click export for 3D printing and choose where to save your file. Make sure to select binary STL as the file type. MINEWAYS B. Check your settings: After you click save you will see a model export dialog open with options for formatting. You shouldn t need to change any of the default settings, just click OK. MAKERBOT EDUCATORS GUIDEBOOK PROJECT 04: 3D PRINTED MINECRAFT CASTLE


88 MAKERBOT EDUCATORS GUIDEBOOK PROJECT 04: 3D PRINTED MINECRAFT CASTLE STEP 06: PRINT AND PAINT YOUR CASTLE A. Import the.stl files into MakerBot Print and scale them up or down if necessary. B. Print the designs and write your name on the bottom. Print Settings: Rafts Yes Supports Varies Resolution 0.2mm Infill 10% PAGE 88 C. Paint and decorate your castle to bring it to life. Include some elements from your research.

89 PROJECT COMPLETE: RULE YOUR KINGDOM PAGE 89 GOING FURTHER A. For more advanced students, you could calculate the volume of castle and exact area if their castle isn t a perfect square or rectangle. B. Have students create rooms inside the castle, then explain bird s eye view and basic blueprint design principles. They can also calculate the area and volume of each room individually. MAKERBOT EDUCATORS GUIDEBOOK PROJECT 04: 3D PRINTED MINECRAFT CASTLE

90 MAKERBOT EDUCATORS GUIDEBOOK PROJECT 05: THE SPEEDY ARCHITECT PROJECT FIVE THE SPEEDY ARCHITECT PAGE 90 LINK: thingiverse.com/thing: for access to handouts, videos and other materials associated with this project.
91 PROJECT INFO AUTHOR MakerBot This is an easy project to get started with. After printing the pieces, you can run it in a single class period. If you have a bit more time, the extension activity helps emphasize why 3D printing is such a powerful tool. Students first experience the limitations of the materials they re given, then get the chance to design and print their own custom solutions to overcome those limitations. PAGE 91 SUBJECT Engineering, Technology MakerBot Learning AUDIENCE Grade Levels 3 8 DIFFICULT Y Beginner SKILLS NEEDED None DURATION 1 Class Period, 3 4 with extension activity GROUPS 8 Groups 3 4 Students / Group MATERIALS Drinking Straws (50 per group) Scissors Ruler 3D Printed Connector Pieces (15 20 of each type per group) Measuring tape Two 5 lb weights SOFTWARE Tinkercad (web app) PRINTERS Works with all MakerBot Replicator 3D printers PRINT TIME Prep: 20 hrs / Group Lesson: 2-3 hrs / Group FILAMENT USED 2 Large Spools ½ Large Spool for extension activity LESSON SUMMARY In this quick project, students take on the role of architects to build a structure that satisfies the teacher s design requirements using a limited amount of connector pieces and straws. Without modification, this lesson will engage students to work together in teams to overcome two challenges; building both the strongest and tallest buildings. Students will learn what shapes create the most stable buildings, how to build within design and resource constraints, and some basic 3D design skills in Tinkercad software. This project is applicable for grades 3-8, and many sections of the lesson can be expanded to include more advanced engineering or design principles. LEARNING OBJECTIVES After completing this project, students will be able to: Design within specified requirements and restraints Understand the importance of teamwork Use Tinkercad software to modify an existing model NGSS STANDARDS MS-ETS1-1. Define the criteria and constraints of a design problem with sufficient precision to ensure a successful solution, taking into account relevant scientific principles and potential impacts on people and the natural environment that may limit possible solutions. MS-ETS1-2. Evaluate competing design solutions using a systematic process to determine how well they meet the criteria and constraints of the problem. MS-ETS1-3. Analyze data from tests to determine similarities and differences among several design solutions to identify the best characteristics of each that can be combined into a new solution to better meet the criteria for success. MAKERBOT EDUCATORS GUIDEBOOK PROJECT 05: THE SPEEDY ARCHITECT


92 MAKERBOT EDUCATORS GUIDEBOOK PROJECT 05: THE SPEEDY ARCHITECT TEACHER PREPARATION A. Print the connector pieces from the Thingiverse Education project: thingiverse.com/thing: Print of each connector per group. It will take some time to print them all, but you only need to do this step once because the pieces are all reusable for future projects. If possible, print extras of the corner connector piece, it s usually the most popular. TIP: Print each connector piece in it s own color for easier sorting. PAGE 92 B. Lay out all building materials and student handouts. Any standard sized drinking straws with a 0.22 diameter will work. Check the link in the project s materials section on Thingiverse Education for the straws used here.

93 STUDENT ACTIVITY STEP 01: DESIGN REQUIREMENTS - THE TALLEST BUILDING PAGE 93 A. Get challenge handout: Get your group s Design Requirements Sheet from your teacher. B. Review challenge: Using the materials provided, you will need to build the TALLEST possible structure that can stand on its own and remain standing for long enough to be measured. Review the critical design requirements and the secondary design requirements on your handout. MAKERBOT EDUCATORS GUIDEBOOK PROJECT 05: THE SPEEDY ARCHITECT


94 MAKERBOT EDUCATORS GUIDEBOOK PROJECT 05: THE SPEEDY ARCHITECT STEP 02: PLAN AND SHOP FOR THE TALLEST BUILDING A. Plan: Now that you ve reviewed the design requirements, plan your design. B. Shop for materials: Take a short amount of time (5 minutes or so) to shop for materials. Try to take a diverse amount of connectors, but only take what you need! This emphasizes the importance of planning and will challenge you to find creative solutions. Groups with leftover materials will receive less points. TIP: See grading sheet about excess materials and re-buying materials. PAGE 94


95 STEP 03: BUILD THE TALLEST BUILDING PAGE 95 A. Build! Groups have 15 minutes to create their buildings. Reference your handout for the guidelines: All towers will be measured at the end of the time limit. You can rebuild your tower as many times as you want. Your tower must stand on its own and remain standing while being measured - no leaning against the wall, taping to the floor, magic, etc. Give your tower a creative name! B. Measure buildings: After 15 minutes, your teacher will measure the height of your building, count your leftover materials, and record the results. C. Disassemble: Take apart your buildings and place the materials back in the class pile to get ready for the second challenge. MAKERBOT EDUCATORS GUIDEBOOK PROJECT 05: THE SPEEDY ARCHITECT

96 MAKERBOT EDUCATORS GUIDEBOOK PROJECT 05: THE SPEEDY ARCHITECT STEP 04: DESIGN REQUIREMENTS - THE STRONGEST BUILDING A. Review challenge: Using the materials provided, build the STRONGEST possible structure that can withstand 5 lbs of weight for at least 5 seconds. PAGE 96 B. Design requirements: Review the critical design requirements and the secondary design requirements on your handout.


97 STEP 05: PLAN AND SHOP FOR THE STRONGEST BUILDING PAGE 97 A. Plan. Now that you ve reviewed the design requirements, plan your design. B. Shop for materials: Take a short amount of time (5 minutes or so) to shop for new materials. Try to take a diverse amount of connectors, but only take what you need! This emphasizes the importance of planning and will challenge you to find creative solutions. Groups with leftover materials will receive less points. MAKERBOT EDUCATORS GUIDEBOOK PROJECT 05: THE SPEEDY ARCHITECT


98 MAKERBOT EDUCATORS GUIDEBOOK PROJECT 05: THE SPEEDY ARCHITECT STEP 06: BUILD THE STRONGEST BUILDING A. Build! Groups have 15 minutes to create their buildings. Reference your handout for the guidelines. B. Measure buildings: After 15 minutes, your teacher will bring a 5 lb weight to measure your building, count your leftover materials, and record the results. C. Disassemble: Take apart your buildings and place the materials back in the class pile. PAGE 98

99 EXTENSION ACTIVITY STEP 01: IMPORT CONNECTOR PAGE 99 To add more design and engineering challenges to the project, incorporate 3D design using Tinkercad software. Design your own custom 3D printed connector using what you learned after building from a set of existing connectors. Can you improve on one of the connector designs? How would your building designs improve using a brand new 3D printed connector type? A. Download: Start by downloading one of the connector.stl files found on the Thingiverse Education project page (thingiverse. com/thing: ). We used the two arm connector. B. Navigate to Tinkercad.com and click create new design. C. Import: Once you ve opened a new design, navigate to the upper right hand corner of the window and select import. Choose your downloaded file and click import. MAKERBOT EDUCATORS GUIDEBOOK PROJECT 05: THE SPEEDY ARCHITECT


.")
100 MAKERBOT EDUCATORS GUIDEBOOK PROJECT 05: THE SPEEDY ARCHITECT STEP 02: RESIZE AND DUPLICATE Because this connector was designed to hold two straws across its length, you ll need to edit the length to begin creating a new connector. A. Insert ruler: Drag the ruler tool from the upper right hand corner of your screen onto your workplane, then select your object to see its dimensions. B. Resize: The connector measures 4.6 x 4.6 x 40 mm. Edit the length so that the dimensions are 4.6 x 4.6 x 20 mm. Now that the connector leg is the proper size, you can duplicate it to create new custom connectors with several legs. C. Copy and paste: To copy a part, press ctrl-c then ctrl-v (cmd-c, cmd-v on Mac). Create several copies depending on the number of legs you want your connector to have. PAGE 100


101 STEP 03: BUILD A NEW CONNECTOR PAGE 101 Now that you ve duplicated your connector legs, it s time to design an all new connector by moving and rotating the legs created into place. A. Move and rotate: Move each leg into place to build a custom connector. You can create more duplicates if needed. TIP: The rotate tool appears around your part when selected. If you hold shift while rotating, your object will rotate in 45 increments, making repositioning connector legs a breeze. B. Align: Once you have all of your legs in place, it s best to use the align tool to make sure they re in the right place. Select 2 or more parts, then click align in the upper right hand corner. Click on the circles that appear to align parts to the center, left, or right on each axis. C. Group: Select all legs of your connector by holding shift and clicking on each leg. Then click the group in the upper right hand corner. Once your model has been grouped, you re ready to print! MAKERBOT EDUCATORS GUIDEBOOK PROJECT 05: THE SPEEDY ARCHITECT


102 MAKERBOT EDUCATORS GUIDEBOOK PROJECT 05: THE SPEEDY ARCHITECT STEP 04: EXPORT AND PRINT A. Export: Click export in the upper right hand corner of the screen and choose to download your new connector as an.stl file. B. Import: Import your new connector in MakerBot Print and re-orient the part if needed. If you want to print multiple, right click on your model, select duplicate, and enter the number of copies you want. C. Print: Select your print settings and begin printing! Print Settings: Rafts Yes Supports No Resolution 0.2mm Infill 10% PAGE 102

103 PROJECT COMPLETE: BUILD FOR TOMORROW PAGE 103 GOING FURTHER A. Discuss the following reflection questions: What was your initial design plan? How did this initial design change as you built your buildings? Did you ever start over? What was the final height of your Tall Building? How much weight could your Strong Building hold? What was the hardest part of building your structures? Was there anything else you learned while building? MAKERBOT EDUCATORS GUIDEBOOK PROJECT 05: THE SPEEDY ARCHITECT
104 MAKERBOT EDUCATORS GUIDEBOOK PROJECT 05: SPEEDY ARCHITECT PROJECT WORKSHEET BUILDING NAME CHALLENGE Build the tallest freestanding building Satisfy the critical design requirements Use only the materials you have been given PLANNING You have 5 minutes to plan your structure before you start building. During this time, you will shop for your materials. Try to estimate as best you can, as you will lose points for taking too much or too little materials! RULES You will have 15 minutes to construct each building. Only use the materials you select during the planning phase. If you run out of materials, you can get more, but you will have a small penalty. BUILDING ONE: THE TALLEST BUILDING Safety / Structural Integrity Cosmetic 10 points Structure stands on its own. Capacity 36" or taller Minimal Waste Planning CRITICAL DESIGN REQUIREMENTS - 10 POINTS EACH MEETS REQUIREMENT Less than 10 connectors and 10 straws wasted Did not need to buy additional materials 8 points 2 bonus 6 points 4 points 0 bonus 2 points Is taller than 48" Is less than 48" 0 points Structure cannot stand on its own. - Taller than 30" Less than 11 connectors and 11 straws wasted Needed to buy additional materials once Less than 12 connectors and 12 straws wasted Needed to buy additional materials more than once - - Less than 30" Less than 13 connectors and 13 straws wasted Less than 14 connectors and 14 straws wasted DOES NOT MEET REQUIREMENT More than 14 connectors and 14 straws wasted SECONDARY DESIGN REQUIREMENTS - 2 BONUS POINTS EACH Your building must stand on its own and remain standing while Zero Waste Uses all materials provide to create building Does not use all materials provided to create building being measured - no PAGE 104 leaning against the wall, taping to the floor, magic, etc. Give your buildings Space Saver Building base measures 10" x 10" or less Base is larger than 10" x 10" creative names! TO DOWNLOAD: thingiverse.com/thing:
105 PROJECT WORKSHEET BUILDING TWO: THE STRONGEST BUILDING PAGE 105 BUILDING NAME CRITICAL DESIGN REQUIREMENTS - 10 POINTS EACH CHALLENGE Build the strongest freestanding building 10 points 8 points 6 points 4 points 2 points 0 points Satisfy the critical design requirements MEETS REQUIREMENT DOES NOT MEET REQUIREMENT Use only the materials you have been given PLANNING You have 5 minutes to plan your structure before you start building. During this time, you will shop for your materials. Try to estimate as best you can, as you will lose points for taking too much or too little materials! RULES You will have 15 minutes to construct each building. Only use the materials you select during the planning phase. If you run out of materials, you can get more, but you will have a small penalty. Your building must stand on its own and remain standing while being measured - no leaning against the wall, taping to the floor, magic, etc. Give your buildings creative names! Safety / Structural Integrity Strength Minimal Waste Planning Super Strength 2 bonus Can hold a 10lb weight without breaking ( bending okay ) 0 bonus Cannot hold a 10lb weight without breaking Zero Waste Uses all materials provided Does not use all materials provided Space Saver Structure stands on its own. Can hold a 5lb weight for 5 secs without breaking Less than 10 connectors and 10 straws wasted Did not need to buy additional materials Structure cannot stand on its own. Can hold a 5lb weight for 4 secs without breaking Less than 11 connectors and 11 straws wasted Needed to buy additional materials once Can hold a 5lb weight for 3 secs without breaking Less than 12 connectors and 12 straws wasted Needed to buy additional materials more than once Building base measures 10" x 10" or less Can hold a 5lb weight for 2 secs without breaking Less than 13 connectors and 13 straws wasted Can hold a 5lb weight for 1 sec without breaking Less than 14 connectors and 14 straws wasted Base is larger than 10" x 10" Cannot hold a 5lb weight without breaking More than 14 connectors and 14 straws wasted SECONDARY DESIGN REQUIREMENTS - 2 BONUS POINTS EACH MAKERBOT EDUCATORS GUIDEBOOK PROJECT 05: SPEEDY ARCHITECT TO DOWNLOAD: thingiverse.com/thing:

106 MAKERBOT EDUCATORS GUIDEBOOK PROJECT 06: H2 MAKE IT GO PROJECT SIX H ² MAKE IT GO PAGE 106 LINK: thingiverse.com/thing: for access to handouts, videos and other materials associated with this project.

 Stopwatch or Timer Ruler or Calipers Optional: Pipe Cleaners, Rubber Bands SOFTWARE Tinkercad (web app) PRINTERS Works with all MakerBot Replicator 3D printers PRINT TIME Prep: 2.")
107 PROJECT INFO AUTHORS Amy Kurt SUBJECT Engineering, Technology AUDIENCE Grade Levels 4 8 DIFFICULT Y Intermediate SKILLS NEEDED Basic Tinkercad software experience DURATION 7 8 Class Periods GROUPS 4 Groups 6 7 Students / Group MATERIALS Sphero robot Tablet or Mobile Device with Sphero app Measuring Cup Small Cups or Containers to hold 100 ml of water Track Material (tape, meter sticks, etc.) Stopwatch or Timer Ruler or Calipers Optional: Pipe Cleaners, Rubber Bands SOFTWARE Tinkercad (web app) PRINTERS Works with all MakerBot Replicator 3D printers PRINT TIME Prep: 2.5 hrs / Hat Lesson: 4 hrs / Group FILAMENT USED 1 1 ½ Large Spool This lesson is a great depiction of combining multiple disciplines into one project. The students were so excited with the programming and racing that they forgot how much planning and math they were doing in the process! Amy Otis Kurt Knueve LESSON SUMMARY Students will be asked to create a vehicle that attaches to the Sphero appenabled robot using the given hat. This vehicle must be able to carry 100 ml of water from the starting line, around a track and to the finish line. Students should aim to spill as litle water as possible while speeding around the track. LEARNING OBJECTIVES After completing this project, students will be able to: Understand volume and how much space is required to hold a specific volume of water. Design around real-world constraints (such as size of cup and hat attachment). Use Tinkercad software to design elements necessary to help the car drive smoother, keep water in place, and prevent splashing. Understand how weight, materials, and other factors affect speed and efficiency. NGSS STANDARDS 4-PS3-3 Energy Ask questions and predict outcomes about the changes in energy that occur when objects collide. 4-PS3-4 Energy Apply scientific ideas to design, test, and refine a device that converts energy from one form to another. 3-5-ETS1-1 Engineering and Design Define a simple design problem reflecting a need or a want that includes specified criteria for success and constraints on materials, time, or cost. 3-5-ETS1-2 Engineering and Design Generate and compare multiple possible solutions to a problem based on how well each is likely to meet the criteria and constraints of the problem. 3-5-ETS1-3 Engineering and Design Plan and carry out fair tests in which variables are controlled and failure points are considered to identify aspects of a model or prototype that can be improved. COMMON CORE MATH STANDARDS 4.MD.A.2 Measurement and Data Solve word problems involving distances, intervals of time, liquid volumes, masses of objects, and money, including problems involving simple fractions or decimals, and problems that require expressing measurements given in a larger unit in terms of a smaller unit. 5.MD.C.3 Measurement and Data Recognize volume as an attribute of solid figures and understand concepts of volume measurement. 5.MD.C.5 Measurement and Data: Relate volume to the operations of multiplication and addition and solve real world and mathematical problems involving volume. PAGE 107 MAKERBOT EDUCATORS GUIDEBOOK PROJECT 06: H2 MAKE IT GO
 and assemble the vechicles to demonstrate")

108 MAKERBOT EDUCATORS GUIDEBOOK PROJECT 06: H2 MAKE IT GO TEACHER PREPARATION A. Print the sample files from Thingiverse Education (hat, vehicle, wheels, and axles) and assemble the vechicles to demonstrate the concept to the students. B. Print one hat file for each group. This way you ll only need to print vechicles later on. PAGE 108 TIP: Remind the students that these are just some examples and not necessarily the best. It s their job to come up with more creative solutions!


109 PAGE 109 C. Set up your Sphero: We used the Sphero Sprk+, the educational, programmable version. Go to Sphero.com for help getting started. MAKERBOT EDUCATORS GUIDEBOOK PROJECT 06: H2 MAKE IT GO D. Download the Sphero app and pair Sphero(s) with your tablet or mobile device(s). Students should be given a chance to become familiar with the Sphero control and its driving capabilities before starting the project. E. Lay out the track on the floor of your classroom using tape or other materials. Make sure to identify a start and end line to make timing easier.

110 MAKERBOT EDUCATORS GUIDEBOOK PROJECT 06: H2 MAKE IT GO STUDENT ACTIVITY STEP 01: CREATE TINKERCAD SOFTWARE ACCOUNT A. Create an account for your group for design purposes. If you re unfamiliar with Tinkercad software, work with the program prior to beginning this project to practice design skills. PAGE 110


111 STEP 02: DESIGN VEHICLES PAGE 111 Each group should design their own vehicle using Tinkercad software then test it. Your vehicle should attach to the Sphero hat provided and should be able to carry a container with 100 ml of water. A. Measure the water cup and Sphero hat using a ruler or calipers. This way you can ensure your vehicle will be able to properly attach to the Sphero and carry the water cup. B. Start a new design in Tinkercad software. C. Use the basic shapes, holes, and group tool to create your vehicle. The ruler is helpful to make sure your vehicle and components are the correct size. MAKERBOT EDUCATORS GUIDEBOOK PROJECT 06: H2 MAKE IT GO


112 MAKERBOT EDUCATORS GUIDEBOOK PROJECT 06: H2 MAKE IT GO D. Check your work: Your vehicle should have the following components: A place to hold the water cup Properly placed prongs for attaching to the hat Correctly sized holes for axles Wheels and axles TIP: You can either start by importing the sample files included on Thingiverse or start from scratch. TIP: If students import the Sphero hat.stl into Tinkercad software, they can make sure their prongs line up before printing. PAGE 112


113 STEP 03: PRINT, TEST, AND ITERATE! PAGE 113 A. Export models from Tinkercad software using the export button in the top right. Choose.STL format to download the files and design aspects. TIP: Select download the selected shape to export parts of your model individually. B. Import your files into MakerBot Print and prepare for printing. The sample vehicle is able to print without support material, but student designs may need support material. C. Print: Select your print settings and begin printing. Print Settings: Rafts Yes Supports Varies Resolution 0.2mm Infill 5% MAKERBOT EDUCATORS GUIDEBOOK PROJECT 06: H2 MAKE IT GO


114 MAKERBOT EDUCATORS GUIDEBOOK PROJECT 06: H2 MAKE IT GO D. Assemble your vehicle: Make sure your wheels and axles attach properly and can roll. E. Attach hat: Make sure the vehicle attaches to the hat. You can use pipe cleaners or rubber bands to help. F. Insert cup and test: Make sure the water cup fits into your vehicle and that the Sphero can still drive with the vehicle attached. PAGE 114


115 PROJECT COMPLETE: START YOUR ENGINES! A. Race! The goal of the race is to transport 100 ml of water from the starting line, around the track and to the finish line. You should aim to save as much water as possible while navigating the track in the least amount of time. PAGE 115 B. Measure the exact amount of water in your cup before starting, then measure the cup after racing. Subtract your final amount from the starting amount to figure out how much water you lost during the race, then record that value. C. Record your time D. Discuss: Compare class results and discuss which designs were most/least successful and why. MAKERBOT EDUCATORS GUIDEBOOK PROJECT 06: H2 MAKE IT GO
116 MAKERBOT EDUCATORS GUIDEBOOK PROJECT 06: H2 MAKE IT GO PROJECT RUBRIC GROUP NAME Water Transport Function Creativity 4 points 3 points 2 points 1 points 100mL 90-80mL 70-60mL 50mL and below The vehicle carries the water smoothly around corners. Group used creativity in design and overall it helped in success of the project. H ² MAKE IT GO The vehicle carries the water fairly well but not smoothly. Design showed creativity that didn t help the overall success of the project. The vehicle carries the water, but struggles on turns and does not ride smoothly. Design shows minimal creativity. The vehicle does not carry the water well. No creativity was used. points earned Group Work All members of the group worked together and contributed ideas. Most of the group worked together with few distractions. Less than half of the group was working on task. The group did not finish or was off task most of the time. PAGE 116 Course Completion Time Fastest time Top 50% Bottom 50% Did not finish TOTAL POINTS TO DOWNLOAD: thingiverse.com/thing:

117 MAKERBOT EDUCATORS GUIDEBOOK PROJECT 06: H2 MAKE IT GO PAGE 117 GOING FURTHER A. Try having the students use the Sphero app to code directions for the Sphero to navigate the track on its own.

118 MAKERBOT EDUCATORS GUIDEBOOK PROJECT 07: WEATHER SURVIVAL CHALLENGE PROJECT SEVEN WEATHER SURVIVAL CHALLENGE PAGE 118 LINK: thingiverse.com/thing: for access to handouts, videos and other materials associated with this project.
119 PROJECT INFO AUTHOR Nichole SUBJECT Science AUDIENCE Grade Levels 2 6 DIFFICULT Y Intermediate SKILLS NEEDED Basic Tinkercad software experience DURATION 2-3 Class Periods GROUPS 10 Groups 2-3 Students / Group MATERIALS Plastic tub Sand or stones Water Sketchbook SOFTWARE Tinkercad (web app) PRINTERS Works with all MakerBot Replicator 3D printers PRINT TIME Prep: None Lesson: 5-10 hrs / Group FILAMENT USED 1-2 Large Spools I love this project because it covers so many different lessons and strategies. When testing their designs, the students not only engage in the basics of STEM education, but also learn how to design (and redesign) and make the best model for the job. They get a chance to try, fail, redesign and try again something that many students don t get the opportunity to do. It s awesome seeing all of the different solutions that the students create to solve the same problem! Nichole Thomas LESSON SUMMARY This project is a great expansion for any class unit discussing weather patterns and how they affect us. Students are challenged to create a structure that will withstand extreme weather or flooding, then print and test their models. LEARNING OBJECTIVES After completing this project, students will be able to: Create objects in Tinkercad using the group, hole, and transformation tools. Understand basic types and patterns of weather. Understand conceptual methods of creating structures impervious to flooding. VIRGINIA STANDARDS SOL: SCI 2.6 The student will investigate and understand basic types, changes, and patterns of weather. Key concepts include Temperature, wind, precipitation, drought, flood, storms The uses and importance of measuring and recording weather data NGSS STANDARDS MS-ESS2-4 Earth s Systems Develop a model to describe the cycling of water through Earth s systems driven by energy from the sun and the force of gravity. 3-5-ETS1-1 Engineering Design Define a simple design problem reflecting a need or a want that includes specified criteria for success and constraints on materials, time, or cost. 3-5-ETS1-2 Engineering Design Generate and compare multiple possible solutions to a problem based on how well each is likely to meet the criteria and constraints of the problem. 3-5-ETS1-3 Engineering Design Plan and carry out fair tests in which variables are controlled and failure points are considered to identify aspects of a model or prototype that can be improved. PAGE 119 MAKERBOT EDUCATORS GUIDEBOOK PROJECT 07: WEATHER SURVIVAL CHALLENGE


120 MAKERBOT EDUCATORS GUIDEBOOK PROJECT 07: WEATHER SURVIVAL CHALLENGE TEACHER PREPARATION A. Create Tinkercad accounts: Students must have an active account in order to design their structures. B. Place sand or stones at the bottom of the plastic bin to replicate soil and to create a firm base for testing the printed structures. C. Use a small book to prop the bin up at a slight incline. PAGE 120

121 STUDENT ACTIVITY STEP 01: DISCUSS AND BRAINSTORM PAGE 121 A. Discuss how communities deal with weather challenges, such as floods and hurricanes. B. Research how heavy rain can cause flooding; use this information to create a structure that will withstand a flood. C. Brainstorm which type of structures would be most beneficial in a flood-prone environment. MAKERBOT EDUCATORS GUIDEBOOK PROJECT 07: WEATHER SURVIVAL CHALLENGE


122 MAKERBOT EDUCATORS GUIDEBOOK PROJECT 07: WEATHER SURVIVAL CHALLENGE STEP 02: TINKERCAD INSTRUCTION In order for you to successfully complete this project you will need a basic understanding of how to use Tinkercad software. Review and practice the following tools before building your structure. A. Move: This includes rotate, scale, etc. B. Group/Ungroup: These functions allow you to merge one or more shapes to create your weatherproofing structures. This tool also allows you to use holes to cut from an existing shape. Grouping is an essential step in exporting files for 3D printing. PAGE 122 C. Hole: Holes in Tinkercad are shapes that are used to remove material from another object. You can use holes to create windows, doors or other cutouts. D. Align: Align can save you time when moving objects. This tool allows you to line up edges or centers of models.


123 STEP 03: DESIGN PAGE 123 A. Design structures: Once you are familiar with the basic operation of Tinkercad software, start designing your own floodproof structure. This should take 1-2 class periods for design and iteration. B. Review structures: Once you have completed your design, review it with your group and teacher. Make sure all parts of your model are touching so that it will print successfully. Also make sure your model is grouped into one part. MAKERBOT EDUCATORS GUIDEBOOK PROJECT 07: WEATHER SURVIVAL CHALLENGE

124 MAKERBOT EDUCATORS GUIDEBOOK PROJECT 07: WEATHER SURVIVAL CHALLENGE STEP 04: PRINT PAGE 124 A. Export: Click export in the upper right side of the Tinkercad software window. Select the.stl format to start the download. B. Prepare: Once you have completed and exported your model, import it into MakerBot Print to prepare for printing. C. Print all models with the same settings to ensure consistent testing. Print Settings: Rafts Yes Supports Depends on Model Resolution 0.2mm Infill 5%


125 STEP 05: TEST PAGE 125 One at a time, test each group s model in a mock flooding simulation to see how well each structure performs under heavy rain and flooding. Keep the following questions in mind: Does the model stay in place? Are there parts of the model that could easily be washed away? Does the model stand above the water line? STEP 06: REFLECT A. Complete the worksheet: Answer the following questions on the provided worksheet: Did your structure stand up to the flood? Explain what happened when you tested it. If you had a chance to redesign, what would you do differently? A. Place structure into the water bin, using the sand/ stones as your soil. B. Add water to the bin to simulate heavy rain. Observe the behavior of the model once water reaches flood levels. MAKERBOT EDUCATORS GUIDEBOOK PROJECT 07: WEATHER SURVIVAL CHALLENGE
126 MAKERBOT EDUCATORS GUIDEBOOK PROJECT 07: WEATHER SURVIVAL CHALLENGE PROJECT WORKSHEET STUDENT NAME DRAW YOUR STRUCTURE: Did your structure stand up to the flood? Explain what happened when you tested it. WEATHER SURVIVAL CHALLENGE If you had a chance to design your structure, what would you do differently? PAGE 126 TO DOWNLOAD: thingiverse.com/thing:

127 PROJECT COMPLETE: REIMAGINE AND REBUILD PAGE 127 GOING FURTHER A. Have students redesign their structures using what they learned from their first test. Test the new models and compare the results. B. Change some of the print settings, such as increasing the infill density, and run the same flood test again: what happens? C. Now that students have designed structures for a flood environment, ask how they would design structures to withstand other severe weather like tornados, hurricanes, etc. MAKERBOT EDUCATORS GUIDEBOOK PROJECT 07: WEATHER SURVIVAL CHALLENGE

128 MAKERBOT EDUCATORS GUIDEBOOK PROJECT 08: RUBBER BAND GLIDERS PROJECT EIGHT RUBBER BAND GLIDERS PAGE 128 LINK: thingiverse.com/thing: for access to handouts, videos and other materials associated with this project.

129 PROJECT INFO AUTHOR Jeffry SUBJECT Engineering AUDIENCE Grade Levels 6 12 DIFFICULT Y Intermediate SKILLS NEEDED Basic Autodesk Fusion 360 experience DURATION 3 5 Class periods GROUPS 15 Groups 1 2 students / Group MATERIALS Rubber Bands Tape Measure Tape or Superglue Calipers or Ruler Open space to launch SOFTWARE Autodesk Fusion 360 PRINTERS Works with all MakerBot Replicator 3D printers, except the MakerBot Replicator Mini PRINT TIME Prep: 1 hr / Glider Lesson: 30 mins / Group FILAMENT USED ½ Large Spool I m a pilot and have loved airplanes since I was old enough to talk. I have built hundreds of model planes. Some fly, some just look pretty. We need more young people interested in aerospace! So, I set out to design a project to make a practical exploration of wing design by making rubber band gliders with wings that can easily be replaced, redesigned, and tested. LESSON SUMMARY Rubber band gliders are a great way to get students excited about engineering, specifically flight and aerodynamics. In this project you ll provide students with a universal rubber band glider body to be paired with wings that they design in class. With a large selection of wings available on Thingiverse, as well as the wings designed by your class, students will learn basic principles of aerodynamics through practical research and exploration as the gliders crash and soar. It s also a great excuse to spend a fun class period with your students launching rubber band gliders! LEARNING OBJECTIVES After completing this project, students will be able to: Learn about aerodynamic forces including lift, drag, weight, thrust, and flight Describe how wing design influences lift Collect data and modify wing design based on this data COMMON CORE MATH STANDARDS RST Science & Technical Subjects Evaluate the hypotheses, data, analysis, and conclusions in a science or technical text, verifying the data when possible and corroborating or challenging conclusions with other sources of information. Jeffry Turnmire CCSS.Math.Practice.MP4 Model with Mathematics By high school, a student might use geometry to solve a design problem or use a function to describe how one quantity of interest depends on another. NGSS STANDARDS HS-ETS1-2 Engineering Design Design a solution to a complex real-world problem by breaking it down into smaller, more manageable problems that can be solved through engineering. HS-ETS1-3 Engineering Design Evaluate a solution to a complex real-world problem based on prioritized criteria and trade-offs that account for a range of constraints, including cost, safety, reliability, and aesthetics as well as possible social, cultural, and environmental impacts. PAGE 129 MAKERBOT EDUCATORS GUIDEBOOK PROJECT 08: RUBBER BAND GLIDERS


130 MAKERBOT EDUCATORS GUIDEBOOK PROJECT 08: RUBBER BAND GLIDERS TEACHER PREPARATION A. Print two or three of the glider body files included in the Thingiverse Education post (thingiverse.com/thing: ). TIP: When printing the glider body, print with support material and rafts. Printing the wings laying flat on the build plate creates a higher-quality wing. B. Print a few of the sample wings to give students ideas about different wing designs. PAGE 130


131 MAKERBOT EDUCATORS GUIDEBOOK PROJECT 08: RUBBER BAND GLIDERS PAGE 131 C. Review and discuss some of the basic principles and terminology of aerospace engineering: Aerodynamic force: The force exerted on a body whenever there is relative velocity between the body and the air. Friction: The resistance that one surface or object encounters when moving over another. Air resistance: The friction force air exerts against a moving object. Center of gravity: The point at which the entire weight of a body may be considered as concentrated so that if supported at this point the body would remain in equilibrium in any position. D. Discuss: How air resistance, friction, and aerodynamic forces are considered in wing design, NASA has great online resources to help How center of gravity relates to glider performance Different styles of wings like rectangular, elliptical, swept (forward and rear), and delta E. Demonstrate: 3D print and launch one of the predesigned gliders. Discuss which wing designs are more and less effective.


132 MAKERBOT EDUCATORS GUIDEBOOK PROJECT 08: RUBBER BAND GLIDERS STUDENT ACTIVITY STEP 01: DESIGN AND BUILD A. Begin planning a set of glider wings using the knowledge you gained through classroom discussion and demonstration. Your understanding of aerodynamic forces and flight will be tested later. B. Open Autodesk Fusion 360 and design a set of wings to attach to the premade glider body. It is useful to have the printed gliders available to hold and measure as you design. PAGE 132 TIP: The original Fusion 360 software files are included in the Thingiverse Education page for this project. If needed, students can download and open those to help make sure their wing designs will fit on the body.

133 PAGE 133 AUTODESK FUSION 360 MAKERBOT EDUCATORS GUIDEBOOK PROJECT 08: RUBBER BAND GLIDERS C. Review the diagram: The wing root on the glider body is 2.4 mm square x 18mm long. Your wings will need a socket that measures roughly 3 mm square x ~20mm long to slip onto the root. TIP: Wing weight is one of the most important factors affecting flight. Experiment with the weight of your design by changing print settings like infill.


134 MAKERBOT EDUCATORS GUIDEBOOK PROJECT 08: RUBBER BAND GLIDERS AUTODESK FUSION 360 AUTODESK FUSION 360 AUTODESK FUSION 360 D. Sketch / extrude wing: Make sure your wing has enough space to fit the wing root. E. Sketch / extrude the root: Make sure it is connected to your wing and has the correct dimensions. F. Use the mirror tool to create a second wing. Move and rotate the wings to position them on the glider body and verify the size and fit. AUTODESK FUSION 360 PAGE 134


135 STEP 02: PRINT PAGE 135 AUTODESK FUSION 360 A. Export for 3D printing by clicking File, selecting the 3D Print menu and choosing the.stl format. B. Import the.stl files into MakerBot Print Settings: Rafts Yes Print and prepare for printing. Supports Yes (body only) Resolution 0.2mm Infill 30% TIP: Have students experiment with different iterations of the glider s body to perfect its center of gravity. MAKERBOT EDUCATORS GUIDEBOOK PROJECT 08: RUBBER BAND GLIDERS
 and a large open space.")


136 MAKERBOT EDUCATORS GUIDEBOOK PROJECT 08: RUBBER BAND GLIDERS STEP 03: TEST A. Assemble the gliders by slipping the wings onto the body roots. Set up your testing range with a launch line (marked with tape) and a large open space. If possible, lay out a landing grid to make measuring easier after launching. CAUTION: Be aware of what is down range. With stronger rubber bands or different wind conditions, gliders could fly 30 or more! B. Launch gliders from the launch line one at a time using the same rubber band. If you find the gliders hitting your fingers, use a pen as a launching tool. It s important that everyone uses the same method for consistency. TIP: Launches should be performed at the same angle, into similar wind conditions. Watch the video on Thingiverse demonstrating proper launching technique. PAGE 136 C. Measure the flight distance of each glider and record all data in a table.


137 STEP 04: EVALUATE A. Evaluate your data for trends and calculate the average distance that you were able to achieve with your wing design. PAGE 137 STEP 05: REVIEW A. Discuss with your class: Which wing designs were most effective? Do they share common design traits? What other conclusions can you draw from the class results? B. How could you do the experiment differently? What outside factors affected the results and how can they be minimized in the future? MAKERBOT EDUCATORS GUIDEBOOK PROJECT 08: RUBBER BAND GLIDERS
138 MAKERBOT EDUCATORS GUIDEBOOK PROJECT 08: RUBBER BAND GLIDERS PROJECT WORKSHEET STUDENT / GROUP NAME RUBBER BAND GLIDERS FIRST LAUNCH SECOND LAUNCH AVERAGE DISTANCE PAGE 138 TO DOWNLOAD: thingiverse.com/thing:

139 PROJECT COMPLETE: LEARN TO FLY PAGE 139 GOING FURTHER A. After the first round of testing you can prompt students to use the iterative design process and design a new set of wings. In future class periods, launch student gliders again and test their improved designs compared to their original designs. B. Have students start from scratch and design both the glider bodies and wings. This is more timeintensive but allows for more design creativity. MAKERBOT EDUCATORS GUIDEBOOK PROJECT 08: RUBBER BAND GLIDERS

140 MAKERBOT EDUCATORS GUIDEBOOK PROJECT 09: ARCHIMEDES SCREW PROJECT NINE ARCHIMEDES SCREW BONANZA PAGE 140 LINK: thingiverse.com/thing: for access to handouts, videos and other materials associated with this project.
141 PROJECT INFO AUTHOR MakerBot SUBJECT Engineering AUDIENCE Grade Levels 9 12 DIFFICULT Y Advanced SKILLS NEEDED Some Onshape software experience DURATION Class Periods GROUPS 3 4 Groups 6 7 Students / Group MATERIALS 2 Large Bowls Superglue Bag of Dried Beans Dual Lock Tape Ruler or Calipers SOFTWARE Onshape (web app) APPLICABLE PRINTERS Works with all MakerBot Replicator 3D printers PRINT TIME Prep: 65 hrs Lesson: hrs / Group FILAMENT USED 3 4 Large Spools This projects brings an ancient invention to life using modern technology. While the project is definitely an investment in printing time and filament, the students final products make this lesson well worth the effort! MakerBot Learning LESSON SUMMARY The Archimedes Screw is a device believed to be invented by Archimedes, one of the world s greatest scientists, in the 3rd century B.C. It was most often used to transport water from lower ground to higher ground for irrigation, flood prevention, and more. Interestingly, it is still used today in many different applications. Well before power tools were created, people had to cleverly use common materials to make their work more efficient. The Archimedes screw is one example of this type of simple machine. A basic design consists of a screw (helical spiral part), a tube (full or partial), and a crank. By rotating the crank, you can move large quantities of material up an incline much more efficiently than by simply carrying it. All Archimedes screw designs have the same basic components, but can take many shapes and sizes depending on the application. Check out some videos in the Thingiverse Education post (thingiverse.com/thing: ). In this project, students will create or modify an Archimedes screw to transport material from lower ground to higher ground. The sample file included was designed in Onshape. The students task is to observe the sample printed screw design, and create a more efficient screw design that fits into the supplied case. LEARNING OBJECTIVES After completing this project, students will be able to: Discuss the history of the Archimedes screw Apply engineering principles to design a simple machine Comprehend and apply the fundamentals of parametric 3D design Understand the impact of changing design parameters NGSS STANDARDS HS-PS3-3: Energy Design, build, and refine a device that works within given constraints to convert one form of energy into another form of energy. HS-ETS1-2: Engineering Design Design a solution to a complex real-world problem by breaking it down into smaller, more manageable problems that can be solved through engineering. HS-ETS1-4: Engineering Design Use a computer simulation to model the impact of proposed solutions to a complex real-world problem with numerous criteria and constraints on interactions within and between systems relevant to the problem. PAGE 141 MAKERBOT EDUCATORS GUIDEBOOK PROJECT 09: ARCHIMEDES SCREW


 12x Case Connector")

142 MAKERBOT EDUCATORS GUIDEBOOK PROJECT 09: ARCHIMEDES SCREW TEACHER PREPARATION CASE BOTTOM SUPPORT PIECES CRANK BLADE BLADE CONNECTORS SPILL PLATE BOTTOM ADAPTER CASE BRACKET CASE CONNECTORS PAGE 142 A. 3D print the sample files from Thingiverse: Leave yourself at least a week for printing and assembly. Print the following quantities of parts: 3x Case Bottom 3x Blade 1x Bottom Adaptor 2x Case Bracket 1x Crank 2x Support Clamp 1x Support Bar Top 1x Support Bar Bottom 2x Support Base 4x Support Nut and Bolt (you can subsitute 1/4-20 Nut & Bolt) 12x Case Connector (24x if you print the Case Top parts) 4x Blade Connector 1x Spill Plate 3x Case Top (optional - only if you want to fully enclose the screw)


143 PAGE 143 Print Settings: Support Parts Rafts Yes Supports No Resolution 0.2mm Infill 25% Print Settings: All Other Parts Rafts Yes Supports No Resolution 0.2mm Infill 5% MAKERBOT EDUCATORS GUIDEBOOK PROJECT 09: ARCHIMEDES SCREW B. Assemble the sample screw: Glue a blade connector into the top hole of each blade part (3x). Once dry, connect the blade parts together and glue them into place. Insert the square end of the bottom adaptor into the bottom hole of the blade assembly and glue into place.


144 MAKERBOT EDUCATORS GUIDEBOOK PROJECT 09: ARCHIMEDES SCREW PAGE 144 TEACHER PREPARATION C. Assemble the case: Insert and glue case connectors into the 3 holes in the bottom of each case bottom part. Glue an additional 3 into the topmost case bottom part. Once dry, glue the 3 case bottom pieces together. Align a case bracket piece onto the case connectors at the bottom of the case bottom assembly. The pointed tip should be facing away from the case bottom. Glue the case bracket into place. Align the spill plate onto the center case connector at the top of the case bottom assembly. Glue into place. Insert the case bracket onto the case connectors at the top of the case, but DO NOT glue into place - this will allow you to remove the screw after demonstrating and replace it with student models. Note: DO NOT glue the top bracket or crank - this will allow you to remove the screw after demonstrating and replace it with students models later on. This way, you don t have to print a case for every group.


145 D. Assemble the supports: Insert the support bar bottom into a support base and line up the holes. Insert a nut and bolt to keep the parts together. PAGE 145 Insert the support bar top into a case clamp and align the holes. Insert a nut and bolt to keep the parts together. Insert a case clamp into a support base and line up the holes. Insert a nut and bolt to keep the parts together. Attach the support base parts to the bowls using dual lock. E. Final Assembly: Snap the case assembly onto the case clamps. Insert the blade assembly into the case by inserting the bottom adaptor into the bottom case bracket. Place a case bracket onto the top of the case by slipping it over the protruding blade connector and aligning it to the case connectors. FInally, slip the crank onto the blade connector and fill the bottom bowl with your material. MAKERBOT EDUCATORS GUIDEBOOK PROJECT 09: ARCHIMEDES SCREW


146 MAKERBOT EDUCATORS GUIDEBOOK PROJECT 09: ARCHIMEDES SCREW TEACHER PREPARATION F. Demonstrate the sample screw design to students. Explain that their task is to make a more efficient screw design that fits into the case. G. Create an Onshape account. H. Distribute the sample Onshape file to students. The link to the file is in the Thingiverse Education post (thingiverse.com/thing: ). PAGE 146

147 STUDENT ACTIVITY STEP 01: PLANNING PAGE 147 A. Measure the bowls, case, transport distance, and material before beginning to plan your screw design. B. Analyze the printed sample screw and take notes of possible improvements. MAKERBOT EDUCATORS GUIDEBOOK PROJECT 09: ARCHIMEDES SCREW

148 MAKERBOT EDUCATORS GUIDEBOOK PROJECT 09: ARCHIMEDES SCREW STEP 02: REVIEW SAMPLE CAD DESIGN In this step, you ll experiment with changing the variables in each feature of the sample CAD model and observe the impact. PAGE 148 A. Open your browser and navigate to the Onshape link included in the Thingiverse Education post (thingiverse.com/thing: ).
149 PAGE 149 B. Review the major design steps for each screw part. The sample is by no means the only way to create this model but should provide an idea for how to construct your own. The basic steps to modeling this sample are: Sketch and extrude the center cylinder. Use sweep tool to create blades. Sketch and extrude case bottom, offset from blade. Mirror to create case top. Sketch and extrude the adaptors, brackets, crank, and spill plate. TIP: Use the rollback bar in Onshape to go through the timeline and simulate the model being built. MAKERBOT EDUCATORS GUIDEBOOK PROJECT 09: ARCHIMEDES SCREW
150 MAKERBOT EDUCATORS GUIDEBOOK PROJECT 09: ARCHIMEDES SCREW PAGE 150 C. Edit the helix sketch: The helix sketch defines the pitch of the blade part. Right click to edit and experiment with this number to observe the impact on the blade. This is a quick way to dramatically affect the screw design. In these pictures, the pitch is reduced to create a tighter screw. Later, you will need to calculate an appropriate pitch for your blade.
151 PAGE D. Edit the blade profile sketch: Experiment with changing the angle and length of the blade to observe the impact on the blade part. The 65-degree angle allows for 3D printing without the need for support material. MAKERBOT EDUCATORS GUIDEBOOK PROJECT 09: ARCHIMEDES SCREW
152 MAKERBOT EDUCATORS GUIDEBOOK PROJECT 09: ARCHIMEDES SCREW PAGE 152 E. Edit the blade part. The blade was created using the sweep tool with the blade profile sketch (region to sweep) and the helix sketch (sweep path). To create a second blade using the transform tool, duplicate the blade and rotate 180 degrees. Experiment with creating more than 2 blades using the transform tool. Once you re done, merge the blade parts with the center cylinder using the boolean tool. TIP: This step is only necessary if you want to create multiple blades.


153 PAGE F. Edit the case sketch. This sketch defines the size and shape of the case part. Experiment with the space between the blade and the case (sample is at 0.1"). Shrinking the space will help to minimize material loss but could lead to rubbing between the blade and the case. MAKERBOT EDUCATORS GUIDEBOOK PROJECT 09: ARCHIMEDES SCREW


154 MAKERBOT EDUCATORS GUIDEBOOK PROJECT 09: ARCHIMEDES SCREW STEP 03: DESIGN, PRINT, TEST, AND ITERATE This step generally takes 3-5 class periods. A. Export.STL files from Onshape: Right click on the part in the bottom left hand side and click export. Make sure to change the units to millimeters before exporting. B. Import your files into MakerBot Print and prepare for printing. C. Print your models: Print Settings: Rafts Supports Resolution Yes Infill 5% Depends on the model 0.2mm TIP: Given that these are large prints, test small sections or small scale versions before printing out your entire assembly. D. Finalize your design, assemble it, and get in any last-minute tests before the official testing. PAGE 154


155 PROJECT COMPLETE: GET CRANKIN! PAGE 155 A. Each group should demonstrate their design by showing how much material they can transport from the lower bowl to the upper bowl in 30 seconds. B. Record the results for each team, while also taking note of the differences in designs between groups. C. Discuss the different designs from each group: Which worked best? Which adjustments proved most effective? If you were to redesign, what would you change? MAKERBOT EDUCATORS GUIDEBOOK PROJECT 09: ARCHIMEDES SCREW
156 MAKERBOT EDUCATORS GUIDEBOOK PROJECT 09: ARCHIMEDES SCREW PAGE 156 PROJECT WORKSHEET STUDENT / GROUP NAME ARCHIMEDES SCREW BONANZA MATERIAL MOVED (g) NOTES ON SCREW DESIGN TO DOWNLOAD: thingiverse.com/thing:
 and have them think about what modifications would need to be made to accommodate these different materials. MAKERBOT EDUCATORS GUIDEBOOK PROJECT 09: ARCHIMEDES SCREW B.")
157 PAGE 157 GOING FURTHER A. Provide each group a different material (i.e. water, gravel, cereal, etc.) and have them think about what modifications would need to be made to accommodate these different materials. MAKERBOT EDUCATORS GUIDEBOOK PROJECT 09: ARCHIMEDES SCREW B. If you don t want to involve 3D design in this project, there are great Customizer designs on Thingiverse that allow you to create custom screws without needing to actually design them.
158 MAKERBOT EDUCATORS GUIDEBOOK PROJECT 01: CLOUD TYPES AND DISPLAY STANDS PAGE 158
159 PART 03: GOING FURTHER MAKERBOT EDUCATORS GUIDEBOOK PROJECT 01: CLOUD TYPES AND DISPLAY STANDS PAGE 159

160 MAKERBOT EDUCATORS GUIDEBOOK GOING FURTHER: POST-PROCESSING GOING FURTHER POST-PROCESSING YOUR 3D PRINTS PAGE 160 SANDING YOUR 3D PRINTS


161 3D printing can bring your ideas to life, but sometimes your ideas don t stop with 3D printed parts. What if your ideas call for multiple materials? Or a smoother surface? What if your ideas are larger than the build volume of your 3D printer? PAGE 161 Post processing isn t necessary, but finishing techniques like sanding, gluing, painting, and silicone molding can refine your prints and take your ideas far beyond the build plate. POST-PROCESSING TECHNIQUES: GLUING YOUR 3D PRINTS SILICONE MOLDING WITH 3D PRINTED MASTERS PAINTING YOUR 3D PRINTS SILICONE MOLDING WITH 3D PRINTED MOLDS MAKERBOT EDUCATORS GUIDEBOOK GOING FURTHER: POST-PROCESSING


162 MAKERBOT EDUCATORS GUIDEBOOK POST-PROCESSING: SANDING POST- PROCESSING When 3D printing with FDM 3D printers, there is often a subtle layer pattern on prints. Sanding 3D prints is a great way to eliminate layer lines in preparation for painting, silicone molding, or assembly. VIDEO TUTORIAL: makerbot.com/professionals/post-processing/sanding SANDING YOUR 3D PRINTS MATERIALS Sandpaper (80, 120, 600, 1000, 1500 grit) Handheld electric sander Hobby knife Needlenose pliers Flush cutters Chisels Bin to hold water PAGE 162 Gloves, eye protection and respiratory mask Be sure to consult the safety precautions listed by the manufacturer on any materials and equipment used in this tutorial before starting.
163 STEP 01: PREPARE AND PRINT YOUR MODEL A. Consider print settings, print orientation, number of build plates. MAKERBOT PRINT PAGE 163 TIP: Surfaces printed vertically will have the smoothest finish. HAIR DRYER SHELL: grabcad.com/library/hair-dryer-shell-1 STEP 02: REMOVE SUPPORT MATERIALS AND RAFTS A. Remove the prints from the build plate. B. Remove rafts and support material from your print. Be sure to wear eye protection when removing supports using pliers or clippers. C. Remove large pieces of support first and then D. Clean the edges and seams of your print to ensure approach smaller pieces and fine details. better alignment of pieces. MAKERBOT EDUCATORS GUIDEBOOK POST-PROCESSING: SANDING


164 MAKERBOT EDUCATORS GUIDEBOOK POST-PROCESSING: SANDING STEP 03: SAND WITH COARSE GRIT SANDPAPER (DRY) When sanding your prints, begin with lower grit sandpaper, and move on to higher grit as the print surface gets smoother. A. Begin sanding, with coarse 80 grit sandpaper. B. When sanding with 80 grit the goal is to remove any leftover blemishes from raft or support material, and create an even surface to refine. This process will remove the most amount of material and take the most time. C. In early stages of sanding you will notice your print s surface changing from shiny to dull. The shine will return as you move to higher grit sandpaper. D. To save time you can use an electric sander or multitool. If using a multitool, be sure to choose a low setting to avoid overheating/deforming the PLA. PAGE 164 E. After each sanding stage, clean the print of any dust and inspect for a uniform surface finish. Move on to sanding with higher grit when all large-to-medium sized imperfections or blemishes have been removed.


165 STEP 04: SAND WITH FINE SANDPAPER (WET) When your print s surface is even and refined it s time to wet sand the model using fine grit sandpaper. This process doesn t remove much material, but will polish its surface. PAGE 165 A. Submerge the print in a tub of water. C. Dry the print and inspect for a uniform surface finish. TIP: Be sure not to sand in one place for too long as heat generated from friction could deform the PLA. B. Sand the print using 1000 grit sandpaper until it is completely smooth to the touch. D. Once finished, your print s surface should now be even, blemish free, and glass-like to the touch. Here you can see the difference between the unfinished surface and final sanded part. MAKERBOT EDUCATORS GUIDEBOOK POST-PROCESSING: SANDING


166 MAKERBOT EDUCATORS GUIDEBOOK POST-PROCESSING: GLUING POST- PROCESSING Gluing your 3D prints is essential if you re looking to combine multiple components of an assembly or to create a model larger than the build volume of your 3D printer. Working time will vary depending on your model. VIDEO TUTORIAL: makerbot.com/professionals/post-processing/gluing GLUING YOUR 3D PRINTS MATERIALS 3D print with multiple components Cyanoacrylate glue 2 part epoxy Rubber bands Paper towels Scraping tool grit sandpaper PAGE 166 Gloves, eye protection and respiratory mask Be sure to consult the safety precautions listed by the manufacturer on any materials and equipment used in this tutorial before starting.
167 IF YOU VE ALREADY COMPLETED SANDING YOUR PRINTS, JUMP TO STEP 3 STEP 01: PREPARE AND PRINT YOUR MODEL MAKERBOT PRINT PAGE 167 A. Consider print settings, print orientation, number of build plates. TIP: Surfaces printed vertically will have the smoothest finish. STEP 02: REMOVE SUPPORT MATERIALS AND RAFTS HAIR DRYER SHELL: grabcad.com/library/hair-dryer-shell-1 A. Remove the prints from the build plate. B. Remove rafts and support material from your print. Be sure to wear eye protection when removing supports using pliers or clippers. C. Remove large pieces of support first and then D. Clean the edges and seams of your print to ensure approach smaller pieces and fine details. better alignment of pieces. MAKERBOT EDUCATORS GUIDEBOOK POST-PROCESSING: PRINT / SAND


168 MAKERBOT EDUCATORS GUIDEBOOK POST-PROCESSING: GLUING STEP 03: INSPECT JOINTS Make sure the areas where the two pieces will be bonded are clean and clear of any debris or blemishes. Follow the steps below to ensure your print is ready for gluing. A. Inspect your part. It s ready to glue when all surfaces and joints are smooth and fit together. STEP 04: SECURE COMPONENTS A. Join components together using rubber bands. TIP: If rubber bands don t work for the geometry of your parts, try straps, tape or clamps. PAGE 168


169 STEP 05: SPOT GLUE Once your parts surfaces have been prepared and are in a fixed and stable position, you can begin gluing. PAGE 169 A. Begin gluing by applying small amounts of glue to central locations around your model. This will ensure that your parts are evenly attached in all places. TIP: Work from the center outwards in regular intervals for even gluing. B. Wipe away any excess glue with a paper towel. C. Spray accelerant to speed up the drying process (optional). MAKERBOT EDUCATORS GUIDEBOOK POST-PROCESSING: GLUING


.")
170 MAKERBOT EDUCATORS GUIDEBOOK POST-PROCESSING: GLUING STEP 06: GLUE ALL SEAMS Once the seams are correctly aligned, apply glue to each seam around your assembled print. A. Apply glue evenly to the B. Wipe away any excess glue. C. Spray accelerator to speed up the remaining unglued seams. drying process (optional). PAGE 170 D. Inspect the part to make sure each seam is fully glued.


171 STEP 07: (OPTIONAL) FILL SEAMS If you find the seams are rough or have gaps, you can use a body filler to smooth them - this works especially well if you plan to paint your model or create a silicone mold from it. Body fillers come in two parts - filler and hardener. PAGE 171 A. Pour a small amount of filler on a tray. C. Mix and generously spread across seams of the assembled print. B. Spread a small amount of hardener next to filler. D. Allow time to cure according to your filler s instructions. MAKERBOT EDUCATORS GUIDEBOOK POST-PROCESSING: GLUING


172 MAKERBOT EDUCATORS GUIDEBOOK POST-PROCESSING: PAINTING POST- PROCESSING If you re looking to add a bit more creativity into your classroom 3D printing activities, painting your models is a great solution. VIDEO TUTORIAL: makerbot.com/professionals/post-processing/painting PAINTING YOUR 3D PRINTS MATERIALS 3D print Rubbing alcohol Paper towels Spray primer/filler Hanging cord 80, 120, 240, 600, 1000 grit sandpaper Needlenose pliers Sanding block and sandpaper PAGE 172 Be sure to consult the safety precautions listed by the manufacturer on any materials and equipment used in this tutorial before starting. Gloves, eye protection and respiratory mask


173 IF YOU VE ALREADY COMPLETED SANDING AND GLUING YOUR PRINTS, JUMP TO STEP 4 STEP 01: PREPARE AND PRINT YOUR MODEL MAKERBOT PRINT PAGE 173 A. Consider print settings, print orientation, number of build plates. TIP: Surfaces printed vertically will have the smoothest finish. STEP 02: REMOVE SUPPORT MATERIALS AND RAFTS HAIR DRYER SHELL: grabcad.com/library/hair-dryer-shell-1 A. Remove the prints from the build plate. B. Remove rafts and support material from your print. Be sure to wear eye protection when removing supports using pliers or clippers. C. Remove large pieces of support first and then D. Clean the edges and seams of your print to ensure approach smaller pieces and fine details. better alignment of pieces. MAKERBOT EDUCATORS GUIDEBOOK POST-PROCESSING: PRINT / SAND


 For")

174 MAKERBOT EDUCATORS GUIDEBOOK POST-PROCESSING: PAINTING STEP 03: SAND, GLUE AND USE FILLER (OPTIONAL) For more detail on gluing and sanding, see previous sections. PAGE 174


175 STEP 04: HANG YOUR PRINTS Before painting, hang your prints in an open, dust-free space with plenty of ventilation. This will allow you to paint all surfaces evenly without having to handle the part while paint is drying. PAGE 175 A. Tie hanging cord around the print. B. Hang print in an open room. STEP 05: APPLY PRIMER/FILLER A few layers of primer/filler will fill any small surface imperfections before painting. A. Apply primer filler using wide strokes beginning and B. Once you ve sprayed 2-3 layers of primer/ ending in the space outside of the part. Paint in thin layers. filler, allow minutes for drying. MAKERBOT EDUCATORS GUIDEBOOK POST-PROCESSING: PAINTING
.")


176 MAKERBOT EDUCATORS GUIDEBOOK POST-PROCESSING: PAINTING STEP 06: SAND A. Lightly sand with 1000 grit sandpaper (dry). This will smooth the surface of the primer filler. B. Look for surface imperfections you would like to smooth. Continue to apply layers of primer/filler, if needed. STEP 07: PAINT PAGE 176 A. Apply paint using wide strokes beginning and ending in the space outside of the part. Paint in thin layers. B. Let paint cure overnight. TIP: When choosing paint, make sure to pick something that adheres well to plastic.

177 STEP 08: THE FINAL PRODUCT PAGE 177 MAKERBOT EDUCATORS GUIDEBOOK POST-PROCESSING: PAINTING

 Silicone Resin and dye Mixing cups Mixing sticks Hot glue")
178 MAKERBOT EDUCATORS GUIDEBOOK POST-PROCESSING: SILICONE MOLDING 01 POST- PROCESSING You don t have to be an engineer, designer, or know about molding and casting to make a silicone mold. Silicone molding is an inexpensive, easy, fun way to create objects in a number of different materials, or create a mold around a 3D printed part. VIDEO TUTORIAL: SILICONE MOLDING WITH 3D PRINTED MASTERS makerbot.com/professionals/post-processing/silicone-molding-1 MATERIALS 3D printed mold box, hardware, vents & keys Master (the print you are molding) Silicone Resin and dye Mixing cups Mixing sticks Hot glue or cyanoacrylate glue Funnel Hobby knife Rubber bands, tape, or straps Gloves, eye protection and respiratory mask Mold release spray PAGE 178 Be sure to consult the safety precautions listed by the manufacturer on any materials and equipment used in this tutorial before starting.


179 STEP 01: CHOOSE A FILE TO CAST A MODEL AROUND PAGE 179 A. Print a part that you would like to either make several of, or create in a material not supported by your printer. Here, we chose the cap to a perfume bottle. STEP 02: CREATE YOUR MOLD BOX AUTODESK 123D AUTODESK 123D A. Design a mold box to hold the silicone in place around your part when pouring. Your master will need to be suspended in this structure. You can create mold boxes from foam core board, legos, or 3D printing. Designing and 3D printing mold boxes allows you to create custom pour holes and vents, easily calculate the volume of the mold, create boxes that perfectly fit the parts you plan to create a mold of, and re-use mold boxes to create multiple molds. MAKERBOT PRINT MAKERBOT PRINT B. Prepare and print your mold box using standard print settings. MAKERBOT EDUCATORS GUIDEBOOK POST-PROCESSING: SILICONE MOLDING 01


180 MAKERBOT EDUCATORS GUIDEBOOK POST-PROCESSING: SILICONE MOLDING 01 STEP 03: SUSPEND MASTER IN MOLD BOX AND PREPARE You can suspend your master using popsicle sticks, skewers, or 3D printed rods glued to the surface of the master in an inconspicuous place. The holes left in their place after your mold has cured will aid in resin flow through the mold. A. Spray your mold box, master, vents, and keys with B. Choose points across model to glue vents. mold release. PAGE 180 C. Glue the master to the mold box. D. Spray again with mold release for good measure.


181 STEP 04: OPEN BOTTLES OF SILICONE (PARTS A AND B) AND STIR THOROUGHLY PAGE 181 We calculated our mold volume by filling our mold box with water and pouring the water into a measuring cup to find exact volume. STEP 05: MEASURE A. Determine the volume of silicone needed to fill your intended mold. B. Measure and pour the desired amount of silicone and hardener separately in two measuring cups. MAKERBOT EDUCATORS GUIDEBOOK POST-PROCESSING: SILICONE MOLDING 01


182 MAKERBOT EDUCATORS GUIDEBOOK POST-PROCESSING: SILICONE MOLDING 01 STEP 06: MIX SILICONE Combine the two parts into one mixing cup and stir slowly with a mixing tool. Be cautious not to stir in air bubbles. Scrape the sides of the cup to mix in all material. Once your parts are thoroughly mixed the curing process will begin. PAGE 182 TIP: Read instructions on your silicone for pot-life. This is how much time you have to work with the silicone before it cures.


183 STEP 07: POUR MOLD (PART ONE) Pour silicone into the first half of your mold box. Pour slowly into one corner of the mold box and allow the silicone to run to other parts of the mold box as it fills. Stop when the silicone reaches the top of the box. PAGE 183 After you ve poured the silicone, place small keys into the uncured silicone. These will create negative spaces and allow the mold halves to fit together once poured. We will remove them before pouring the second half of our mold. STEP 08: LET CURE Depending on what type of silicone you are using it can take anywhere from 75 minutes to several hours to cure. Temperature and humidity will affect curing times, so we recommend this process be done in a room temperature environment. MAKERBOT EDUCATORS GUIDEBOOK POST-PROCESSING: SILICONE MOLDING 01


184 MAKERBOT EDUCATORS GUIDEBOOK POST-PROCESSING: SILICONE MOLDING 01 STEP 09: ATTACH AND PREPARE MOLD (PART TWO) Repeat the process to form the second half of the mold. A. Remove the keys you inserted in the previous step. B. Attach and secure the second half of your mold box. C. Spray with mold release. PAGE 184 STEP 10: POUR INTO MOLD PART TWO A. Repeat steps 5-8 to create the second half of your mold using the methods mentioned above. STEP 11: LET CURE


185 STEP 12: BREAK DOWN MOLD BOX PAGE 185 A. Remove hardware. B. Remove the mold from C. Remove the master and vents. the mold box. STEP 13: REASSEMBLE AND PREPARE MOLD A. Ensure that all parts of your mold are correctly B. Secure the mold pieces using rubber aligned, and plug any holes created by vents. bands, straps, or tape. TIP: If your vents leave holes in areas where resin can spill out during the pour, they will need to be plugged. MAKERBOT EDUCATORS GUIDEBOOK POST-PROCESSING: SILICONE MOLDING 01


186 MAKERBOT EDUCATORS GUIDEBOOK POST-PROCESSING: SILICONE MOLDING 01 STEP 14: MEASURE RESIN AND ADD DYE Once you have mixed your resin, you will have only a few short minutes to pour your mold following the steps below. STEP 15: MIX RESIN A. Combine both parts of the resin mixture and mix thoroughly being sure not to stir in air bubbles. PAGE 186 TIP: Resins typically have a shorter pot-life than silicone, meaning they will cure faster.


187 PAGE 187 STEP 16: POUR RESIN STEP 17: LET CURE Once mixed, pour Once poured, allow immediately into the the resin to cure for the opening of your mold appropriate amount of time. using a funnel. Pour slowly and be careful not to overfill and spill resin. STEP 19: FINAL PART Using this process, you can see that we were able to recreate the perfume bottle cap in several different colors and opacities. STEP 18: OPEN & REMOVE MAKERBOT EDUCATORS GUIDEBOOK POST-PROCESSING: SILICONE MOLDING 01 Once your resin has cured, open the mold and remove your cast part. Any resin that escaped through seams or voids and cured is called flash. Flash will need to be removed from the part.


188 MAKERBOT EDUCATORS GUIDEBOOK POST-PROCESSING: SILICONE MOLDING 02 POST- PROCESSING Silicone molding is a powerful production method when combined with 3D printing. In this How To, we will show you some of the best practices associated with 3D printing molds to pour into. To demonstrate this process, we will create a bicycle handlebar grip out of flexible silicone using a 3D printed mold. VIDEO TUTORIAL: SILICONE MOLDING WITH 3D PRINTED MOLDS makerbot.com/professionals/post-processing/silicone-molding-2 MATERIALS 3D printed mold Mold release spray Measuring/mixing cups Mixing sticks Hobby knife Silicone Gloves, eye protection and respiratory mask PAGE 188 Be sure to consult the safety precautions listed by the manufacturer on any materials and equipment used in this tutorial before starting.


189 STEP 01: PRINT MOLD BIKE HANDLE BAR GRIP MOLD: thingiverse.com/thing: PAGE 189 A. Prepare and print your parts using standard print settings. STEP 02: PREPARE YOUR MOLD A. Spray all mold surfaces with mold release and fasten mold pieces together with rubber bands. MAKERBOT EDUCATORS GUIDEBOOK POST-PROCESSING: SILICONE MOLDING 02


190 MAKERBOT EDUCATORS GUIDEBOOK POST-PROCESSING: SILICONE MOLDING 02 STEP 03: OPEN, MEASURE, MIX SILICONE AND ADD DYE Once you ve thoroughly mixed your silicone, you can pour it into your printed mold. Because we used a slow curing silicone, we let this mold sit overnight to cure. A. Measure part A B. Measure part B C. Add dye to either part A or B (refer to D. Stir in dye silicone/dye instructions). PAGE 190


191 MAKERBOT EDUCATORS GUIDEBOOK POST-PROCESSING: SILICONE MOLDING 02 PAGE 191 E. Pour mixture into mold. F. Insert third piece after pouring. STEP 04: FINAL PART Using this process, we created a flexible bicycle handlebar grip in a rubber-like material.
WHO USES 3D PRINTING?
 MAKERBOT EDUCATORS GUIDEBOOK CHAPTER ONE: WHO USES 3D PRINTING? WHO USES 3D PRINTING? 3D printing is used to solve problems in a variety of industries including engineering, product design, technology,
3D Printing Guide: MakerBot Replicator 2X
 SOUTHERN POLYTECHNIC STATE UNIVERSITY 3D Printing Guide: MakerBot Replicator 2X Operating and Troubleshooting Guide Architecture Department 8/13/2014 Revision Table Version Dated Description By 1.00 06/25/2014
SOLIDWORKS Apps for Kids New Designs
 SOLIDWORKS Apps for Kids are designed to inspire students to create, invent, and shape their futures. Educators can use the following exercise to engage their students, and help them imagine and explore
MAKERBOT METHOD PAGE 1
 WWW.MAKERBOT.COM/METHOD MAKERBOT METHOD PAGE 1 MAKERBOT METHOD PAGE 2 The First Performance 3D Printer Bridging the gap between industrial and desktop 3D printing. MAKERBOT.COM/METHOD PAGE 3 MAKERBOT METHOD
So... You Want To Use The 3D Printers
 So... You Want To Use The 3D Printers 3D Printing Overview When a student would like to use the 3D Printers: 1. They should contact a supervisor and prepare the build plate. 2. Supervisors will level the
Feather Weather Lamp. Created by Ruiz Brothers. Last updated on :54:26 PM UTC
 Feather Weather Lamp Created by Ruiz Brothers Last updated on 2018-08-22 03:54:26 PM UTC Guide Contents Guide Contents Overview Weather Reactive Pixels Prerequisite Guides Parts Tools & Supplies Circuit
The product may differ slightly from the images and instructions in this guide as we continue to improve the MakerBot Replicator Mini.
 REFERENCE GUIDE The product may differ slightly from the images and instructions in this guide as we continue to improve the MakerBot Replicator Mini. Please see www.makerbot.com/um_rep_mini for the latest
Webcam Cover-Up Lego brick with Adabot Mini Fig
 Webcam Cover-Up Lego brick with Adabot Mini Fig Created by Ruiz Brothers Last updated on 2018-08-22 04:06:44 PM UTC Guide Contents Guide Contents Overview 3D Printing What If I Don't Have A 3D Printer?
3DPrinted Custom Keycaps
 3DPrinted Custom Keycaps Created by Ruiz Brothers Last updated on 2016-09-05 07:20:30 PM UTC Guide Contents Guide Contents Overview Custom Keycaps Easy to install Accessibility Project Expectations Parts
Trellis 3D Printed Enclosure
 Trellis 3D Printed Enclosure Created by Ruiz Brothers Last updated on 2018-08-22 03:39:07 PM UTC Guide Contents Guide Contents Overview Parts Tools & Supplies Modeling 123D Design Customize Measuring Parts
Circuit Playground Combadge
 Circuit Playground Combadge Created by Ruiz Brothers Last updated on 2017-10-22 10:42:02 PM UTC Guide Contents Guide Contents Overview What's a Combadge? DIY Combadge How Does It Work? Make It How You
Ember 3D Printer. Created by Ruiz Brothers. Last updated on :00:07 PM EDT
 Ember 3D Printer Created by Ruiz Brothers Last updated on 2015-03-11 03:00:07 PM EDT Guide Contents Guide Contents Overview How DLP SLA Works Print setup Orientation Tip diameter Resolution Fixing the
Using BodyPaint 3D with LightWave
 Addendum 23 Plugins ADDENDUM 1 Exchange Plugins Using BodyPaint 3D with LightWave If you are a LightWave user, the quickest way to get your models from LightWave to BodyPaint 3D then back again once you
3D Printed Google AIY Voice Kit
 3D Printed Google AIY Voice Kit Created by Ruiz Brothers Last updated on 2018-01-09 12:47:26 AM UTC Guide Contents Guide Contents Overview 3D Print a DIY AI enclosure for the Raspberry PI! Parts, Tools
Home Security Begins at the Front Door
 Video Doorbell Pro Home Security Begins at the Front Door Your new Ring Video Doorbell Pro is the start of a Ring of Security around your entire property. Now, you re always connected, so you can watch
3D Printed Case for Adafruit Feather
 3D Printed Case for Adafruit Feather Created by Ruiz Brothers Last updated on 2018-08-22 03:59:38 PM UTC Guide Contents Guide Contents Overview Adafruit Feather Box New Update! Check out the TFT Feather
3D Printed 20w Amplifier Box
 3D Printed 20w Amplifier Box Created by Ruiz Brothers Last updated on 2018-02-26 06:48:02 PM UTC Guide Contents Guide Contents Overview Prerequisite Guide Tools & Supplies Parts 3D Printing Print in your
BLE Light Switch with Feather nrf52840 and Crickit
 BLE Light Switch with Feather nrf52840 and Crickit Created by John Park Last updated on 2019-02-15 07:06:19 PM UTC Guide Contents Guide Contents Overview Parts Adafruit Feather nrf52840 Express Adafruit
POST-PROCESSING YOUR 3D PRINTS
 MAKERBOT EDUCATORS GUIDEBOOK GOING FURTHER: POST-PROCESSING GOING FURTHER POST-PROCESSING YOUR 3D PRINTS PAGE 160 SANDING YOUR 3D PRINTS 3D printing can bring your ideas to life, but sometimes your ideas
7 Portable Multitouch Raspberry Pi Tablet
 7 Portable Multitouch Raspberry Pi Tablet Created by Ruiz Brothers Last updated on 2017-02-27 04:13:53 PM UTC Guide Contents Guide Contents Overview Portable Raspberry Pi Tablet 7" Multitouch Display Parts
Desktop Fume Extractor
 Desktop Fume Extractor Created by Ruiz Brothers Last updated on 2018-06-18 02:20:04 PM UTC Guide Contents Guide Contents Overview Fumey The Fume Extrator Air Clean Friendly 3D Printing What If I Don't
Home Security Begins at the Front Door
 Video Doorbell Pro Home Security Begins at the Front Door Your new Ring Video Doorbell Pro is the start of a Ring of Security around your entire property. Now, you re always connected, so you can watch
1 WELCOME 06 Safety and Compliance 07 Specifications 09 How it Works 10
 USER MANUAL TABLE OF CONTENTS 1 WELCOME 06 Safety and Compliance 07 Specifications 09 How it Works 10 2 SETUP 12 Unpacking Your MakerBot Replicator 2X 13 MakerBot Replicator 2X Diagrams 14 Accessory Checklist
Wallet Technology. Information Presentation
 Wallet Technology Information Presentation 1 Basics A crypto currency wallet is a software program that stores private and public keys and interacts with various block chains (in our case Ethereum) to
How to Create Your Cryptocurrency Wallet and Add PumaPay Tokens
 How to Create Your Cryptocurrency Wallet and Add PumaPay Tokens 1 FOREWORD Thank you for joining PumaPay. We are happy to welcome you to the PumaPay Community. Faithfully, The PumaPay Team 2 TABLE OF CONTENTS
Video Doorbell Pro 1
 Video Doorbell Pro 1 Home Security Begins at the Front Door Your new Ring Video Doorbell Pro is the start of a Ring of Security around your entire property. Now, you re always connected, so you can watch
LED Eyes. Created by Ruiz Brothers. Last updated on :50:55 AM UTC
 LED Eyes Created by Ruiz Brothers Last updated on 2018-01-13 05:50:55 AM UTC Guide Contents Guide Contents Overview Parts, Tools and Supplies Enameled Copper Magnet Wire 11 meters / 0.1mm diameter Adafruit
NeoPixel Bike Light. Created by Ruiz Brothers. Last updated on :43:46 PM UTC
 NeoPixel Bike Light Created by Ruiz Brothers Last updated on 2018-11-15 07:43:46 PM UTC Guide Contents Guide Contents Overview 3D Printed Headlight Adafruit's Feather Platform Circuit Python Powered Parts
3D Printed 20w Amplifier Box
 3D Printed 20w Amplifier Box Created by Noe & Pedro Ruiz Last updated on 2014-04-22 03:01:38 PM EDT Guide Contents Guide Contents Overview Prerequisite Guide Tools & Supplies Parts 3D Printing Print in
1. Charging. 2. In-app Setup. 3. Physical Installation. 4. Features. 5. Troubleshooting. Home Security Begins at the Front Door.
 Video Doorbell 2 1 Home Security Begins at the Front Door Your new Ring Video Doorbell is the start of a Ring of Security around your entire property. Now, you ll always be connected to your home, so you
Slider Crank Mechanism -- from Cardboard and Craft Sticks
 Slider Crank Mechanism -- from Cardboard and Craft Sticks Created by John Park Last updated on 2018-08-22 04:07:21 PM UTC Guide Contents Guide Contents Overview Materials Tools Build the Slider Crank Build
Portable Apple Watch Charger
 Portable Apple Watch Charger Created by Ruiz Brothers Last updated on 2017-10-22 09:58:04 PM UTC Guide Contents Guide Contents Overview Smart Charging Prerequisite Guides Parts, Tool & Supplies Circuit
Alarm.com Wi-Fi Doorbell Camera and Slim Line - Installation Guide
 Alarm.com Wi-Fi Doorbell Camera and Slim Line - Installation Guide Introduction Each Alarm.com Doorbell Camera features a doorbell with an integrated camera, PIR motion sensor, digital microphone and speaker,
Bunny Ears with MakeCode
 Bunny Ears with MakeCode Created by Erin St Blaine Last updated on 2018-08-22 04:05:47 PM UTC Guide Contents Guide Contents Introduction Tools & Other Materials Programming with MakeCode Set Up the Light
Boomy The Boombox. Created by Ruiz Brothers. Last updated on :52:13 PM UTC
 Boomy The Boombox Created by Ruiz Brothers Last updated on 2017-09-05 08:52:13 PM UTC Guide Contents Guide Contents Overview Boomy The Boombox AdaBox 004 Parts 3D Printing 3D Printed Parts Enclosure Design
Circuit Playground Yoyo
 Circuit Playground Yoyo Created by Ruiz Brothers Last updated on 2018-01-13 05:56:02 AM UTC Guide Contents Guide Contents Overview 3D Printed NeoPixel Yoyo History of the Yo-Yo Expectations Parts Tools
Zelda Thunder Helm. Created by Ruiz Brothers. Last updated on :46:52 PM UTC
 Zelda Thunder Helm Created by Ruiz Brothers Last updated on 2017-08-23 02:46:52 PM UTC Guide Contents Guide Contents Overview Zelda: Breath Of The Wild Parts, Tools and Supplies Proto-Pasta - Aromatic
Stilwell Construction
 CASE STUDY Stilwell Construction Challenge Stilwell Construction needed to move away from a paper-based document management system. Manually filed paperwork led to lost receipts and difficulty finding
3D Printed Camera Tripod Adapter for Telescope
 3D Printed Camera Tripod Adapter for Telescope Created by Ruiz Brothers Last updated on 2017-11-16 03:29:25 AM UTC Guide Contents Guide Contents Overview Designed for Mobile Phones 3D Printing Support
3D Printed LED Buckle
 3D Printed LED Buckle Created by Ruiz Brothers Last updated on 2018-08-22 03:38:02 PM UTC Guide Contents Guide Contents Overview Customize the Buckle Artwork, Design and Text Scale, Adjust and Combine
Ping Pong Ball Launcher
 Ping Pong Ball Launcher Created by Dano Wall Last updated on 2019-01-25 03:19:13 AM UTC Guide Contents Guide Contents Overview Electronic Parts Circuit Playground Express USB cable - USB A to Micro-B Alkaline
TrichoScan Smart Version 1.0
 USER MANUAL TrichoScan Smart Version 1.0 TRICHOLOG GmbH D-79117 Freiburg, Germany DatInf GmbH D-72074 Tübingen, Germany Manual TrichoScan Smart 09/2008 Index Introduction 3 Background 3 TrichoScan Smart
Guardian Shield+ Zelda Breath of the Wild
 Guardian Shield+ Zelda Breath of the Wild Created by Ruiz Brothers Last updated on 2018-08-22 04:01:50 PM UTC Guide Contents Guide Contents Overview Articulating Handle Rechargeable Prerequisite Guides
FPV Mini Display. Created by Ruiz Brothers. Last updated on :00:18 PM UTC
 FPV Mini Display Created by Ruiz Brothers Last updated on 2017-07-19 01:00:18 PM UTC Guide Contents Guide Contents Overview Mini FPV monitor Adafruit Parts Tools and Supplies Circuit Diagram Electronics
Pushrod Garage. Created by John Park. Last updated on :07:30 PM UTC
 Pushrod Garage Created by John Park Last updated on 2018-08-22 04:07:30 PM UTC Guide Contents Guide Contents Overview Parts & Materials Tools Pushrod Mechanism Code it with MakeCode Functions On Start
Con Badge with Circuit Playground Express
 Con Badge with Circuit Playground Express Created by Sophy Wong Last updated on 2018-04-11 05:00:16 PM UTC Guide Contents Guide Contents Overview Tools & Materials Laser Cutting Program the Circuit Playground
Alarm.com Wi-Fi Doorbell Camera and Slim Line
 Alarm.com Wi-Fi Doorbell Camera and Slim Line INSTALLATION GUIDE INTRODUCTION Your customers will always know who is at the front door with an Alarm.com Doorbell Camera. Now with two options tochoose from
Add to Apple Wallet. Guidelines March 2017
 Add to Apple Wallet Guidelines March 2017 Contents Add to Apple Wallet Overview 3 Graphic Standards 4 Examples 5 Do s and Don ts 6 Printing the Add to Apple Wallet Button Requirements 7 Codes 8 Button
Crickit Dancing Marionette Kit Created by Dano Wall. Last updated on :03:11 PM UTC
 Crickit Dancing Marionette Kit Created by Dano Wall Last updated on 2019-04-04 07:03:11 PM UTC Overview This project demonstrates how to build a robotic marionette that is controlled with four arcade-style
Circuit Cookie Roller
 Circuit Cookie Roller Created by Ruiz Brothers Last updated on 2018-01-23 08:50:41 PM UTC Guide Contents Guide Contents Overview Filament for 3D Printers in Various Colors and Types Ultimaker 2+ 3D Printer
OBIS Scientific Remote
 OBIS Scientific Remote OBIS Scientific Remote P. P. 2 2 OBIS Scientific Remote The OBIS laser with shutter, OBIS Remote key switch, interlock and 5- second delay allows the OBIS laser system to conform
Solar Boost Bag. Created by Becky Stern. Last updated on :44:55 PM UTC
 Solar Boost Bag Created by Becky Stern Last updated on 2018-08-22 03:44:55 PM UTC Guide Contents Guide Contents Overview 3D Design Files Customize Design Assemble Circuit Prepare Solar Panel Enclosure
Color Swatch Add-on User Guide
 Color Swatch Add-on User Guide A guide to using Color Swatch add-on interface Last Updated: February 7, 2018 Version 1.0 2017-2018 Cybage. All rights reserved. The information contained in this document
Clare Video Doorbell Version 2 User Manual
 Clare Video Doorbell Version 2 User Manual Index Doorbell buttons and features...3 What s included in the box...4 Clare Video Doorbell power requirements...5 Wi-Fi signal strength requirements...6 Getting
TROUBLESHOOTING AND MAINTENANCE
 TROUBLESHOOTING AND MAINTENANCE TABLE OF CONTENTS 1 TROUBLESHOOTING 04 Objects Do Not Stick to the Build Plate 05 Objects are Difficult to Remove from the Build Plate 05 Extrusion Stops 06 Replicator
Higher National Unit Specification. General information for centres. Fashion: Commercial Design. Unit code: F18W 34
 Higher National Unit Specification General information for centres Unit title: Fashion: Commercial Design Unit code: F18W 34 Unit purpose: This Unit enables candidates to demonstrate a logical and creative
Solder Dispenser Adabot Head
 Solder Dispenser Adabot Head Created by Ruiz Brothers Last updated on 2017-01-04 02:15:15 PM UTC Guide Contents Guide Contents Overview Solder Dispenser Parts Solder Spool - 1/4 lb SAC305 RoHS lead-free
7" Portable HDMI Monitor
 7" Portable HDMI Monitor Created by Ruiz Brothers Last updated on 2017-05-29 05:47:14 PM UTC Guide Contents Guide Contents Overview DIY Monitor Connect to a Raspberry pi Use as a second monitor Camera
Circuit Playground Express Head-Tilt Ears
 Circuit Playground Express Head-Tilt Ears Created by Dave Astels Last updated on 2018-10-09 04:07:03 PM UTC Guide Contents Guide Contents Overview Parts Circuit Playground Express Micro servo Lithium Ion
Using Graphics in the Math Classroom GRADE DRAFT 1
 Using Graphics in the Math Classroom GRADE 7 thebillatwood@gmail 2013 DRAFT 1 Problem Solving Problem solving often invokes an image of a chess player thinking for hours trying to find the right move,
Investigator Guide to Studying Hair
 Investigator Guide to Studying Hair Hair is a great subject for anyone to study; there is so much of it around. You can find it on people s heads; coming off from your pets when you stroke them; in your
3D Printing with NinjaFlex
 3D Printing with NinjaFlex Created by Ruiz Brothers Last updated on 2017-03-01 05:30:13 PM UTC Guide Contents Guide Contents Overview What is Ninjaflex Filament? Why Would I Want Flexible Filament? How
Using ONYX Separation Control Tool. Contents: What is Separation Control? Using ONYX Separation Control Tool. Separation Control Tips and Tricks
 Using ONYX Separation Control Tool Contents: What is Separation Control? Comparison to Basic/Advanced profiling workflow Advantages Using ONYX Separation Control Tool Enabling Separation Control Configuring
3D Printed Google Glass Adapter
 3D Printed Google Glass Adapter Created by Ruiz Brothers Last updated on 2015-02-20 09:31:34 AM EST Guide Contents Guide Contents Overview Tools Disassembly Measure & Customize 3D Printing 2 3 3 5 9 16
DIY Custom American Girl Doll Prosthetics
 DIY Custom American Girl Doll Prosthetics Created by Ruiz Brothers Last updated on 2017-11-15 08:53:16 PM UTC Guide Contents Guide Contents Overview Parts Tools and Supplies 3D Printing 3D Printed Parts
Crawling Animatronic Hand
 Crawling Animatronic Hand Created by Dano Wall Last updated on 2018-12-03 06:39:35 PM UTC Guide Contents Guide Contents Overview Parts Used Tools & Materials Prepare the Hand Your hand is now ready to
Paper Airplane Launcher
 Paper Airplane Launcher Created by Dano Wall Last updated on 2018-08-27 08:36:14 PM UTC Guide Contents Guide Contents Overview A Launching Platform The Electronics Materials Build the Launcher Attach Motors
Crickit Powered Holiday Diorama
 Crickit Powered Holiday Diorama Created by Isaac Wellish Last updated on 2018-12-04 12:49:07 AM UTC Guide Contents Guide Contents Overview Prerequisite Guides Adafruit Parts Tools and Materials Wiring
STYLOPEDIA. Team 4 Kiran Viswanathan Vanitha Venkatanarayanan Prasad Kodre Prathamesh Bhurke 5/13/2014
 2014 STYLOPEDIA Team 4 Kiran Viswanathan Vanitha Venkatanarayanan Prasad Kodre Prathamesh Bhurke 5/13/2014 Table of Contents Introduction... 2 Revenue Model... 2 Competitor Analysis... 3 Key Scenarios...
Android GBoard Morse Code Control with Circuit Playground Express
 Android GBoard Morse Code Control with Circuit Playground Express Created by Dave Astels Last updated on 2018-08-22 04:10:30 PM UTC Guide Contents Guide Contents Overview Parts Materials for the box Installing
i2c/spi LCD Backpack Created by lady ada Last updated on :11:04 PM UTC
 i2c/spi LCD Backpack Created by lady ada Last updated on 2017-08-16 05:11:04 PM UTC Guide Contents Guide Contents Overview Which LCD to Use? Wait - the backpack has 16 holes, but my LCD only has 14 pins!
TRON Bag. Created by Becky Stern
 TRON Bag Created by Becky Stern Last updated on 2018-08-22 03:30:39 PM UTC Guide Contents Guide Contents Overview Tools Design Soldering Sewing Detailing Splitting Finishing Buy EL! Forums 2 3 5 7 12 15
Overview. Label Gallery SDK User Guide
 Overview Label Gallery SDK User Guide 1 Overview COPYRIGHTS Rev: Rev-20100716 Copyright 2009 SATO CORPORATION. All rights reserved. www.satoworldwide.com The software described in this document is furnished
OBIS LX/LS Single Laser Remote
 OBIS LX/LS Single Laser Remote Full Feature Laser Remote and Power Supply OBIS LX and OBIS LS laser products come with a variety of accessories to support your application needs. The OBIS Single Laser
FLORA TV-B-Gone. Created by Becky Stern. Last updated on :32:57 PM UTC
 FLORA TV-B-Gone Created by Becky Stern Last updated on 2018-08-22 03:32:57 PM UTC Guide Contents Guide Contents Overview Parts Tutorials Transistors Resistors LEDs Pushbutton Program it Power Fabric pinwheel
The Scream: Interactive Screaming Painting
 The Scream: Interactive Screaming Painting Created by John Park Last updated on 2018-08-22 04:10:47 PM UTC Guide Contents Guide Contents Overview Parts & Materials Optional Build the Interactive Painting
Datalogging Hat with FLORA BLE
 Datalogging Hat with FLORA BLE Created by Becky Stern Last updated on 2018-08-22 03:50:19 PM UTC Guide Contents Guide Contents Overview Circuit and Arduino code Bluefruit LE Connect settings Adafruit IO
Simple LED Unicorn Horn
 Simple LED Unicorn Horn Created by Ruiz Brothers Last updated on 2018-08-22 03:56:14 PM UTC Guide Contents Guide Contents Overview 3D Printed Unicorn Horn Want More Magic/Colors? Great For Beginners Parts
EPUB / GARMENT PROCESS PRODUCTS MANUAL EBOOK
 24 December, 2017 EPUB / GARMENT PROCESS PRODUCTS MANUAL EBOOK Document Filetype: PDF 226.89 KB 0 EPUB / GARMENT PROCESS PRODUCTS MANUAL EBOOK Apparel manufacturing process involves Product Design, Fabric
Foot and Calf Massager Model Number: FCM1000
 Foot and Calf Massager Model Number: FCM1000 INSTRUCTION MANUAL Welcome Congratulations on choosing to buy a Visage product. All products brought to you by Visage are manufactured to the highest standards
Sampling Process in garment industry
 Sampling Process in garment industry Sampling is one of the main processes in garment manufacturing and it plays vital role in attracting buyers and confirming the order, as the buyers generally places
3D Printed LED Knuckle Jewelry
 3D Printed LED Knuckle Jewelry Created by Ruiz Brothers Last updated on 2015-02-20 09:31:06 AM EST Guide Contents Guide Contents Overview Prerequisite Guides Parts Tools & Supplies 3D Printing Filament
OBIS LX/LS Single Laser Remote
 OBIS LX/LS Single Laser Remote OBIS LX and OBIS LS laser products come with a variety of accessories to support your application needs. The OBIS Single Laser Remote for OBIS LS and OBIS LX offers all the
CPX Mystery Dreidel. Created by Kathy Ceceri. Last updated on :51:40 PM UTC
 CPX Mystery Dreidel Created by Kathy Ceceri Last updated on 2018-12-04 02:51:40 PM UTC Guide Contents Guide Contents Overview Parts List -- Electronics Circuit Playground Express USB cable - USB A to Micro-B
Fiddy - the FTDI Clip
 Fiddy - the FTDI Clip Created by Timothy Reese Last updated on 2016-11-22 09:18:04 PM UTC Guide Contents Guide Contents Overview FTDI is Great! Things you'll need: What You'll Learn: 3D Printing Assembly
WGSN 2016 CHEATSHEET
 CHEATSHEET WELCOME TO YOUR WGSN FASHION HOMEPAGE Access your favorite reports quickly and easily from your homepage CUSTOMISE YOUR HOMEPAGE Tailor your WGSN Fashion experience by arranging your homepage
ISS Pin. Created by Leslie Birch. Last updated on :27:30 PM UTC
 ISS Pin Created by Leslie Birch Last updated on 2017-04-18 09:27:30 PM UTC Guide Contents Guide Contents Overview Tools & Supplies Solder Circuit Create Cover Code Set Up IFTTT Want a Test? Wear It! 2
Non-SAC Member Facility Higg Index Guide: Overview
 Non-SAC Member Facility Higg Index Guide: Overview The Higg Index is an online self-assessment tool developed by the Sustainable Apparel Coalition, that standardizes the measurement of environmental and
Mystical LED Halloween Hood
 Mystical LED Halloween Hood Created by Becky Stern Last updated on 2017-09-28 11:13:20 PM UTC Guide Contents Guide Contents Overview NeoPixel GEMMA circuit Arduino Code NeoPixel Überguide: Arduino Library
Boise Art Museum 2018 Art in the Park Prospectus WELCOME
 Boise Art Museum 2018 Art in the Park Prospectus WELCOME Thank you for your interest in applying to exhibit as an artist at Boise Art Museum's 64th Annual Art in the Park to be held September 7-9, 2018.
37,097. We Analyzed Design Requests. Here Are The Hottest Business Graphic Design Trends for 2018
 Here Are The Hottest Business Graphic Design Trends for 2018 37,097 We Analyzed Design Requests. As of April 2018, Design Pickle had created 37,097 unique design requests for our clients in 2018 so far.
Neon LED Signs. Created by John Park. Last updated on :11:09 PM UTC
 Neon LED Signs Created by John Park Last updated on 2018-08-22 04:11:09 PM UTC Guide Contents Guide Contents Overview Parts Materials Tools Build the Sign Driver Preparation Solder the Circuit Solder the
Stumble-Bot. Created by Dano Wall. Last updated on :04:06 AM UTC
 Stumble-Bot Created by Dano Wall Last updated on 2018-09-06 05:04:06 AM UTC Guide Contents Guide Contents Overview Simply Stumbling We Have the Technology Other Supplies Leg Assembly Front Legs Back Legs
Bluetooth Controlled NeoPixel Headphones
 Bluetooth Controlled NeoPixel Headphones Created by Ruiz Brothers Last updated on 2017-03-09 07:38:05 PM UTC Guide Contents Guide Contents Overview Smart LED HeadPhones Prerequisite Guides Parts Tools
'Sup Brows. Created by Kate Hartman. Last updated on :52:04 PM UTC
 'Sup Brows Created by Kate Hartman Last updated on 2018-08-22 03:52:04 PM UTC Guide Contents Guide Contents Overview Circuit Bluetooth Test Upload the Code Place the Sensor View Sensor Values Via Bluetooth
Illustrator Tutorial: Holland Tulip Field
 Illustrator Tutorial: Holland Tulip Field This tutorial will show you how to create a beautiful Holland landscape filled full of colorful tulips and a traditional Dutch windmill. We will start by creating
The Higg Index 1.0 Index Overview Training
 The Higg Index 1.0 Index Overview Training Presented by Ryan Young Index Manager, Sustainable Apparel Coalition August 20 th & 21 st, 2012 Webinar Logistics The webinar is being recorded for those who
H Fashion Storyboard
 OVERVIEW 4-H Fashion Storyboard General Rules and Guidelines The 4-H Fashion Storyboard is an industry-inspired method of displaying original designs. The best storyboards create vivid visual images that
Steven Universe Cosplay Shirt & Gem Created by Erin St Blaine. Last updated on :54:25 PM UTC
 Steven Universe Cosplay Shirt & Gem Created by Erin St Blaine Last updated on 2019-04-04 06:54:25 PM UTC Overview Make yourself a Steven Universe costume that will light up the world. This guide will show
Hammer Time Mini Golf Hazard with Crickit
 Hammer Time Mini Golf Hazard with Crickit Created by John Park Last updated on 2018-07-09 06:47:53 AM UTC Guide Contents Guide Contents Overview Please Hammer, Don't Hurt Em Parts Materials & Tools Program