LED Ampli-Tie. Created by Becky Stern. Last updated on :02:03 PM EDT
|
|
|
- Shon Weaver
- 5 years ago
- Views:
Transcription
1 LED Ampli-Tie Created by Becky Stern Last updated on :02:03 PM EDT
2 Guide Contents Guide Contents Overview Tools & Supplies Circuit Diagram Battery Pouch & Flora Sewing Pixels Add Microphone The Code Wear it! Adafruit Industries Page 2 of 33

3 Overview Make your necktie light up like a VU meter! This Flora project uses the Electret Microphone Adafruit Industries Page 3 of 33
4 Amplifier to trigger 16 Flora NeoPixels sewn with conductive thread along the length of the tie. Before you begin this project, we recommend reading the following guides: Getting Started with FLORA ( Adafruit Microphone Amplifier Breakout ( Conductive Thread ( Photo by johngineer. Adafruit Industries Page 4 of 33
 Lipoly battery (http://adafru.it/258) Scrap fabric for battery pouch 3-ply conductive thread (http://adafru.")
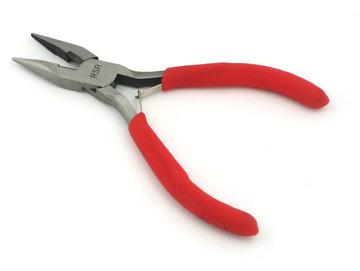
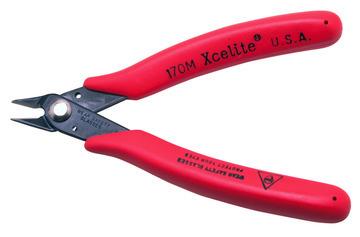
5 Tools & Supplies Bill of materials: 16 Flora NeoPixels ( Flora main board ( Microphone amplifier breakout ( Lipoly battery ( Scrap fabric for battery pouch 3-ply conductive thread ( Standard cotton/poly thread Ribbon cable or conductive thread ribbon ( Break-away or otherwise clip-on tie ( You'll use a needle ( and to stitch up the circuit. Adafruit Industries Page 5 of 33

, pliers (http://adafru.it/146), and flush snips (http://adafru.")
6 Sharp scissors are a must! You'll also need a long ruler, some tailor's chalk, and a seam ripper. Don't forget your wire strippers ( pliers ( and flush snips ( Adafruit Industries Page 6 of 33

7 Adafruit Industries Page 7 of 33
 Click here to buy a pocket multimeter. (http://adafru.it/850) Don't forget to learn how to use your multimeter too! (http://adafru.it/aoy) Any entry level 'all-in-one' soldering iron that you might find at your local hardware store should work.")
8 You will need a good quality basic multimeter that can measure voltage and continuity. Click here to buy a basic multimeter. ( Click here to buy a top of the line multimeter. ( Click here to buy a pocket multimeter. ( Don't forget to learn how to use your multimeter too! ( Any entry level 'all-in-one' soldering iron that you might find at your local hardware store should work. As with most things in life, you get what you pay for. Upgrading to a higher end soldering iron setup, like the Hakko FX-888 that we stock in our store ( will make soldering fun and easy. Do not use a "ColdHeat" soldering iron! They are not suitable for delicate electronics work and can damage the Flora (see here ( Click here to buy our entry level adjustable 30W 110V soldering iron. ( Click here to upgrade to a Genuine Hakko FX-888 adjustable temperature soldering iron. ( Learn how to solder with tons of tutorials! ( Adafruit Industries Page 8 of 33


. (http://adafru.")
9 You will want rosin core, 60/40 solder. Good solder is a good thing. Bad solder leads to bridging and cold solder joints which can be tough to find. Click here to buy a spool of leaded solder (recommended for beginners). ( Click here to buy a spool of lead-free solder. ( Adafruit Industries Page 9 of 33
10 Circuit Diagram Adafruit Industries Page 10 of 33
11 Adafruit Industries Page 11 of 33
12 The Flora pixels are all connected to common ground bus, as well as a common power bus connected to VBATT. The Flora pixel data bus is connected to D6. The microphone amplifier is connected to 3.3V, GND, and D9. Adafruit Industries Page 12 of 33

13 Battery Pouch & Flora Use a piece of scrap fabric to stitch a small pouch for your lipoly battery. The pouch should be stitched to the back of the tie, just above where the Flora goes, and have an opening at the top for easy removal of the battery for charging. Use a seam ripper to open up the back seam of the tie just a little so you can thread the JST plug and wire inside the tie and down to the Flora. Adafruit Industries Page 13 of 33

14 The plug joins the Flora just inside the folds of the tie so it won't get caught on anything. Adafruit Industries Page 14 of 33

15 Tack your Flora in place with plain thread by stitching some unused pads to the tie. Try to just stitch to the back surface of the tie so the front fabric remains smooth. Adafruit Industries Page 15 of 33


 pad on your first pixel and Adafruit Industries")
16 Sewing Pixels Use a ruler to draw a line down the center of your tie with tailor's chalk, and evenly distribute your 16 Flora pixels along this line. Mark the position of each pixel with chalk. Stitch a long length of conductive thread to GND next to D6, only piercing the back surface of the tie. Stitch over to the (-) pad on your first pixel and Adafruit Industries Page 16 of 33
")


17 secure (but don't cut the thread). Add a few more pixels by connecting this long ground line to the (-) pads on the pixels. Stitch the data bus from D6 to the input pad on the first pixel (marked with an inward-facing arrow). Tie off, seal the knot, and snip the thread. Stitch small segments of conductive thread between each pixel, connecting the output of one Adafruit Industries Page 17 of 33


 pads on the")
18 pixel to the input on the next. Check out our Conductive Thread guide ( for more tips on working with conductive thread! Use another long length of conductive thread to connect Flora's VBATT pad to the (+) pads on the pixels. Adafruit Industries Page 18 of 33
, and fire up the NeoPixel library test code to ensure your fledgeling circuit is all")

19 Once you've stitched a few pixels, test for shorts with your multimeter (make sure your long power and ground threads aren't touching), and fire up the NeoPixel library test code to ensure your fledgeling circuit is all good so far. Stitch up the rest of the pixels - you'll have one long ground bus, one long power bus, and short segments between each input/output data pads. Adafruit Industries Page 19 of 33

20 Adafruit Industries Page 20 of 33

21 Add Microphone To match the tie, paint your microphone amplifier with a little black nail polish. Adafruit Industries Page 21 of 33

22 Cut a piece of ribbon cable longer than the main part of the tie. Peel off three wires to use with the microphone amplifier, which will live at the knot of the tie. Insert the ribbon cable up through the inside of the tie. Cut a small hole with a seam ripper inside the knot of the tie and bring the ribbon cable through it. Adafruit Industries Page 22 of 33


23 Strip the ends of the wires and solder them up to the three holes on the microphone amplifier. Use plain thread to anchor the mic to the tie knot using the large mounting holes. Adafruit Industries Page 23 of 33


24 Back at the Flora end of the board, solder the corresponding wires to 3.3V, GND, and D9. Adafruit Industries Page 24 of 33
, and rename the resulting folder \"Adafruit_NeoPixel\" and move to your Arduino libraries folder.")
25 The Code You'll need the NeoPixel library for this project. Download by clicking the ZIP button on the NeoPixel Github repository page ( and rename the resulting folder "Adafruit_NeoPixel" and move to your Arduino libraries folder. For more information on programming your Flora board including the software you need to do so, head over to the Getting Started with Flora ( guide. We got so excited about this project we made TWO Arduino sketches to meter the volume in the room (by Phil Burgess, James DeVito, and Andy Doro). You can download them both at the LED Ampli-Tie Github repo ( or copy from below. The first dynamically adjusts to whatever volume is happening: /* LED VU meter for Arduino and Adafruit NeoPixel LEDs. Hardware requirements: - Most Arduino or Arduino-compatible boards (ATmega 328P or better). - Adafruit Electret Microphone Amplifier (ID: 1063) - Adafruit Flora RGB Smart Pixels (ID: 1260) OR - Adafruit NeoPixel Digital LED strip (ID: 1138) - Optional: battery for portable use (else power through USB or adapter) Adafruit Industries Page 25 of 33
26 - Optional: battery for portable use (else power through USB or adapter) Software requirements: - Adafruit NeoPixel library Connections: - 3.3V to mic amp + - GND to mic amp - - Analog pin to microphone output (configurable below) - Digital pin to LED data input (configurable below) See notes in setup() regarding 5V vs. 3.3V boards - there may be an extra connection to make and one line of code to enable or disable. Written by Adafruit Industries. Distributed under the BSD license. This paragraph must be included in any redistribution. */ #include <Adafruit_NeoPixel.h> #define N_PIXELS 16 // Number of pixels in strand #define MIC_PIN A9 // Microphone is attached to this analog pin #define LED_PIN 6 // NeoPixel LED strand is connected to this pin #define DC_OFFSET 0 // DC offset in mic signal - if unusure, leave 0 #define NOISE 10 // Noise/hum/interference in mic signal #define SAMPLES 60 // Length of buffer for dynamic level adjustment #define TOP (N_PIXELS + 2) // Allow dot to go slightly off scale #define PEAK_FALL 40 // Rate of peak falling dot byte peak = 0, // Used for falling dot dotcount = 0, // Frame counter for delaying dot-falling speed volcount = 0; // Frame counter for storing past volume data int vol[samples], // Collection of prior volume samples lvl = 10, // Current "dampened" audio level minlvlavg = 0, // For dynamic adjustment of graph low & high maxlvlavg = 512; Adafruit_NeoPixel strip = Adafruit_NeoPixel(N_PIXELS, LED_PIN, NEO_GRB + NEO_KHZ800); void setup() { // This is only needed on 5V Arduinos (Uno, Leonardo, etc.). // Connect 3.3V to mic AND TO AREF ON ARDUINO and enable this // line. Audio samples are 'cleaner' at 3.3V. // COMMENT OUT THIS LINE FOR 3.3V ARDUINOS (FLORA, ETC.): // analogreference(external); memset(vol, 0, sizeof(vol)); Adafruit Industries Page 26 of 33
27 memset(vol, 0, sizeof(vol)); strip.begin(); void loop() { uint8_t i; uint16_t minlvl, maxlvl; int n, height; n = analogread(mic_pin); // Raw reading from mic n = abs(n DC_OFFSET); // Center on zero n = (n <= NOISE)? 0 : (n - NOISE); // Remove noise/hum lvl = ((lvl * 7) + n) >> 3; // "Dampened" reading (else looks twitchy) // Calculate bar height based on dynamic min/max levels (fixed point): height = TOP * (lvl - minlvlavg) / (long)(maxlvlavg - minlvlavg); if(height < 0L) height = 0; // Clip output else if(height > TOP) height = TOP; if(height > peak) peak = height; // Keep 'peak' dot at top // Color pixels based on rainbow gradient for(i=0; i<n_pixels; i++) { if(i >= height) strip.setpixelcolor(i, 0, 0, 0); else strip.setpixelcolor(i,wheel(map(i,0,strip.numpixels()-1,30,150))); // Draw peak dot if(peak > 0 && peak <= N_PIXELS-1) strip.setpixelcolor(peak,wheel(map(peak,0,strip.numpixels()-1,30,150) strip.show(); // Update strip // Every few frames, make the peak pixel drop by 1: if(++dotcount >= PEAK_FALL) { //fall rate if(peak > 0) peak--; dotcount = 0; Adafruit Industries Page 27 of 33
28 vol[volcount] = n; // Save sample for dynamic leveling if(++volcount >= SAMPLES) volcount = 0; // Advance/rollover sample counter // Get volume range of prior frames minlvl = maxlvl = vol[0]; for(i=1; i<samples; i++) { if(vol[i] < minlvl) minlvl = vol[i]; else if(vol[i] > maxlvl) maxlvl = vol[i]; // minlvl and maxlvl indicate the volume range over prior frames, used // for vertically scaling the output graph (so it looks interesting // regardless of volume level). If they're too close together though // (e.g. at very low volume levels) the graph becomes super coarse // and 'jumpy'...so keep some minimum distance between them (this // also lets the graph go to zero when no sound is playing): if((maxlvl - minlvl) < TOP) maxlvl = minlvl + TOP; minlvlavg = (minlvlavg * 63 + minlvl) >> 6; // Dampen min/max levels maxlvlavg = (maxlvlavg * 63 + maxlvl) >> 6; // (fake rolling average) // Input a value 0 to 255 to get a color value. // The colors are a transition r - g - b - back to r. uint32_t Wheel(byte WheelPos) { if(wheelpos < 85) { return strip.color(wheelpos * 3, WheelPos * 3, 0); else if(wheelpos < 170) { WheelPos -= 85; return strip.color(255 - WheelPos * 3, 0, WheelPos * 3); else { WheelPos -= 170; return strip.color(0, WheelPos * 3, WheelPos * 3); The second allows you to adjust the sensitivity of the VU meter: /* LED VU meter for Arduino and Adafruit NeoPixel LEDs. Hardware requirements: - Most Arduino or Arduino-compatible boards (ATmega 328P or better). - Adafruit Electret Microphone Amplifier (ID: 1063) Adafruit Industries Page 28 of 33
29 - Adafruit Electret Microphone Amplifier (ID: 1063) - Adafruit Flora RGB Smart Pixels (ID: 1260) OR - Adafruit NeoPixel Digital LED strip (ID: 1138) - Optional: battery for portable use (else power through USB or adapter) Software requirements: - Adafruit NeoPixel library Connections: - 3.3V to mic amp + - GND to mic amp - - Analog pin to microphone output (configurable below) - Digital pin to LED data input (configurable below) See notes in setup() regarding 5V vs. 3.3V boards - there may be an extra connection to make and one line of code to enable or disable. Written by Adafruit Industries. Distributed under the BSD license. This paragraph must be included in any redistribution. fscale function: Floating Point Autoscale Function V0.1 Written by Paul Badger 2007 Modified from code by Greg Shakar */ #include <Adafruit_NeoPixel.h> #include <math.h> #define N_PIXELS 16 // Number of pixels in strand #define MIC_PIN A9 // Microphone is attached to this analog pin #define LED_PIN 6 // NeoPixel LED strand is connected to this pin #define SAMPLE_WINDOW 10 // Sample window for average level #define PEAK_HANG 24 //Time of pause before peak dot falls #define PEAK_FALL 4 //Rate of falling peak dot #define INPUT_FLOOR 10 //Lower range of analogread input #define INPUT_CEILING 300 //Max range of analogread input, the lower the value the more sensitive (1023 = byte peak = 16; unsigned int sample; // Peak level of column; used for falling dots byte dotcount = 0; //Frame counter for peak dot byte dothangcount = 0; //Frame counter for holding peak dot Adafruit_NeoPixel strip = Adafruit_NeoPixel(N_PIXELS, LED_PIN, NEO_GRB + NEO_KHZ800); Adafruit Industries Page 29 of 33
30 void setup() { // This is only needed on 5V Arduinos (Uno, Leonardo, etc.). // Connect 3.3V to mic AND TO AREF ON ARDUINO and enable this // line. Audio samples are 'cleaner' at 3.3V. // COMMENT OUT THIS LINE FOR 3.3V ARDUINOS (FLORA, ETC.): // analogreference(external); // Serial.begin(9600); strip.begin(); strip.show(); // Initialize all pixels to 'off' void loop() { unsigned long startmillis= millis(); // Start of sample window float peaktopeak = 0; // peak-to-peak level unsigned int signalmax = 0; unsigned int signalmin = 1023; unsigned int c, y; // collect data for length of sample window (in ms) while (millis() - startmillis < SAMPLE_WINDOW) { sample = analogread(mic_pin); if (sample < 1024) // toss out spurious readings { if (sample > signalmax) { signalmax = sample; // save just the max levels else if (sample < signalmin) { signalmin = sample; // save just the min levels peaktopeak = signalmax - signalmin; // max - min = peak-peak amplitude // Serial.println(peakToPeak); //Fill the strip with rainbow gradient Adafruit Industries Page 30 of 33
31 //Fill the strip with rainbow gradient for (int i=0;i<=strip.numpixels()-1;i++){ strip.setpixelcolor(i,wheel(map(i,0,strip.numpixels()-1,30,150))); //Scale the input logarithmically instead of linearly c = fscale(input_floor, INPUT_CEILING, strip.numpixels(), 0, peaktopeak, 2); if(c < peak) { peak = c; // Keep dot on top dothangcount = 0; // make the dot hang before falling if (c <= strip.numpixels()) { // Fill partial column with off pixels drawline(strip.numpixels(), strip.numpixels()-c, strip.color(0, 0, 0)); // Set the peak dot to match the rainbow gradient y = strip.numpixels() - peak; strip.setpixelcolor(y-1,wheel(map(y,0,strip.numpixels()-1,30,150))); strip.show(); // Frame based peak dot animation if(dothangcount > PEAK_HANG) { //Peak pause length if(++dotcount >= PEAK_FALL) { //Fall rate peak++; dotcount = 0; else { dothangcount++; //Used to draw a line between two points of a given color void drawline(uint8_t from, uint8_t to, uint32_t c) { uint8_t fromtemp; if (from > to) { fromtemp = from; from = to; to = fromtemp; for(int i=from; i<=to; i++){ Adafruit Industries Page 31 of 33
32 for(int i=from; i<=to; i++){ strip.setpixelcolor(i, c); float fscale( float originalmin, float originalmax, float newbegin, float newend, float inputvalue, float curve){ float OriginalRange = 0; float NewRange = 0; float zerorefcurval = 0; float normalizedcurval = 0; float rangedvalue = 0; boolean invflag = 0; // condition curve parameter // limit range if (curve > 10) curve = 10; if (curve < -10) curve = -10; curve = (curve * -.1) ; // - invert and scale - this seems more intuitive - postive numbers give more weight to h curve = pow(10, curve); // convert linear scale into lograthimic exponent for other pow function /* Serial.println(curve * 100, DEC); // multply by 100 to preserve resolution Serial.println(); */ // Check for out of range inputvalues if (inputvalue < originalmin) { inputvalue = originalmin; if (inputvalue > originalmax) { inputvalue = originalmax; // Zero Refference the values OriginalRange = originalmax - originalmin; if (newend > newbegin){ NewRange = newend - newbegin; else { Adafruit Industries Page 32 of 33
33 { NewRange = newbegin - newend; invflag = 1; zerorefcurval = inputvalue - originalmin; normalizedcurval = zerorefcurval / OriginalRange; // normalize to 0-1 float // Check for originalmin > originalmax - the math for all other cases i.e. negative numbers seems to work out if (originalmin > originalmax ) { return 0; if (invflag == 0){ rangedvalue = (pow(normalizedcurval, curve) * NewRange) + newbegin; else // invert the ranges { rangedvalue = newbegin - (pow(normalizedcurval, curve) * NewRange); return rangedvalue; // Input a value 0 to 255 to get a color value. // The colours are a transition r - g - b - back to r. uint32_t Wheel(byte WheelPos) { if(wheelpos < 85) { return strip.color(wheelpos * 3, WheelPos * 3, 0); else if(wheelpos < 170) { WheelPos -= 85; return strip.color(255 - WheelPos * 3, 0, WheelPos * 3); else { WheelPos -= 170; return strip.color(0, WheelPos * 3, WheelPos * 3); Adafruit Industries Last Updated: :02:04 PM EDT Page 33 of 33

34 Wear it! Take your tie out on the town! It's perfect for parties, concerts, weddings, Bar Mitzvahs... If you need to wash your tie, remove the battery and gently spot clean-- the pixels, thread and Flora board can handle getting wet (then dry throrougly), but water should not get in the microphone.
3D Printed LED Microphone Flag
 3D Printed LED Microphone Flag Created by Ruiz Brothers Last updated on 2017-11-15 10:40:06 PM UTC Guide Contents Guide Contents Overview Parts & Supplies Tools Customize Measure 3D Modeling Bottom Cover
Light-Up Angler Fish Embroidery
 Light-Up Angler Fish Embroidery Created by Becky Stern Last updated on 2018-08-22 03:35:36 PM UTC Guide Contents Guide Contents Overview Tools & Supplies Layout & Circuit Diagram Sew Circuit Code Hand
Getting Started with FLORA
 Getting Started with FLORA Created by Becky Stern Last updated on 2015-05-13 01:00:11 PM EDT Guide Contents Guide Contents Overview Download software Blink onboard LED Blink onboard NeoPixel Install the
Adafruit TPL5110 Power Timer Breakout
 Adafruit TPL5110 Power Timer Breakout Created by lady ada Last updated on 2017-12-11 06:28:19 AM UTC Guide Contents Guide Contents Overview Pinouts Power Pins Control Pins Assembly Prepare the header strip:
Celebration Spectacles
 Celebration Spectacles Created by Becky Stern Last updated on 2018-08-22 03:45:59 PM UTC Guide Contents Guide Contents Overview Circuit Diagram Assemble Circuit Test and Glue Wear 'em! 2 3 6 7 10 14 Adafruit
LED Stego Flex Spike Hoodie
 LED Stego Flex Spike Hoodie Created by Becky Stern Last updated on 2015-02-19 04:45:44 PM EST Guide Contents Guide Contents Overview Like this project? 3D Print Spikes NinjaFlex Assemble Circuit Layout
Adafruit TPL5111 Reset Enable Timer Breakout
 Adafruit TPL5111 Reset Enable Timer Breakout Created by lady ada Last updated on 2017-11-02 07:32:27 PM UTC Guide Contents Guide Contents Overview Pinouts Power Pins Control Pins Assembly Prepare the header
Getting Started with FLORA
 Getting Started with FLORA Created by Becky Stern Last updated on 2018-01-03 04:31:24 AM UTC Guide Contents Guide Contents Overview Windows Driver Installation Manual Driver Installation Download software
Sewable NeoPixels. Created by Becky Stern. Last updated on :50:14 PM EDT
 Sewable NeoPixels Created by Becky Stern Last updated on 2015-08-25 07:50:14 PM EDT Guide Contents Guide Contents Overview Prerequisite guides Lots of Pixels? Hook up alligator clips Run pixel test code
NeoPixel LED Cortana Costume
 NeoPixel LED Cortana Costume Created by Ruiz Brothers Last updated on 2018-08-22 03:43:43 PM UTC Guide Contents Guide Contents Overview How it Works Project Advisory Prerequisite Guides Parts & Components
FLORA Pixel Brooch. Created by Becky Stern. Last updated on :19:07 PM EST
 FLORA Pixel Brooch Created by Becky Stern Last updated on 2015-02-20 01:19:07 PM EST Guide Contents Guide Contents Overview Connect first signal wire Connect power and ground wires Add more pixels Program
NeoPixel Basketball Hoop
 NeoPixel Basketball Hoop Created by Justin Cooper Last updated on 2018-08-27 12:19:58 AM UTC Guide Contents Guide Contents Overview Parts Needed Power choices! Parts for Option #1 Parts for Option #2 Tools
3D Printed Camera LED Ring
 3D Printed Camera LED Ring Created by Ruiz Brothers Last updated on 2018-08-22 03:39:34 PM UTC Guide Contents Guide Contents Overview DIY LED Ring Light Prerequisite Guide: Parts List: Tools & Supplies
Flora Brake Light Backpack
 Flora Brake Light Backpack Created by Becky Stern Last updated on 2018-02-14 02:47:42 PM UTC Guide Contents Guide Contents Overview Tools & Supplies Circuit Diagram Control Circuit LED Pixels The Code
NeoPixel Punk Collar. Created by Becky Stern. Last updated on :41:18 PM UTC
 NeoPixel Punk Collar Created by Becky Stern Last updated on 2018-08-22 03:41:18 PM UTC Guide Contents Guide Contents Overview Circuit Diagram Prototype Circuit Arduino Code CircuitPython Code Build Collar
Interior Purse Light. Created by Becky Stern. Last updated on :41:08 PM UTC
 Interior Purse Light Created by Becky Stern Last updated on 2018-08-22 03:41:08 PM UTC Guide Contents Guide Contents Overview Circuit Diagram Stitch Sequins Add Tape Arduino Code CircuitPython Code Use
Adafruit LED Sequins. Created by Becky Stern. Last updated on :00:06 PM EST
 Adafruit LED Sequins Created by Becky Stern Last updated on 2015-02-19 05:00:06 PM EST Guide Contents Guide Contents Overview Sewing with conductive thread GEMMA sequin hat 2 3 8 15 Adafruit Industries
FLORA TV-B-Gone. Created by Becky Stern. Last updated on :32:57 PM UTC
 FLORA TV-B-Gone Created by Becky Stern Last updated on 2018-08-22 03:32:57 PM UTC Guide Contents Guide Contents Overview Parts Tutorials Transistors Resistors LEDs Pushbutton Program it Power Fabric pinwheel
Sparkle Skirt. Created by Becky Stern. Last updated on :48:58 PM UTC
 Sparkle Skirt Created by Becky Stern Last updated on 2017-12-13 03:48:58 PM UTC Guide Contents Guide Contents Overview Tools & Supplies Layout & Circuit Diagram Sew Circuit Code & Battery Wear it! 2 3
Jewel Hair Stick. Created by Leslie Birch. Last updated on :47:17 PM UTC
 Jewel Hair Stick Created by Leslie Birch Last updated on 2018-08-22 03:47:17 PM UTC Guide Contents Guide Contents Overview Tools & Supplies Prepare Chopstick Circuit Diagram Solder Circuit Arduino Code
Magical Mistletoe. Created by Leslie Birch. Last updated on :45:29 PM UTC
 Magical Mistletoe Created by Leslie Birch Last updated on 2018-08-22 03:45:29 PM UTC Guide Contents Guide Contents Overview Tools & Supplies Circuit Diagram Test the Sensor Prepare Parts Attach LED Sequins
Chirping Plush Owl Toy
 Chirping Plush Owl Toy Created by Becky Stern Last updated on 2018-11-21 08:56:55 PM UTC Guide Contents Guide Contents Overview Tools & Supplies Solder Circuit Arduino Code CircuitPython Code Assemble
Adafruit LED Sequins. Created by Becky Stern. Last updated on :02:00 AM UTC
 Adafruit LED Sequins Created by Becky Stern Last updated on 2018-03-02 04:02:00 AM UTC Guide Contents Guide Contents Overview Sewing with conductive thread Circuit Diagram GEMMA sequin hat Arduino Code
NeoPixel Ring Bangle Bracelet
 NeoPixel Ring Bangle Bracelet Created by Becky Stern Last updated on 2017-09-28 11:14:48 PM UTC Guide Contents Guide Contents Overview Circuit Diagram Build it! Arduino Code CircuitPython Code Planning
Cyberpunk Spikes. Created by Becky Stern. Last updated on :07:06 PM UTC
 Cyberpunk Spikes Created by Becky Stern Last updated on 2017-10-20 09:07:06 PM UTC Guide Contents Guide Contents Overview Download and 3D Print Prepare NeoPixel Strip Assemble Circuit Arduino Code CircuitPython
Bunny Ears with MakeCode
 Bunny Ears with MakeCode Created by Erin St Blaine Last updated on 2018-08-22 04:05:47 PM UTC Guide Contents Guide Contents Introduction Tools & Other Materials Programming with MakeCode Set Up the Light
Guardian Shield+ Zelda Breath of the Wild
 Guardian Shield+ Zelda Breath of the Wild Created by Ruiz Brothers Last updated on 2018-08-22 04:01:50 PM UTC Guide Contents Guide Contents Overview Articulating Handle Rechargeable Prerequisite Guides
Lie Ren's Stormflower Gun Blade
 Lie Ren's Stormflower Gun Blade Created by Ruiz Brothers Last updated on 2017-04-02 05:39:24 PM UTC Guide Contents Guide Contents Overview Cosplay Props with NeoPixels Triggered Lighting Effects DIY Electronics
Adafruit Capacitive Touch Sensor Breakouts
 Adafruit Capacitive Touch Sensor Breakouts Created by Bill Earl Last updated on 2018-08-22 03:36:13 PM UTC Guide Contents Guide Contents Overview Momentary Toggle 5-Pad Momentary Assembly and Wiring Installing
Trinket NeoPixel LED Longboard
 Trinket NeoPixel LED Longboard Created by Ruiz Brothers Last updated on 2017-10-02 06:00:32 PM UTC Guide Contents Guide Contents Overview Parts Tools & Supplies Prerequisite Guides 3D Printing PLA Material
Adafruit APDS9960 breakout
 Adafruit APDS9960 breakout Created by Dean Miller Last updated on 2018-01-19 11:18:59 PM UTC Guide Contents Guide Contents Overview Pinouts Power Pins: Logic pins: Assembly Prepare the header strip: Add
Circuit Playground Digital Input
 Circuit Playground Digital Input Created by Carter Nelson Last updated on 2017-02-27 03:36:50 AM UTC Guide Contents Guide Contents Overview Required Parts Before Starting Digital Signals 3V Logic Pocket
Mystical LED Halloween Hood
 Mystical LED Halloween Hood Created by Becky Stern Last updated on 2017-09-28 11:13:20 PM UTC Guide Contents Guide Contents Overview NeoPixel GEMMA circuit Arduino Code NeoPixel Überguide: Arduino Library
Monochrome OLED Breakouts
 Monochrome OLED Breakouts Created by lady ada Last updated on 2018-01-02 08:35:47 PM UTC Guide Contents Guide Contents Overview Power Requirements OLED Power Requirements 5V- ready 128x64 and 128x32 OLEDs
Adafruit MCP9808 Precision I2C Temperature Sensor Guide
 Adafruit MCP9808 Precision I2C Temperature Sensor Guide Created by lady ada Last updated on 2017-11-12 06:09:49 PM UTC Guide Contents Guide Contents Overview Pinouts Power Pins I2C Data Pins Optional Pins
Feather Weather Lamp. Created by Ruiz Brothers. Last updated on :54:26 PM UTC
 Feather Weather Lamp Created by Ruiz Brothers Last updated on 2018-08-22 03:54:26 PM UTC Guide Contents Guide Contents Overview Weather Reactive Pixels Prerequisite Guides Parts Tools & Supplies Circuit
GPS Logging Dog Harness
 GPS Logging Dog Harness Created by Becky Stern Last updated on 2015-01-15 10:15:19 PM EST Guide Contents Guide Contents Overview Circuit Diagram Sew Circuit Use It! 2 3 5 6 15 Adafruit Industries https://learn.adafruit.com/gps-logging-dog-harness
MCP Bit DAC Tutorial
 MCP4725 12-Bit DAC Tutorial Created by lady ada Last updated on 2016-10-07 04:47:03 PM UTC Guide Contents Guide Contents Overview Wiring Using with Arduino Using the library Increasing the speed Download
MCP Bit DAC Tutorial
 MCP4725 12-Bit DAC Tutorial Created by lady ada Last updated on 2018-03-05 10:51:16 PM UTC Guide Contents Guide Contents Overview Wiring Arduino Code Using the library Increasing the speed CircuitPython
Adafruit 8x16 LED Matrix FeatherWing
 Adafruit 8x16 LED Matrix FeatherWing Created by lady ada Last updated on 2016-05-20 01:58:38 PM EDT Guide Contents Guide Contents Overview Pinouts Power Pins I2C pins Address Jumpers Changing Addresses
Crystal Glow Knuckles
 Crystal Glow Knuckles Created by Matthew Borgatti Last updated on 2015-06-04 11:30:07 PM EDT Guide Contents Guide Contents What you're getting Crystal Glow Knuckles Prerequisite Guides 3D Printers Can
Adafruit Color Sensors
 Adafruit Color Sensors Created by Bill Earl Last updated on 2018-11-05 03:48:12 PM UTC Guide Contents Guide Contents Overview Assembly and Wiring Assembly (breakout version only) Position the header Position
TSL2561 Luminosity Sensor
 TSL2561 Luminosity Sensor Created by lady ada Last updated on 2018-01-27 12:17:52 AM UTC Guide Contents Guide Contents Overview Wiring the TSL2561 Sensor Breakout Board Prep Wiring up the sensor Arduino
MiniPOV4 - DIY Full-Color Persistence of Vision & Light-Painting Kit
 MiniPOV4 - DIY Full-Color Persistence of Vision & Light-Painting Kit Created by lady ada Last updated on 2018-08-22 03:41:06 PM UTC Guide Contents Guide Contents Overview Make it! Testing Upload Images
Solar Boost Bag. Created by Becky Stern. Last updated on :44:55 PM UTC
 Solar Boost Bag Created by Becky Stern Last updated on 2018-08-22 03:44:55 PM UTC Guide Contents Guide Contents Overview 3D Design Files Customize Design Assemble Circuit Prepare Solar Panel Enclosure
NeoMatrix 8x8 Word Clock
 NeoMatrix 8x8 Word Clock Created by Andy Doro Last updated on 2017-10-10 04:10:51 AM UTC Guide Contents Guide Contents Overview Parts List Parts Tools Circuit Assembly Overview Uploading Code Understanding
TRON Bag. Created by Becky Stern
 TRON Bag Created by Becky Stern Last updated on 2018-08-22 03:30:39 PM UTC Guide Contents Guide Contents Overview Tools Design Soldering Sewing Detailing Splitting Finishing Buy EL! Forums 2 3 5 7 12 15
Coffee Detonator: The TNT Plunger Grinder
 Coffee Detonator: The TNT Plunger Grinder Created by John Park Last updated on 2017-04-12 08:04:36 PM UTC Guide Contents Guide Contents Overview Materials Voltage Conversion AC/DC Voltage Divider Microcontroller
Adafruit 1.27" and 1.5" Color OLED Breakout Board
 Adafruit 1.27" and 1.5" Color OLED Breakout Board Created by Bill Earl Last updated on 2017-11-17 05:54:22 PM UTC Guide Contents Guide Contents Overview Board Technical Details Assembly Prepare the header
1.8" TFT Display Breakout and Shield
 1.8" TFT Display Breakout and Shield Created by lady ada Last updated on 2017-11-17 05:51:22 PM UTC Guide Contents Guide Contents Overview Breakout Pinouts Breakout Assembly Prepare the header strip: Add
Adafruit MMA8451 Accelerometer Breakout
 Adafruit MMA8451 Accelerometer Breakout Created by lady ada Last updated on 2014-07-31 07:00:14 PM EDT Guide Contents Guide Contents Overview Pinouts (http://adafru.it/dln)power Pins I2C Pins INT and ADDR
Adafruit Mini TFT " 160x80
 Adafruit Mini TFT - 0.96" 160x80 Created by lady ada Last updated on 2017-11-17 05:56:10 PM UTC Guide Contents Guide Contents Overview Pinouts Assembly Prepare the header strip: Add the breakout board:
Adafruit Si5351 Clock Generator Breakout
 Adafruit Si5351 Clock Generator Breakout Created by lady ada Last updated on 2017-06-02 07:54:50 PM UTC Guide Contents Guide Contents Overview Pinouts Power Pins I2C Pins Assembly Prepare the header strip:
Simple LED Unicorn Horn
 Simple LED Unicorn Horn Created by Ruiz Brothers Last updated on 2018-08-22 03:56:14 PM UTC Guide Contents Guide Contents Overview 3D Printed Unicorn Horn Want More Magic/Colors? Great For Beginners Parts
Getting Started with FLORA
 Getting Started with FLORA Created by Becky Stern Last updated on 2014-12-12 02:30:15 PM EST Guide Contents Guide Contents Overview Download software Mac OSX Install Drivers! (Windows Only) Windows 8 Windows
Portable Apple Watch Charger
 Portable Apple Watch Charger Created by Ruiz Brothers Last updated on 2017-10-22 09:58:04 PM UTC Guide Contents Guide Contents Overview Smart Charging Prerequisite Guides Parts, Tool & Supplies Circuit
GPS Dog Collar. Created by Becky Stern. Last updated on :30:40 PM UTC
 GPS Dog Collar Created by Becky Stern Last updated on 2018-08-22 03:30:40 PM UTC Guide Contents Guide Contents Overview & Parts Code & Wiring Downloads 2 3 5 10 Adafruit Industries https://learn.adafruit.com/gps-dog-collar
Adafruit AS channel Visible Light Sensor
 Adafruit AS7262 6-channel Visible Light Sensor Created by Dean Miller Last updated on 2018-03-28 08:29:27 PM UTC Guide Contents Guide Contents Overview Pinouts Power Pins: Logic pins: UART Logic pins:
Clockwork Goggles. Created by John Park. Last updated on :03:10 PM UTC
 Clockwork Goggles Created by John Park Last updated on 2018-08-22 04:03:10 PM UTC Guide Contents Guide Contents Overview Assemble Circuit and Goggles CircuitPython Setup and Code Rock the Goggles 2 3 6
ISS Pin. Created by Leslie Birch. Last updated on :27:30 PM UTC
 ISS Pin Created by Leslie Birch Last updated on 2017-04-18 09:27:30 PM UTC Guide Contents Guide Contents Overview Tools & Supplies Solder Circuit Create Cover Code Set Up IFTTT Want a Test? Wear It! 2
Camera LED Ring Light
 Camera LED Ring Light Created by Ruiz Brothers Last updated on 2017-05-09 06:07:12 PM UTC Guide Contents Guide Contents Overview NeoPixel Ring Light Dedicated white LED Prerequisite Guides Parts Tools
Naughty or Nice Machine
 Naughty or Nice Machine Created by Brian Corteil Last updated on 2018-08-22 03:45:31 PM UTC Guide Contents Guide Contents Overview It knows if you have been Naughty or Nice! Make It! Parts The Case The
Neon LED Signs. Created by John Park. Last updated on :11:09 PM UTC
 Neon LED Signs Created by John Park Last updated on 2018-08-22 04:11:09 PM UTC Guide Contents Guide Contents Overview Parts Materials Tools Build the Sign Driver Preparation Solder the Circuit Solder the
Unicorn Hat with Moving Ears
 Unicorn Hat with Moving Ears Created by Erin St Blaine Last updated on 2017-06-15 09:53:10 PM UTC Guide Contents Guide Contents Introduction Other Materials Tools Code Before You Start TiCo Servo Library
Trinket-Powered Conference Room Occupancy Display
 Trinket-Powered Conference Room Occupancy Display Created by Mike Barela Last updated on 2018-08-22 03:38:56 PM UTC Guide Contents Guide Contents Overview Build Wiring Diagrams Populating the Board Code
Adafruit VL53L0X Time of Flight Micro-LIDAR Distance Sensor Breakout
 Adafruit VL53L0X Time of Flight Micro-LIDAR Distance Sensor Breakout Created by lady ada Last updated on 2017-12-28 11:56:14 PM UTC Guide Contents Guide Contents Overview Sensing Capablities Pinouts Power
Bandolier of Light. Created by Becky Stern. Last updated on :16:17 PM EST
 Bandolier of Light Created by Becky Stern Last updated on 2015-02-19 02:16:17 PM EST Guide Contents Guide Contents Overview 3D Design File Ninjaflex STLs Slicer Settings Clean Up Modify Design Solder Circuit
0.96" mini Color OLED
 0.96" mini Color OLED Created by lady ada Last updated on 2016-09-08 03:41:52 PM UTC Guide Contents Guide Contents Overview Power Wiring New Model Older Model Wiring the OLDER design (two rows of pins
Cup o' Sound. Created by Becky Stern. Last updated on :30:06 PM EST
 Cup o' Sound Created by Becky Stern Last updated on 2015-02-18 01:30:06 PM EST Guide Contents Guide Contents Overview Circuit Diagram Load Sound and Prepare Components Solder Circuit and Assemble Use it!
Adafruit I2C FRAM Breakout
 Adafruit I2C FRAM Breakout Created by lady ada Last updated on 2017-07-14 05:38:45 AM UTC Guide Contents Guide Contents Overview Pinouts Power Pins: I2C Logic pins: Assembly Prepare the header strip: Add
Phone-Activated Talking Dog Collar
 Phone-Activated Talking Dog Collar Created by Phillip Burgess Last updated on 2017-01-24 08:28:00 PM UTC Guide Contents Guide Contents Overview Circuit Diagram & Code Leather Collar & Greebles Assemble
Bike Wheel POV Display
 Bike Wheel POV Display Created by Becky Stern Last updated on 2017-09-12 03:10:38 PM UTC Guide Contents Guide Contents Overview Parts and Tools Circuit Diagram Prep LEDs & Breadboard Code Solder Circuit
Adafruit Si7021 Temperature + Humidity Sensor
 Adafruit Si7021 Temperature + Humidity Sensor Created by lady ada Last updated on 2017-11-12 06:14:07 PM UTC Guide Contents Guide Contents Overview Pinouts Power Pins: I2C Logic pins: Assembly Prepare
Alohamora Bottle. Created by Erin St Blaine. Last updated on :58:53 PM UTC
 Alohamora Bottle Created by Erin St Blaine Last updated on 2017-06-16 10:58:53 PM UTC Guide Contents Guide Contents Introduction Ingredients Tools Code 1. Arduino IDE 2. Teensyduino Installer 3. FastLED
Adafruit DRV2605 Haptic Controller Breakout
 Adafruit DRV2605 Haptic Controller Breakout Created by lady ada Last updated on 2016-10-03 09:48:16 PM UTC Guide Contents Guide Contents Overview Pinouts Power Pins I2C Pins Other! Assembly Prepare the
Adabot Operation Game
 Adabot Operation Game Created by John Park Last updated on 2018-08-22 04:11:17 PM UTC Guide Contents Guide Contents Overview Parts Materials & Tools Build the Operating Table Print the Board and Pieces
i2c/spi LCD Backpack Created by lady ada Last updated on :11:04 PM UTC
 i2c/spi LCD Backpack Created by lady ada Last updated on 2017-08-16 05:11:04 PM UTC Guide Contents Guide Contents Overview Which LCD to Use? Wait - the backpack has 16 holes, but my LCD only has 14 pins!
Tent Lantern. Created by Timothy Reese. Last updated on :17:25 AM UTC
 Tent Lantern Created by Timothy Reese Last updated on 2017-07-14 05:17:25 AM UTC Guide Contents Guide Contents Overview Things you'll need: What You'll Learn: 3D Printing Code Assembly Wiring Diagram Soldering
Infinity Mirror Valentine's Candy Box
 Infinity Mirror Valentine's Candy Box Created by Kathy Ceceri Last updated on 2019-02-07 09:44:54 PM UTC Guide Contents Guide Contents Overview Parts List -- Mini Box Version Chibitronics Color LEDs Add-On
Mad Science Test Tube Rack
 Mad Science Test Tube Rack Created by John Park Last updated on 2016-10-17 09:21:01 PM UTC Guide Contents Guide Contents Overview Lighted Test Tube Parts Materials and Tools Optional Test Tube Rack Parts
Toy Car Speed Timer. Created by Kirby Griese. Last updated on :13:49 PM UTC
 Toy Car Speed Timer Created by Kirby Griese Last updated on 2017-03-20 09:13:49 PM UTC Guide Contents Guide Contents Overview Parts needed Prerequisites 3D Printing Assembly Wiring Software Use It 2 3
LED Eye Prosthetic. Created by Tully Jagoe. Last updated on :00:17 AM EST
 LED Eye Prosthetic Created by Tully Jagoe Last updated on 2014-12-11 11:00:17 AM EST Guide Contents Guide Contents Overview Parts List Prepare wires Solder LEDs Attach battery holder Shape it to your skull
Adafruit CCS811 Air Quality Sensor
 Adafruit CCS811 Air Quality Sensor Created by Dean Miller Last updated on 2018-01-15 11:03:58 PM UTC Guide Contents Guide Contents Overview Pinouts Power Pins: Logic pins: Arduino Wiring & Test I2C Wiring
Adafruit DRV2605 Haptic Controller Breakout
 Adafruit DRV2605 Haptic Controller Breakout Created by lady ada Last updated on 2018-08-20 03:28:51 PM UTC Guide Contents Guide Contents Overview Pinouts Power Pins I2C Pins Other! Assembly Prepare the
Glowing Star Chuck Taylor Sneakers
 Glowing Star Chuck Taylor Sneakers Created by Becky Stern Last updated on 2015-02-20 01:03:51 PM EST Guide Contents Guide Contents Overview Round All Star Rubber Star Badge Inverter & Battery Wear 'Em!
Adafruit PowerBoost 500 Shield
 Adafruit PowerBoost 500 Shield Created by lady ada Last updated on 2018-08-22 03:43:27 PM UTC Guide Contents Guide Contents Overview Pinouts DC/DC Boost section Indicator LEDs Charging section Power Switch
Punk LED Collar. Created by Becky Stern. Last updated on :02:45 PM EST
 Punk LED Collar Created by Becky Stern Last updated on 2015-02-20 01:02:45 PM EST Guide Contents Guide Contents Overview Tools & Supplies Circuit Diagram Install LEDs Solder Components Test & Finish Wear
Audio Prank Gift Box. Created by Becky Stern. Last updated on :46:15 PM UTC
 Audio Prank Gift Box Created by Becky Stern Last updated on 2018-08-22 03:46:15 PM UTC Guide Contents Guide Contents Overview Circuit Diagram Prepare Components Build Circuit Wrap and Give 2 3 5 6 12 14
FLORA and GEMMA ICSP. Created by Becky Stern. Last updated on :42:16 PM UTC
 FLORA and GEMMA ICSP Created by Becky Stern Last updated on 2018-08-22 03:42:16 PM UTC Guide Contents Guide Contents Overview Reprogram FLORA over ICSP Reprogram GEMMA over ICSP 2 3 4 9 Adafruit Industries
Trellis 3D Printed Enclosure
 Trellis 3D Printed Enclosure Created by Ruiz Brothers Last updated on 2018-08-22 03:39:07 PM UTC Guide Contents Guide Contents Overview Parts Tools & Supplies Modeling 123D Design Customize Measuring Parts
Adafruit AMG8833 8x8 Thermal Camera Sensor
 Adafruit AMG8833 8x8 Thermal Camera Sensor Created by Justin Cooper Last updated on 2017-11-27 10:00:27 PM UTC Guide Contents Guide Contents Overview Pinouts Power Pins: Logic pins: Assembly Prepare the
Adafruit HUZZAH32 - ESP32 Feather
 Adafruit HUZZAH32 - ESP32 Feather Created by lady ada Last updated on 2017-07-14 02:14:00 AM UTC Guide Contents Guide Contents Overview Pinouts Power Pins Logic pins Serial pins I2C & SPI pins GPIO & Analog
Con Badge with Circuit Playground Express
 Con Badge with Circuit Playground Express Created by Sophy Wong Last updated on 2018-04-11 05:00:16 PM UTC Guide Contents Guide Contents Overview Tools & Materials Laser Cutting Program the Circuit Playground
3D Printed Daft Punk Helmet with Bluetooth
 3D Printed Daft Punk Helmet with Bluetooth Created by Ruiz Brothers Last updated on 2017-10-20 01:47:59 PM UTC Guide Contents Guide Contents Overview Parts List Tools & Supplies Light Painting with Daftpunk
Adafruit IO Basics: Digital Output
 Adafruit IO Basics: Digital Output Created by Todd Treece Last updated on 2017-09-12 03:10:33 PM UTC Guide Contents Guide Contents Overview Adafruit IO Setup Creating the Digital Feed Adding the Toggle
RGB LCD Shield. Created by lady ada. Last updated on :48:40 PM UTC
 RGB LCD Shield Created by lady ada Last updated on 2017-12-04 11:48:40 PM UTC Guide Contents Guide Contents Overview Parts List 1) Resistors 2) Potentiometer 3) Pushbuttons 4) i2c Port Expander Chip 5)
Arduino Lesson 6. Digital Inputs
 Arduino Lesson 6. Digital Inputs Created by Simon Monk Last updated on 2018-02-27 10:20:04 PM UTC Guide Contents Guide Contents Overview Parts Part Qty Breadboard Layout Arduino Code Push Switches Other
NeoPixel Manicure. Created by Sophy Wong. Last updated on :50:38 PM UTC
 NeoPixel Manicure Created by Sophy Wong Last updated on 2018-04-11 05:50:38 PM UTC Guide Contents Guide Contents Overview Parts & Supplies Tools Circuit Diagram Build the Circuit Measure Your Circuit Prepare
NeoPixie Dust Bag with Circuit Playground Express
 NeoPixie Dust Bag with Circuit Playground Express Created by John Park Last updated on 2017-12-20 10:00:29 PM UTC Guide Contents Guide Contents Overview Code It Setup Animation Color Touch Variable Color
FLORA and GEMMA ICSP. Created by Becky Stern. Last updated on :30:55 PM EST
 FLORA and GEMMA ICSP Created by Becky Stern Last updated on 2015-02-19 02:30:55 PM EST Guide Contents Guide Contents Overview Reprogram FLORA over ICSP Reprogram GEMMA over ICSP 2 3 5 10 Adafruit Industries