A Modern Construction of a Corset and a Short Look at Historical and Social Aspects
|
|
|
- Flora Jackson
- 6 years ago
- Views:
Transcription

1 Western Oregon University Digital Honors Senior Theses/Projects Student Scholarship A Modern Construction of a Corset and a Short Look at Historical and Social Aspects Sierra Durfee Western Oregon University, ginyaiba@gmail.com Follow this and additional works at: Part of the Fashion Design Commons Recommended Citation - Durfee, Sierra, "A Modern Construction of a Corset and a Short Look at Historical and Social Aspects" (2011). Honors Senior Theses/ - Projects. Paper This is brought to you for free and open access by the Student Scholarship at Digital Commons@WOU. It has been accepted for inclusion in Honors Senior Theses/Projects by an authorized administrator of Digital Commons@WOU. For more information, please contact digitalcommons@wou.edu.
2 Durfee 1 A Modern Construction of a Corset and a Short Look at Historical and Social Aspects By Sierra J. Durfee An Honors Thesis Submitted in Partial Fulfillment of the Requirements for Graduation from the Western Oregon University Honors Program Professor Sandra Hedgepeth Thesis Advisor Dr. Gavin Keulks, Honors Program Director Western Oregon University May 2011
3 Durfee 2 Table of Contents Abstract. pp. 3 Foreword pp. 4 Introduction pp. 5 A Short Look at Historical and Social Aspects. pp. 6 Illustrations from A Short Look at Historical and Social Aspects..pp. 13 The Constructive Process.pp. 32 Choosing a Pattern...pp. 32 Replicating the Pattern.pp. 34 Creating the Mockup pp. 38 Fitting the Mockup...pp. 49 Drafting the Second Pattern.pp. 51 Cutting and Assembling the Second Mockup..pp. 54 Creating the Final Pattern and Cutting out the Final Material.pp. 59 Adding the Piping pp. 67 Adding the Channels and Bones..pp. 77 Inserting the Bones..pp. 82 Closing the Sides and Adding the Lacing Bones pp. 85 Setting the Grommets..pp. 90 Finishing the Bottom Piping pp. 91 Reviewing the Patterns and Mockups.pp. 93 The Final Product...pp. 119 Conclusion.pp. 127 Acknowledgements pp. 128 List of Illustrations.pp. 129 Works Cited...pp. 131
4 Durfee 3 Abstract In this thesis I endeavor to create an historical corset using a new subset of skills I learned throughout my education at Western Oregon University. I create the corset using skills from classes I have taken in the course of acquiring my degree, through the help of my advisor, and with new skills learned from the research of this project. It is my wish that I understand and am able to replicate in the future, the steps needed in order to create a corset. This includes pattern making and altering, cutting, stitching and fitting. I also wish to impart that knowledge unto others. I also impart historical knowledge about the history of the corset through a brief survey of its creation, use and popularity throughout time. Its use as a foundation garment, the different popular materials of the time, popular opinion and social impact of the corset as well. The historical basis of the corset relays its importance in fashion history. This thesis tracks the steps of this journey through pictures and comments and enables the reader to see how a corset it made through its various steps. The use of pictures enables the work to be seen first-hand instead of merely imagined. This thesis also allows record of what not to do for future projects, or a forewarning for others embarking on the same journey. This thesis allows the reader to not only see my work, but possibly see how interesting the construction of a corset or a garment can be. Perhaps this might inspire projects for the future among those who read this.
5 Durfee 4 Foreword I chose to build a corset for my thesis because it is something that I have always wanted to do. I have always found corsets beautiful and interesting, especially as the precursor to garments such as brassieres and girdles. I think they are interesting to build, wear and see outfits constructed around. However, I did begin this project with no clue of how to build a corset. The most difficult thing I had made up to that point would be a sack dress, which is not difficult in the least bit. I wanted to be able to make something complicated that I wanted to keep and would improve the existing sewing skills I had from working in the Western Oregon University Theatre Costume Shop for over a year. While it is true I became very adept at correctly adding closures to garments, excluding zippers, I still learned a lot during my time there and wanted to prove to myself that I could do something out of my league and do it well. I was very glad to have the opportunity to do this project. It took a lot of work and patience with many parties, but in the end I did what I set out to accomplish. I built an historical corset using modern twists of my own.
6 Durfee 5 Introduction In this thesis you will find a short history regarding the corset as a garment and social catalyst. I include illustrations of items I mention during the history section. Following that you will see the journey I embarked on in creating this garment as an item to wear myself. I document my triumphs and mistakes through pictures and comments. You will see the final product at the end of the thesis.
7 Durfee 6 A Short Look at Historical and Social Aspects As a garment, the corset has helped to shape the silhouettes of women, and some men, since the 16th century. As a costume garment, it is essential for certain periods. However, in order to truly appreciate the corset, understanding its history and why it achieved popularity and then declined is important. The corset is a very influential piece to have in a costume. Some eras have specific silhouettes of the body that were popular which required a corset in order to achieve. For this reason alone, it is very useful to have the experience building a corset can give you. However, building a corset for costume use is different from building a corset for personal use. A costume corset needs to be durable and able to be maintained for a long period of time and many uses. Another thing to consider when building a costume corset is that the wearer may change as seasons change, meaning that building the corset in a way that makes it alterable is very useful. The corset itself is a difficult piece to build because it is meant to bind the body, so if it does not fit the body, the entire silhouette is off. There are many different components to consider when building a corset, such as material, types of stays used and what silhouette the corset is trying to achieve. The construction of a corset requires many steps and a lot of time. Much of this time is devoted to just making mock ups, or trial garments of inexpensive material, and making sure that the corset fits the body in an appropriate way. Throughout the corset's history it has been a controversial garment that has been influential to styles and body shapes. The corset has been a foundation garment that the silhouette has been built on since the sixteenth century. Stiff cloth of brocade and silk
8 Durfee 7 became popular during the Renaissance period and contributed to the rise of the corset. This is when it became fashionable to wear a skirt and a bodice as two separate, straight silhouette pieces. These were meant to be straight and tight. This look was achieved with the use of a stiffened bodice underneath of an outer layer of a nicer fabric. This became known as a waistcoat and began to incorporate stiffened linens and whalebone used as a busk at the front and as stays on the sides in order to fulfill the straight look of the period. As with many things in fashion, the corset changed form over time to match popular styles, gliding from the straight front to the spoon front in the 16 th century, achieved with a spoon busk, curving in at the waist and out over the abdomen, in the late 1800s, to the shorter straight busk of the early 1900s and many variations in between. There is reference to corsets from the 16th century which were possibly brought into Europe from the south, such as Spain and Italy. Catherine d Medici was credited with popularizing the corset in France. In 1579, Henry Estienne [of France] described the new style: The ladies call whalebone (or something else, in the absence of the latter) their stay, which they put under their breast, right in the middle, in order to keep straighter ( The Corset 7). This fashion sped through the aristocracy and over time trickled down to the peasantry. In England, working women acquired the costly garments as second hand stays, instead of paying the price for a new one. This helped them to achieve the popular look while still maintaining their finances. Others created their own out of different material, certainly not the costly silk brocade that the aristocracy sported, but leather more often than not. According to Frances Place the wives of journeymen tradesmen and
9 Durfee 8 shopkeepers...either wore leather stays or what were called full-boned stays...these were never washed although worn every day for years...half-laced and back as post ( The Corset 27). Stays were hard earned, even second hand and not replaced until absolutely necessary. Children were even put into stays beginning in infancy, girls as young as two years wore miniature corsets to support the body and prevent deformities of the skeleton and even little boys were put into stays until the age of six ( The Corset 12). While men within the aristocracy during the 16 th did not wear corsets, they still wore stiffened doublets and padded codpieces, they also adhered to a model of physical restraint and sartorial display ( The Corset 12). (Men s fashion did incorporate a cinched waist throughout the 1830s and some men continued to wear corsets into the 1850s as back support.) The corset was not attributed to any one figure, but rather grew out of the popular notion that rigidity and straightness of posture was a sign of nobility. Whalebone, a popular material in original corsets, is not bone at all, but baleen, which is a substance that is hair covered with enamel and is located in the mouth of the Right Whale. These The hair fibres run parallel and quite even so that a plate of baleen may be split its entire length to any degree of thinness without impairing its peculiar quality of lightness, elasticity and flexibility (Waugh 167). Baleen is also mold-able with heat and will retain the molded form when cold. In later centuries, spiral steel stays and solid spring steel busks replaced the whalebone and are used today. Other busk materials are oxhorn, ebonite, gutta-percha, steel and hardened brass. Although the advances in spiral steel stays do not come until later, there are second source pictures of iron corsets (and even some remaining specimens of iron
10 Durfee 9 corsets in museums) during the late 16th century that are used as orthopedic support for spinal deformities, not as intense stays for fashion purposes. These were full of holes, not solidly iron, so that the corsets could be lighter. These were then covered in silk and brocade and padded so they did not hurt the wearer. One of the reasons that corsets were advocated for originally, in addition to the popular fashion, is that doctors claimed that women were frail and needed the extra support a corset could give them (Freeman). One woman even went so far as to claim that your corset is more like a new layer of muscles than an artificial extraneous article of dress ( The Corset 42). Good posture is also advocated for by the Corset and Brassiere Association of America with the logic that once the abdomen is flattened and the small of the back is straightened via good corsetry, the pattern for good posture is set (Corset and Brassiere Association of America Foundations for Fashion 3). This line of thinking has been present in regards to the corset since the 16 th century when the corset and its rigidity became popular. The corset continued to be popular throughout the 19 th century due to the social pressure of propriety. A proper young woman wore a corset. The more confined she was, the more modest she was according to society s rules. This was not true of tight-lacers, however. Tight-lacing was frowned upon as something that was immoral. Due to the extreme popularity of the corset, the manufacture of the garment expanded and gradually grew to employ as many as 10 thousand in London in 1842 with nearly 25 thousand employees in provincial England (Corset and Brassiere Association of America Foundations for Fashion 21F). Initially, the manufacturers of corsets were men, but by the 1800s women had claimed the right to clothe other women
11 Durfee 10 and slowly pushed the number of men to 1 in every 25 corsetiere. The corset trade exploded after the introduction of Isaac Singer s sewing machine in One company, the Symington Collection, expanded so much that they had 150 different styles of corsets to choose from between the years of 1856 and 1900 (Page V). Although initial advocacy for the corset sped through the masses, by the late 19th century, popular movements formed to protest corsets through Dress Reform. The intent of this movement was to lessen the use of corsets and especially the practice of tight-lacing. Popular belief detailed that tight-lacing was a disgraceful practice that many women participated in. These women were viewed as immoral, wanton and silly. Dress reformers held the view that dress should reflect rationality and female dress did not. Some even viewed the corset as a sexual thing, inciting lust by revealing the form. Some doctors of the time concluded that the use of a corset and especially tightlacing altered the body by compressing the lungs and rearranging the internal organs. This put extreme pressure on sensitive areas such as the uterus, causing it to prolapse outside of the body; this was especially common after multiple pregnancies ( The Corset 76). Doctors corrected this condition with a contraption that was inserted into the body and pushed the uterus back into its proper place. Doctors also concluded that corsets were commonly linked to still births as corsets were still. According to Steele, it is possible that some women used tight-lacing to purposely abort a fetus ( The Corset 76). This was one of the many reasons reformers protested corsets as well. They believed it interfered with a woman s reproductive abilities and cried O, young women! O, young mothers! Undo your girdles! Do not be afraid to admit that from birth heaven created you to become mothers ( The Corset 59). Due also to the pressure on
12 Durfee 11 the lungs, many women swooned while wearing corsets. Another matter under pressure to reform was the use of long skirts, which trailed on the ground and gathered dirt. The long skirt was also under scrutiny for soliciting sexual lust when the skirt was lifted off the ground in order to move and revealed a woman s limbs beneath it. One solution to dress reform was supposedly to introduce androgynous clothing for both sexes, called equality clothing, so much so that it might be hard to tell the sexes apart (Fischer 33). The women would be clothed in pantaloons and a jacket that reached the knees. Both men and women would essentially wear larger versions of what the children wore during that time. Another reaction in dress reform was the anti-fashion sect, which required the participants to pay attention to what was in vogue, but do the opposite of what was fashionable at that point in time (Fischer 29). At one point there was also pressure to introduce anti-corset legislation, but the corset trade was too important an economic factor (especially in terms of the export trade) for any French politician seriously to consider legislation against it (Kunzle 184). Not many countries were in favor of this course of action because the corset trade was so widespread and impacting. In reality, dress reform was not very successful, but did affect fashion somewhat. The tea gown became a popular mode of dress around 1900 as it provided an opportunity to escape the corset but was still fashionable. The growing popularity of sports such as gymnastics and bicycling caused the alteration of garments to accommodate these sports (Fischer 171). Paul Poirot declared war on the corset because he considered the division of the female body into two a heavy bosom at the front and a jutting derriere at the back simply ridiculous (Seeling 24). His
13 Durfee 12 contribution to fashion had a large impact. He designed a long robe with a long skirt that began under the bust and fell straight to the floor. This design revealed the figure in a way that made the wearer appear youthful, supple, and obviously corset-less. He used his wife, who was slim and graceful, as his premiere model. After he ushered in a new mode of fashion, the corset officially declined near the 1920s when the ideal silhouette models after the Gibson girl in the slim and straight fashion. This look was achieved using corselettes, a longer version of the corset that extended past the hips using rubber and elastic, or even bandeaus, which flattened the breasts. Under the deft hands of Paul Poiret, and Coco Chanel, whose designs using light jersey knit revolutionized popular fashion in her own way, the corset declined in favor of garments that allowed women to move more freely, cost less and revealed a woman s actual figure instead of the figure of her corset. The corset made a brief reappearance in the 1950s due to Christian Dior and his luxurious ball gowns. Their meaning, however, changed the way the corset was seen. In this context the corset was no longer necessary, but the height of fashion for an evening out. More recently, Christian Lacroix popularized the corset as outerwear in the 1980s. The corset even made a special appearance in Madonna s Blond Ambition Tour in the early 1990s. Now the corset is seen as a statement, one that empowers women with the ability to choose whether she wants to flout a corset for a specific outing. If she does, now she is just as likely to wear a corset on the outside, as opposed to underneath her clothing as a foundation garment. It is clear that corset has been an important fashion garment that helped to shape current fashion for centuries. Following the s-shape that the corset has cut into history is an important aspect of understanding the impact of the corset for costuming purposes as
14 Durfee 13 well as appreciating the corset as a powerful asset for fashion. Although it is not used heavily now, recognizing the period of time which the corset was essential is important.

15 Durfee 14 Illustrations as per a Short Historical and Social Look Below, iron corsets once used for back problems. Please see the List of Illustrations on page 129.

16 Above, the corset used during the Elizabethan era. Durfee 15

17 Above, a bodice from the 1660s, which would go over the stays. Durfee 16

18 Below, the corset used in the 17 th century. Durfee 17

19 Above, the corset used in the 17 th century. Durfee 18

20 Above, the corset during the 18 th century. Durfee 19

21 Below, the corset during the 18 th century. Durfee 20

22 Durfee th century. Left, the corset during the

23 Durfee 22 Left, the corset in the Victorian Era.

24 Durfee 23 Even though they do not look like they have corsets, many flappers had to tamp down their bodies using girdles in order to achieve the boyish look of the 1920s.

25 Durfee 24 Left, a uterine supporter for help with a prolapsed uterus due to the corset.

26 Above, corsets from the Symington Collection. Durfee 25

27 Above, more corsets from the Symington Collection. Durfee 26


28 Durfee 27 Left, a child stay from the Symington collection. Right, a bloomer girl in her proposed bloomers during the Dress Reform.


29 Durfee 28 Left, a corset opposing design by Poiret. Below, another corset opposing design by Coco Chanel.

30 Dior, 1950s, returns the corset to fashion. Durfee 29
31 Durfee 30

32 Durfee 31 Christian LaCroix reintroduces the historical inspired corset into high fashion, 1990s.
.")
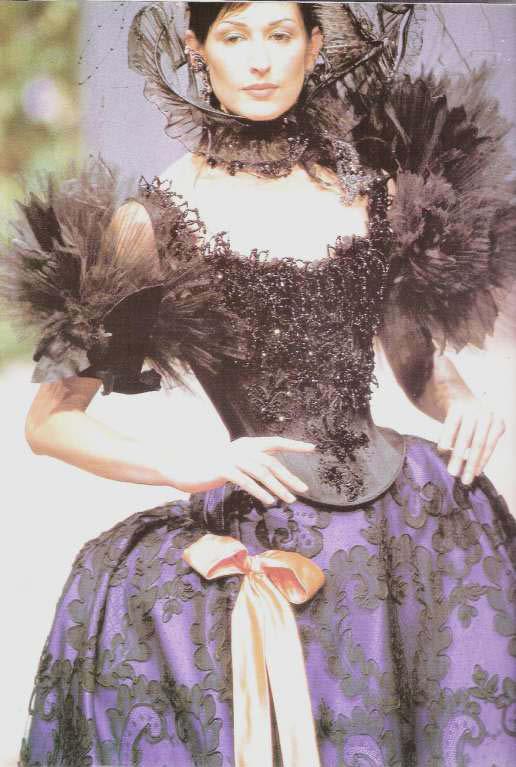
33 Durfee 32 The Constructive Process Choosing a Pattern The first action of this project required me to decide what kind of a corset I wanted to create. I found my ideal corset in a book cataloguing undergarments from the Victoria and Albert Museum (below). I loved the fact that it was smooth, had a wasp-waist and distinctive lines, making it stand out. Unfortunately, I was unable to locate a pattern that I thought was acceptable in order to duplicate this corset, so I had to turn elsewhere. During the acquisition of research, I found comments regarding Jill Salen s Corsets: Historical Patterns and Techniques. I found an historical pattern from the 1890s inside of this book and decided to base my project off of that corset.
34 Durfee 33 This corset struck me because it had a very distinctive curve to it. It definitely encompasses the wasp-waist style that was popular during the 1890s and that I am fond of. However, this corset is extremely frivolous with all of the lace and flossing. Flossing, as you can see in the picture above, are the flowers that are sewn into the corset with thread. These are in place so that the bones are unable to move around very much or poke out the top of the fabric. Another unique feature of this corset is the bust. Instead of having a flat bust like the brown corset on the previous page, this corset has bust gussets, lifting the bust away from the chest instead of compressing it. Having chosen a corset, the next step was to duplicate the pattern provided out of the book. I made a copy of the pattern and cut out the different panels so that I could replicate them.

35 Durfee 34 Replicating the Pattern I first began doing this by measuring from point A to point B and doubling the measurement, then drawing it onto a separate piece of paper. This however, was very inaccurate and did not produce the desired result. From there, Sandy Hedgepeth, my advisor, suggested that I use radial drafting, which was similar to what I was trying to do, but more accurate. I used the copy of the pattern and taped it to the bottom of a piece of butcher paper. Using a central point, point A, I moved around the pattern. I would measure from point A to the next point at the top of the panel. I would then double the measurement, but keep the same angle using a ruler, so that I was creating a larger pattern, as you can see in the picture below. This enabled me to make a duplicate pattern without altering any aspect of it. I continued this practice for all six of the panels, the center back (shown at right), the side back, side front, center front, bust gusset left and bust gusset right. It was very important also, to keep everything meticulously labeled. Corset panels seem similarly shaped, so they are easy to mix up. Some mix ups even come when trying to determine whether you are looking at the right side of the pattern piece, which represents the "right", or attractive side of the fabric, or the wrong side of the pattern. Labeling

36 Durfee 35 correctly can save a lot of hassle in the long run. Below, there is another example of a panel, the side front panel, that I replicated using the radial drafting method. Shown clearly in the picture below is the seam allowance, or the extra inch of paper that is used for extra allowance during the actual construction of the garment. At this stage of pattern drafting, that is not actually needed, so I had to cut that away. The seam allowance is not added until after you have lain out the patterns on the fabric and traced it, in order to give the cutter more flexibility. The next step in pattern drafting was to estimate how I needed to change the pattern to fit my body. The person the corset originally belonged to was much smaller than me, possibly around five feet tall and generally smaller around, as people during this time period tended to be petite. I am 5'6", 26" waist, 34" bust, 38" hip and so the original pattern would not work for me. The pattern needed to be longer and bigger around. Adding length is not very difficult, so I was able to take care of that first. All I did, at

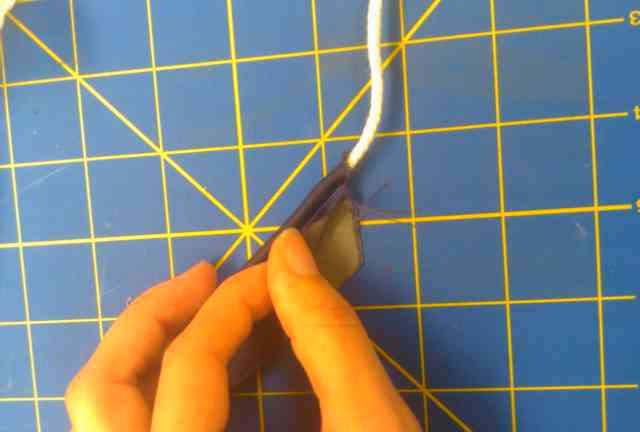
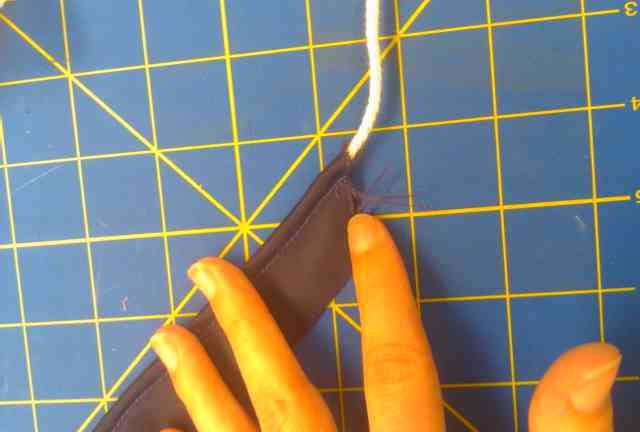
37 Durfee 36 Sandy Hedgepeth's direction, was add two inches in length. I cut across the middle of the body panels, the center back, side back, side front and center front, going through the width of these pieces. I then inserted a two inch strip of paper into that gap and cut around the paper to fit the original lines of the pattern. Below is a picture of the piece of paper that added length. On the following page is a picture of the panel once I added the length into it. You can see the line for the two inch gap between my fingers. On the following page, you can also see how clean the pattern looks, despite having altered it. Notice I still have the seam allowance attached to

38 Durfee 37 Below, the side front with added length and accidentally retained seam allowance.
39 Durfee 38 Creating the Mockup With the pattern completed, the next step in the process of construction is to create a mockup. A mockup is a practice garment before you use the actual, and usually expensive, fabric. For my mockup, Sandy allowed me to choose some jean material out of her stock of cloth in the costume shop. Jean is sometimes used for corset mockups because it is much stiffer than muslin, which is used for normal garments. The actual fabric that corsets are usually made from, coutil, is extremely stiff. After all, the point of a corset is to create a foundation which basically alters your body in order to fit the silhouette of the time period. You cannot achieve this look, in my case the wasp waist look of the 1890s, if your wobbly bits are still allowed to wobble and your bulging bits are still bulging. In the case of corsets, stiff is good. The jean that I chose was stiff, not stretch jean, and even on the bias, or the diagonal direction of the fabric, it did not move very much. After completing the pattern and choosing mockup material, the first step in the mockup is laying out the fabric on the table. You want to have the fabric doubled so that you only have to trace out the pattern one time. A pattern only has one side of the garment etched out, and then you create the other, opposite side when you double the fabric when you cut it out. In order to trace onto both layers of fabric, you generally use a tracing board, which slides underneath of the fabric and lies against the cork table. Using pins, the fabric is pinned to the tracing board so that there is a smaller margin of error. You pin the pattern pieces over the top of the fabric and then use tracing paper and a tracing wheel to make your marks on the actual fabric.

40 Durfee 39 In my case, I used yellow tracing paper because it was the brightest against the blue fabric. Unfortunately, I forgot to put the tracing board underneath of the fabric, so I had to go back and retrace the second half of the garment. I was very careful to remember to flip the pattern over onto its opposite side, as the second half of the garment is the opposite of the first half of the garment. Below, you can see all six of the pattern pieces, the tracing paper with its yellow edge, and the tracing wheel, which you press into the tracing paper underneath of the pattern to stick the color onto the fabric. Notice how many pins are used so that the fabric and the pattern pieces cannot move around.


41 Durfee 40 Jean fabric, doubled over and pinned for the first mockup. Below, you can see a picture of me tracing a pattern piece using tracing paper and wheel.

42 Durfee 41 Right, measuring the distance of the pieces from the selvedge. This is so that you are cutting on the same grain direction for each piece. The idea is that if you control the grain direction, the garment will not stretch in odd ways once it is on the body.

43 Durfee 42 Measuring from piece to piece to maintain the direction of the grain. The next step in construction after tracing out the mockup: cutting it out. Again, as the pieces are cut away, it is very important to meticulously label so that things to not get very confusing as you sew the pieces together. While some pieces, such as the center back and the center front are very distinctive, the other pieces were so similar to each other, that I sometimes found myself confused on whether they were the right pieces and whether they were upside down and backwards. Labeling almost became paranoia for me. As I cut out the pieces and labeled them, I also set them out as they would be if I were to actually piece them together. This was a fun trick to not only show myself how much I had already done, but to make sure that the pieces seemed to fit together correctly. On the following page, you can see Mockup #1 laid out before I began sewing.
 how deep that chunk is")
44 Durfee 43 Mockup #1 laid out and ready to be sewn. From top left, bust gussets, left: center front, side front, side back, center back, center back, side back, side front, center front, bust gussets. Notice on the panels on the far left and right, the center front, (the one with the diagonal bottom and the chunk missing out of the top middle, right beneath the bust gussets) how deep that chunk is cut out of the panel. That is where the bust gussets go. This panel is the one I started with, adding the side front and then the bust gussets to it. It was actually surprisingly difficult. It felt like the bust gussets did not want to fit together with the piece. On the original pattern, there are hash marks that are used to line up pieces correctly. Even utilizing those hash marks, it took me about half an hour (on each side) to put the bust gussets onto the center front panel. What I did initially was keep the bust gussets separate and sew them one at a time onto the center front panel. This was very difficult to line up and the stiffness of

45 Durfee 44 the jean fabric did not want to be manipulated into the curves of the bust. If the jean material did not like it, the coutil that would come later certainly would not want to cooperate. Having added the side front panel to the center front panel first actually made everything more difficult as well, as sewing the bust gussets was delicate and having an extra panel's worth of material did not make manipulating the sewing machine any easier. Below and on the following page, the same layout from different angles and adding the side front to the center front.


46 Above, laying out Mockup #1. Below, pinning the side front to the center front. Durfee 45

47 Durfee 46 When all the pieces had been added to their appropriate mates, I used white thread and stitched over the seam line, so that I knew where the pattern said the closing stitches were supposed to occur. Above is a picture of the first mockup, with the white stitching line in place. Notice also, how the left and right edges of the garment are turned and ironed flat. I added an eyelet strip to use as an enclosure during the fitting in order to emulate the finished fit as much as possible, as is detailed below.

48 Durfee 47 Before the actual fitting however, I needed to make sure the garment was ready for the fitting. I ironed all of the seams flat, so that there would not be bulk fighting against the line of the body. This is an important step to remember as including more bulk than necessary can ruin the look of the silhouette and garment itself. On the following page is a picture of the corset with wrong side up, after pressing.

49 Below, the first mockup, pressed. Durfee 48

50 Durfee 49 Fitting the Mockup The fitting for the first mockup was an interesting experience. Sandy used shoe laces and tightened the corset so that the edges of the fabric touched where possible. The immediate problem lies in the fact that the center back edges did not line up. The edges at the top and bottom of the corset touched; however, the middle left a gaping hole about five inches wide in the center of my back. This meant that the corset did not fit properly, among other issues that gave evidence to this fact. The bust gussets were too low, the side back and side front panels were too low and too thin as well. In the following picture you can see the corset after it has been fitted. It looks akin to a Frankenstein corset, with crude added bits of fabric and stitching held in place by safety pins. Notice the large dip in fabric under the arm, where the side front and back are too low. Also notice the extra fabric in place at the bust where we needed to add more fabric. At this point in the process, I was beginning to feel very overwhelmed and dismayed by the fact that this corset did not fit correctly on the first try. Part of the problem with this project, and it was a very serious problem, was
51 Durfee 50 that the pattern for the corset was so different from normal corsets. The bust gussets were the main problem, creating an obstacle that we had no sure way of finding an answer to within the frame of time we had to work on the corset. I think part of the problem with the bust gussets lie in the fact that the original corset, which you can see below, again, did not use just coutil for the entire corset. Jill Salen estimated that the corset was made from either card, or cording. Cording, in this instance, is what I think they used in the bust in order to make it more flexible. Cording is simply string that is passed through fabric, only in this case, many channels were used side by side to reinforce each other into a set shape, i.e., the bust.

52 Durfee 51 We also chose to add another discrepancy from the original corset in our corset by not including the original straight busk. In the picture above, you can see the busk as the center closure piece. The busk closures are the silver brackets and nails down the center of the corset. The busk is very difficult to work on and is best not included for beginners, which I am, so we decided to omit this piece of the puzzle in favor of a stitched front. Drafting the Second Pattern After fitting the corset and realizing that I had much to do still, we got to work on drafting a second pattern. This required a lot of Sandy's help, as I had never done this before. Basically, we used the fitted corset and drew out new lines onto the first mockup fabric to denote where the pattern should have gone. We then used the old pattern and a tracing wheel and traced where the new lines would go on the pattern. In the case of the bust and side front/side back pieces, however, we had to add fabric. In order to achieve this in pattern form, we simply taped more paper where it was needed and traced it out. In the picture below, you can see where the new pattern
53 Durfee 52 piece is much longer than the first mockup denoted. Notice the white stitching line where the first mockup said the bust gusset ought to end. By changing the bust gusset, however, we also cut into the side front panel. This meant that we needed to alter the side front panel in pattern form as well. In order to make sure all of the pieces fit together after altering them, I needed to true the pattern, or make sure that each pattern piece was sufficient in length to match up to the piece next to it. On the next page you will see the new altered side front panel as I true it to the new center front panel. Truing in the pattern stage makes everything easier in the long run, because then you are not wasting as much time and material as getting to the stage where you stitch everything together, and then realizing that the pieces do not fit properly.
54 Durfee 53

55 Durfee 54 Cutting and Assembling the Second Mockup The second mockup went very similarly to the first. With the new altered pattern, I cut out jean material for the second mockup, surged the edge so that it did not fray (a step I omitted with the first mockup, which was more annoying than a true hindrance), stitched the pieces together and edged the stitching line in white. I pressed open the seam allowances, added the eyelet strip to the center back edges, and we fitted it. There were only very minor changes that needed to happen from this fitting, which were very easy to correct. Below are the pictures documenting this procedure. Laying out the new pattern in order to cutout the second mockup.


56 Durfee 55 Above left, surging the pattern. Above right, the edge, surged. Below, the pattern laid out for sewing.


57 The pattern and fabric laid out for marking and sewing. Durfee 56


58 Durfee 57 You can see the white stitching line, the surged edge, and how closely the fabric matches the pattern beside it. Below, the second mockup center back pattern compared to the original pattern.

59 Durfee 58 Left, the second mockup center back pattern. Below, the second mockup copy in comparison to the first.
60 Durfee 59 Creating the Final Pattern and Cutting Out the Final Material After making the minor adjustments needed for the final pattern, I made a new, clean copy of the paper pattern, so it would not be as confusing. I then repeated the process. Below is a picture of the new pattern piece and the two bust gusset pieces ready to be traced and cut out. The bust gusset pieces look very different from their original form. This sometimes happens, as of course, my body is not from the same period as the corset. In the next picture we see that I have remembered the tracing board underneath of the doubled over fabric, and I have laid out the pattern pieces and traced them. This fabric is coutil from Farthingales in Canada. As I am doing a double layer corset, which includes an inner

61 Durfee 60 layer of cloth and an outer layer of cloth, I have two different fabrics. The inner layer is a fine herringbone coutil, extra stiff due to the fine weave, in plain black. This coutil specially made for corset projects. The top layer, or outer layer, is also coutil, but it is black with roses etched into it to make it finer than the inner layer. Below is the inner layer, the basic coutil.


62 Durfee 61 Above, tracing out patterns in the final fabric. Below, cutting out the center front pattern from the final fabric.


63 Durfee 62 Panels cut out in the inner final fabric, with the seam lines redrawn in silver gel pen so they are easier to see. I found that the yellow tracing line would disappear after a while from touching the fabric while manipulating it and that was a bit of a hindrance when I could not find the sewing line. The gel pen was much more permanent and bright. I lined the sewing line in the gel, and labeled each piece.

64 Durfee 63 Above left, I am surging the inner layer of the final material. Notice how it barely flops as it goes through the machine, like normal material. Since this is coutil, it is very stiff. If I could have gone back and redone this project, I would have washed the fabric before using it, making it more pliable. Without washing it, I felt like I was trying to sew through cardboard. This was especially difficult when I was trying to maneuver pieces for places such as the bust, where there are interesting curves and angles happening that the fabric does not necessarily want to cooperate with. Above right, you can see the thread left over from surging, which I will then snip off. The point of surging at this point is to keep the edges neat and to keep the fabric from fraying as it is used. It limits the ugliness of the garment and keeps from creating more hazards than necessary.

65 Durfee 64 Above, the inner layer of final fabric is all cut out, surged, labeled and lined. It is ready to pin and put together. I think even the picture shows how flat and stiff the coutil is. Working with that fabric was difficult, especially during later steps. There were a couple of different philosophies about double layer corsets regarding how they go together. Linda Sparks, author and owner of Farthingales, writes that the best way to put a double layer corset together is to take the two layers and sew each panel from one layer to its match from the other layer, then to sew everything together like normal. Personally, I find that procedure very confusing, so I was not a big fan of that. Sandy Hedgepeth suggested that I just put the two separate layers together as normal, and then sew along the edges once in order to put them together. I go into further detail later.

66 Durfee 65 Above, the bust gusset going together for the inner layer of final fabric. When it opens, it is only one side of the bust, forming a complete cup. You will see this on the next page. The bust gussets were definitely one of the most difficult parts of this corset. It is not something I will lightly seek to reconstruct again.

67 Durfee 66 Right, the entire left side of the inner layer is being sewn together. Being as accurate as possible is a plus because it cuts down on mistakes later. Using a series of double checks, such as labeling, pinning and general intuition is helpful for putting together garments. Can you see the yellow lines on the leftmost panels? Those are channel markers for later, when I will make boning channels. I decided to put them in just in case it would be too difficult (lumpy) later. These go on every panel, including thick casings on the bust. The thick casings will house 1/2" boning and the rest of the panels will include 1/4" boning, all of which I ordered from Farthingales in Canada. I have to say that this part of the project, putting everything together, was by far my favorite. It made me feel as though I was actually accomplishing what I set out to do, which is a great feeling.

68 Durfee 67 Adding the Piping After putting the inner layer together, I put the outer layer together, which is virtually the same process as the inner layer, but with different material. I used coutil with roses printed into it. I love the material because it adds a little beauty to other wise dense material. After cutting the two layers out and piecing them together, the next step was to put the two layers together. Sandy and I decided to start with the top of the garment, stitching the right sides of the two layers together with piping in between them, so that when turned, they would be right side out with piping on the right side. This meant that I needed to make some piping. I was stuck between blue, red or purple for the piping. I decided on a purple satin cloth for the piping, because it was my favorite from the stash the costume shop already had. I ironed the material and laid it out on a table. I used a rule and cut two inch strips from it going across the bias, or diagonal, of the fabric. The bias contains much more stretch than the straight of grain, which is why it is used for piping, so that it stretches with the material it is piping. I then used cord and folded the purple cloth over it. I used zipper foot attachment and made sure the cord was as snug as it could get as I sewed it into the purple cloth. Voila! Piping. Next page, the finished piping.
69 Durfee 68
70 Durfee 69 I mentioned that I needed the piping to go in between the two layers of fabric. However, I did not want to sew all three layers at once. I decided to pin the piping to the outer layer of the corset first, since that side would be visible to everyone. I had to redo this a couple of times because I would start and end with too little on each side, which was wrong and very frustrating. In the end, I pinned all the way to the center of the bust, drew out about four inches of piping, and then restarted on the other side of the bust. The extra piping was drawn out because I did not want the busts to be connected to each other. While putting together the two layers, Sandy and I decided that perhaps the complication of the bust from the original corset was that it was not meant to be attached at the décolletage. We decided that part of the intention of the bust was that you lift your bust, set the corset around you, and then tighten it, giving your bust lift. This is different from most corsets as they tend to tamp down on your bust. So we left about two inches open right at the center front so that the bust was able to have some room to work. So the extra piping was in place so that I could finish it separately from the other piping. I then stitched the other layer on top of the outer layer and the piping. Keeping the right sides together, I was able to decide how I wanted the center bust to look. It was a toss-up between doing a heart shaped thing with it or a rectangular cutout. I ended up just going with the rectangular cut out because it was cleaner and had less of a Star Trek feel to it. Actually, about the time I was making all of these decisions, the Golden Globes were happening. Sandra Bullock had a red dress that had the exact same rectangular bust cutout in it. I think I made the right decision. So with the piping along

71 Durfee 70 the bust finished, I was able to turn the layers so that their right sides were out. I then had to re-turn it and iron down the seam allowances because there was too much bulk there.

72 Durfee 71 Adding the piping to the outer layer. About to pin the two layers and the piping together.

73 Durfee 72 Above, the right sides are still together and I peeled down the center front about two inches down and two inches wide to create space in the bust. I will have to secure it with high polymer thread and sew it by hand to keep it in place, shown on the next page. I finish the piping here by tucking it into the inside of the corset.
74 Durfee 73

75 Durfee 74 After ironing everything down, before turning it again, I needed to remove some seam allowance, and with it, extra bulk. This was a little nerve wracking, because if I had done this entire step wrong, I would probably need to go quite a few steps back in order to fix it, possibly even back to re-cutting fabric. Any time you cut fabric away, you really need to think about whether you are making the right decision. In this case, it was a good decision and I did not need to go back and fix anything.
76 Removing the seam allowance at the top. Durfee 75

77 Durfee 76 Above, the bust cut is finished, the piping is done and the garment has been ironed and turned.

78 Durfee 77 Adding the Channels and Bones The next step toward finishing the corset was creating the bone channels. I tried to use the yellow lines I had originally marked for the bone channels from the pattern, however, that did not end up look right. Instead, I started in the middle and worked my way out, measuring everything so the bone channels looked symmetrical. When I stitched the channels, one very important thing to remember was to keep the panels all pinned at the seam so that they could not move side to side and make the corset lopsided.

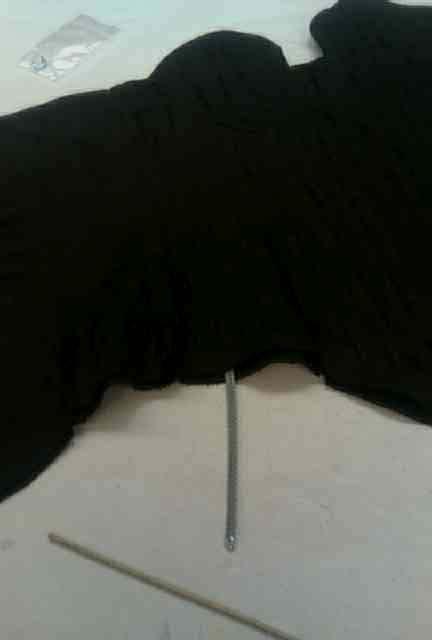
79 Durfee 78 With the bone channels stitched, I began to measure the length of the channels in order to start cutting the bones. I then use the measurements and stretch the bones out so that they can be measured, and cut them using a C7 tool, which is actually used for air pipe for air compressors, but worked dandy on my little project. In fact, I cut bones in 2008 for the Western Oregon University Theatre production The Mystery of Edwin Drood, in which many of the women were wearing corsets. We used needle nose pliers and wire cutters to cut through the bone. This process for one corset would take about four hours, on the short end. It was awful. Your hands would hurt for days afterward as well. The C7 was amazing and it only took about two hours for me to cut all 32 bones.


80 Top, measuring bones, above, the C7 and boning as it s about to be cut. Durfee 79


81 Durfee 80 The trick with the bones is to cut one side of it, and then the other. The bones are actually made out of spiral steel, so you can snip one side, then the other and it will snap off of the line. Once a bone has been cut out, you have to cap it to keep the steel from poking through the fabric and into the wearer. I ordered U-tips. Which look a little like horseshoes and slip over the end of the bone and you squeeze the middle, below, and then the edges of the cap, next page, top.


82 The finished bone, cut, capped, and ready to insert. Durfee 81
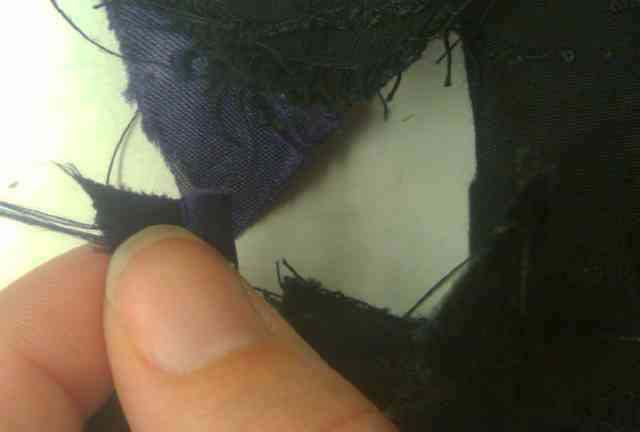
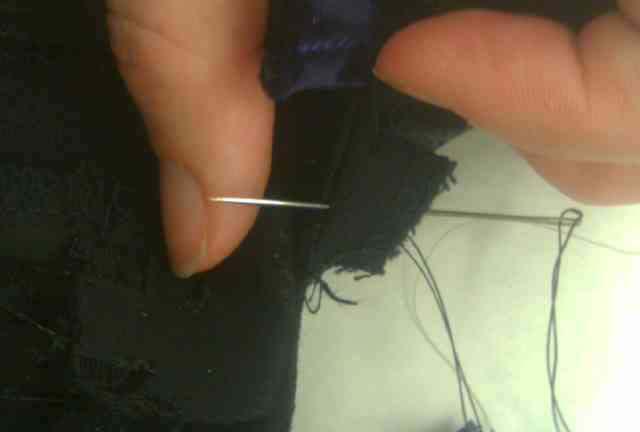
83 Durfee 82 Inserting the Bones I had bit of difficulty putting in the bones in the center of the corset, where the busts are. The reason behind this is because there are bust gussets in this corset, there is seam allowance at the bottom of them, and in order to insert the bones, they have to go through the opening in the seam allowance, which is not visible. So, I was basically poking a bone into the corset in the dark, which was fine, until the cap decided to pop off and get stuck inside of the corset. That was not good. In order to get the cap out, I had to pop open a stitch and reach in and poke it out with a stick. So I had to develop another method.
84 Durfee 83 I ended up using the stick, or barbecue skewer, and inserting it first, below. I poked around until I found the opening of the seam allowance and the skewer poked through to the bust, which we could see the outline of and feel. So I then inserted a safety pin and used that to lift the fabric away from the skewer where the bust seam allowance was. This way when the bone was inserted, next page, there was room to maneuver without losing the cap off the top of the bone. It wasn't fool proof though, seeing as I lost two or three more caps after that, but it ended up getting the job done. After all of the bone was inserted, we decided to have another quick fitting to make sure everything was fine before we closed up the corset. I reattached the eyelet tape to the ends where the lacing bones would go and the fitting went really well. The bust looked better, but honestly, not the prettiest there ever was. Again, the bust was the negative aspect of this corset.
85 Durfee 84


86 Durfee 85 Above, the eyelet tape attached where the lacing bone should be. Closing the Sides and Adding the Lacing Bone After the fitting was completed, I closed up the sides of the corset, left. Following that, I needed to add the lacing bone. The lacing bone is a strip of steel about 13" long, which varies depending on what you order, with holes for grommets in it. You insert it between the two layers of the fabric and then insert grommets into the

87 Durfee 86 holes so that when the corset is laced, it has a firm surface to brace against. Sometimes corsets contain two bones set on either side of the lacing panel to reinforce it, but I feel that the lacing bone is much cleaner. Below, pinning the sides closed.

88 Durfee 87 Left, inserting the lacing bones. After inserting the bone, I placed it in the middle of the panel, and penciled in the holes where I felt the grommets should go.
89 Durfee 88 Right, the grommet holes are placed with pencil.

90 Durfee 89 Left, I edged the bottom of the bones and lacing bone with back stitches so that they would not fall out.

91 Durfee 90 Setting the Grommets After setting the grommet holes, I needed to set the grommets. I used Sandy's hand grommet setter on the floor of the costume shop. You set the hat of the grommet upward on the bottom plate, then place the setter with the grommet top in, and tap it together with a hammer. I ran into some unfortunate complications when I placed the grommets backwards, putting the black finished part on the inside of the corset instead of the outside where it belongs. I had an interesting experience with needle nose pliers to get those grommets out and redo them.

92 Durfee 91 Finishing the Bottom Piping After the grommets were set and finished, I had one more edge that needed finishing: the bottom. I had another strip of purple piping set aside for the bottom. All I did was attach that to the outer layer like before. However, instead of having something to turn over, I had to turn under the piping, the outer layer and the inner layer, and hand stitch it down while keeping it taut so it would look nice. This was one of my favorite parts because I love to hand sew. Left, I am adding the piping to the bottom.

93 Durfee 92 Top, stitching up the bottom piping. Left, the finished bottom piping.


94 Durfee 93 Reviewing the Patterns and Mockups Above, the pattern for mockup #1 Below, the center back panel for mockup #1


95 Durfee 94 Above, the side back panel of mockup #1 Below, the side front panel of mockup #1


96 Above, the bust gussets of mockup #1 Below, the center front panel of mockup #1 Durfee 95

97 Durfee 96 Above, the center back panel of mockup #1 needs to be taken in. Below, the side back panel of mockup #1 also needs to be taken in.


98 Durfee 97 Above, the side front panel of mockup #1 needs taken in. Below, the center front panel of mockup #1 needs taken in, but only a small amount.

99 Durfee 98 Above, the bust of mockup #1 needs to be extended to the drawn line and the panels need to be extended too. Below, the bottom edge of the corset is pinned for length.


100 Durfee 99 Above, the top of the center back panel of mockup #2 needs taken in slightly. Below, the bottom of the center back panel of mockup #2 needs to be taken in as well.


101 Durfee 100 Above, the center back of mockup #2 needs taken in, as shown on opposite side. Below, the side back of mockup #2 needs taken in just slightly.


102 Durfee 101 Above, the bust which was extended, needs taken in right at the center for mockup #2. Below, mockup #2 lined and completed.


103 Durfee 102 Above, the pattern for mockup #2 Below, the center back panel for mockup #2

104 Durfee 103 Above, the side back panel of mockup #2 Below, the side front panel of mockup #2, notice how large the curve at the top is compared to the same panel from mockup #1


105 Durfee 104 Above, the bust gussets for mockup #2 Below, the center front panel for mockup #2
 and")

106 Durfee 105 Above, the center back panels of mockup #1 (top) and mockup #2. Below, the side back panels of mockup #1 (top) and mockup #2.
 and mockup")
107 Durfee 106 Above, the side front panel of mockup #1 (top) and mockup #2 Below, the bust gussets of mockup #1 (top) and mockup #2.


108 Durfee 107 Above, the center front panel of mockup #1 (top) and mockup #2. Below, the final pattern.


109 Durfee 108 Above, the final center back. Below, the final side back.

110 Durfee 109 Above, the final side front. Below, the final bust gusset.


111 Durfee 110 Above, the final center front. Below, a comparison of the three center back panels.


112 Durfee 111 Above, a comparison of the three side back panels. Below, a comparison of the three side front panels.


113 Durfee 112 Above, the three bust gusset panels. Below, the three center front panels.


114 Durfee 113 Above, mockup #1. Below, mockup #2.


115 Durfee 114 Above, the finished corset. Left, a progression of mockups and the final product. Notice how much bigger they get as they continue, both in width and length.


116 The bottom piping of the corset. Durfee 115

117 Durfee 116 Above, the bottom piping of the front of the corset, viewed from the inside. Below, the bottom piping viewed from the front.


118 Durfee 117 Above, the bust with the cutout and piping. Below, the bust cutout and piping finished off into the corset itself.


119 Durfee 118 Above, the lacing bone with grommets set into it. Left, the back of the corset as it should look when laced.

120 The Final Product Durfee 119 The finished corset viewed from the front on me. Taken by Meghan Leigh Keffer, photography and art student at Western Oregon University.

121 The corset, extremely boned and yet possesses a strong curve with the body. Durfee 120

122 Durfee 121 A close-up of the front of the corset. Notice how awkward the bust looks. I feel that it is too stiff to accomplish what the original pattern was able to.

123 Durfee 122 The corset from the back. Notice how tightly it is laced, down to about 1/2", which is how it is supposed to fit.

124 Durfee 123 Notice how high the top of the corset goes up: right between the shoulder blades. It limits your posture to correct posture, especially with the steel lacing bones in place right along the spine.

125 Durfee 124 You can distinctly see how the corset pinches in the waist in this picture, creating the wasp-waist look.

126 Durfee 125 The curve of the corset and how tightly it is laced is apparent in this picture showing the back of the corset.

127 The final garment from the back. Durfee 126
2016 Taylor & Francis
 The panels of 1915 Deep Skirted Corset are designed to lengthen the body to create a long slim silhouette. From the collections of Leicester County Council: Symington Collection. England. 1915 Deep Skirted
Regency Gown Pattern Instructions
 Regency Gown Pattern Instructions Sense and Sensibility Clothing, 1998 (Revised 2003) Notes: I created this pattern after viewing three extant gowns belonging to museum collections in Virginia, D.C. and
No-Sew LED Wristband. Created by Kathy Ceceri. Last updated on :23:40 PM UTC
 No-Sew LED Wristband Created by Kathy Ceceri Last updated on 2018-11-13 09:23:40 PM UTC Guide Contents Guide Contents Overview Playing with LED Options Suggested Parts List -- Electronics Suggested Materials
EC Altering Women's Ready-Made Dresses
 University of Nebraska - Lincoln DigitalCommons@University of Nebraska - Lincoln Historical Materials from University of Nebraska- Lincoln Extension Extension 1961 EC61-427 Altering Women's Ready-Made
from the Weaving Room WEAVING ROOM PATTERNS ON STAGE
 from the Weaving Room WEAVING ROOM PATTERNS ON STAGE 1 Costume and Clothing Design 2001 Owen Carey 2001 Owen Carey 2 from the Weaving Room WEAVING ROOM PATTERNS ON STAGE In the summer of 2001, I was invited
2009-CE-HE (DRESS) HOME ECONOMICS (DRESS AND DESIGN)
 HOME ECONOMICS (DRESS AND DESIGN)") HOME ECONOMICS (DRESS AND DESIGN) AIMS The aims of the examination are to test whether candidates have acquired : 1. an understanding of the place of textiles in modern fashions and the effect of social,
HOME ECONOMICS (DRESS AND DESIGN) AIMS The aims of the examination are to test whether candidates have acquired : 1. an understanding of the place of textiles in modern fashions and the effect of social,
HOME ECONOMICS (DRESS AND DESIGN)
") HOME ECONOMICS (DRESS AND DESIGN) AIMS The aims of the examination are to test whether candidates have acquired : 1. an understanding of the place of textiles in modern fashions and the effect of social,
HOME ECONOMICS (DRESS AND DESIGN) AIMS The aims of the examination are to test whether candidates have acquired : 1. an understanding of the place of textiles in modern fashions and the effect of social,
International Journal of Undergraduate Research and Creative Activities. Volume 5 Article 2
 International Journal of Undergraduate Research and Creative Activities Volume 5 Article 2 June 2013 Seams Brash Megan M. West Central Washington University, jonemega@cwu.edu Andrea C. Eklund Central Washington
How to Make a Basic Skirt
 How to Make a Basic Skirt By: burdastyle http://www.burdastyle.com/projects/how-to-make-a-basic-skirt This tutorial walks you through how to draft a basic one-dart skirt sloper. This exercise can lead
EC Altering Women's Ready Made Dresses
 University of Nebraska - Lincoln DigitalCommons@University of Nebraska - Lincoln Historical Materials from University of Nebraska- Lincoln Extension Extension 1972 EC72-427 Altering Women's Ready Made
News You Can Use. LivingSoft Subscriber Newsletter Volume 19
 News You Can Use LivingSoft Subscriber Newsletter Volume 19 The Summer 2012 Collection Every time Livingsoft releases a seasonal pattern collection, support is added for some new style or fashion trend
Making Perfect Pants
 Making Perfect Pants Guide C-227 Reviewed by Wendy Hamilton 1 Cooperative Extension Service College of Agricultural, Consumer and Environmental Sciences Women s fashions come and go, but pants are here
Secrets of the Victorian Corsetmakers LUCA COSTIGLIOLO ~ SCHOOL OF HISTORICAL DRESS ~ LONDON, UK
 1872 evening gown by Luca and his students at the Centro Sperimentale di Cinematografia in Rome Secrets of the Victorian Corsetmakers LUCA COSTIGLIOLO ~ SCHOOL OF HISTORICAL DRESS ~ LONDON, UK Luca discovered
~========================~
 8-1303 Tooe ZTA245.7 B873 no \'3J~3L-~=============i1 CHILDREN'S CLOTHES,SIZE AND SELECTION ~========================~ Texas Agricultural Extension Service. The Texas A&M University System. Daniel C. pfannstiel,
CHECKPOINTS FOR A GOOD FIT It is difficult to establish rules and regulations for proper fitting of a particular garment because so many factors enter
 fitting series C, \ 91am the (Ram J/{uSQ Lm (Dnege The basic muslin dress is designed to help the woman who sews solve her individual fitting problems. If selected properly and made accurately the dress
The Basics Hemming.
 When planning a wedding, the dress is usually the centerpiece of the entire event. Despite the importance of getting the gown to look just right, many brides wait until the last minute to get it altered
COLOMBINE Maxi dress with ruffles
 COLOMBINE Maxi dress with ruffles Maxi dress with ruffled straps or full back based on the Colombine pattern Sizes 2, 3,, 6, 8 and 10 1 FOREWORD In order to sew this version of Colombine, you must own
Create your own handmade drum lampshade!
 Create your own handmade drum lampshade! Using your own you can make a one-of-a-kind lampshade for a lampbase or to use as a pendant to hang from the ceiling. Included in the kit: 1 x Lampshade ring set
Class: XII Fashion Studies Marking Scheme Time: 3hours M.M 70. S. No. Section A Marks
 Class: XII Fashion Studies Marking Scheme 2018-19 Time: 3hours M.M 70 S. No. Section A Marks 1. Clothing is a general term referring to actual objects related to the human body. 1 Apparel- garments made
PERFECT FITGUIDE DO YOU REALLY KNOW YOUR SEWING PATTERN SIZE? Find out how to use your own measurements to determine your pattern size.
 ? PERFECT FITGUIDE DO YOU REALLY KNOW YOUR SEWING PATTERN SIZE? Find out how to use your own measurements to determine your pattern size. SimplicityFITGUIDE_Brochure_2015.indd 1 SIMPLICIT Y FIT GUIDE A
My BASICS. Denim, Denim, Denim
 My BASICS Denim, Denim, Denim That s right this section is a big one for me! I love denim from the bottom of my heart. Growing up in Southern California, it was pretty much a given that denim was the fabric
Make a Metal-Frame Purse Costume College 2008, instructor Trystan L. Bass
 Make a Metal-Frame Purse Costume College 2008, instructor Trystan L. Bass Historical Background: The earliest surviving metal-frame bags date from the 1400s and functioned as coin purses and alms bags
GUIDE TO A PERFECT MEN S SUIT FIT
 GUIDE TO A PERFECT MEN S SUIT FIT We value quality and perfection. We know that every man is different. Your size, posture, figure, and the shape of your body all change the way your suit fits. This is
OLDE ANNIE PRIMITIVES
 OLDE ANNIE PRIMITIVES SCARECROW HEAD TUCKS Pattern #148 6 H x 5 W Pattern is the sole property of Olde Annie Primitives and may not be reproduced for sell! I have gone through great effort to assure pattern
Patterns and Necklines
 South Dakota State University Open PRAIRIE: Open Public Research Access Institutional Repository and Information Exchange Cooperative Extension Circulars: 1917-1950 SDSU Extension 11-1930 Patterns and
Kataryn Mercer mka Caryn DeCrisanti s Florentine Sottana and Maniche
 Kataryn Mercer mka Caryn DeCrisanti 1560 s Florentine Sottana and Maniche The Garments Sottana (Dress) The sottana began life as a dress that was typically worn beneath another gown, sometimes translated
EC Foundation Garments : Selection, Fitting, Care
 University of Nebraska - Lincoln DigitalCommons@University of Nebraska - Lincoln Historical Materials from University of Nebraska- Lincoln Extension Extension 1956 EC56-410 Foundation Garments : Selection,
A few notes about PDF patterns from Designs by Jude...
 A few notes about PDF patterns from.... This PDF pattern requires legal size paper (8.5 x 14 ) or A4 size paper (8.27 x 11.69, 210mm x 297mm). It will not print on standard letter. Patterns containing
A Novice's Guide to Draping
 A Novice's Guide to Draping By: joboenvogue http://www.burdastyle.com/techniques/a-novices-guide-to-draping This is from my own experience with draping, so it s only going to be advice for people like
Men s Suit Measure your best fitting suit
 Men s Suit Measure your best fitting suit Please note that the suit should be laid flat on a table or smooth surface for proper measurement. JACKET HALF CHEST Button up the coat and lay it on flat surface.
A Highland Revival Drawstring Plaid
 Introduction A Highland Revival Drawstring Plaid The late 18th and early 19th centuries were a period of great variation and change in the development of Highland Dress. Covering much of the reign of Geo
Why Plastic is Better than Steel. Written by Luca Costiglio)o
o") 911n..uutL{)n.s ReuteaW. THE CORSET. AKER'S COMPA.IOK Why Plastic is Better than Steel Written by Luca Costiglio)o Making a corset was my first sewing experience. I was fourteen and it was 1991. I wanted
911n..uutL{)n.s ReuteaW. THE CORSET. AKER'S COMPA.IOK Why Plastic is Better than Steel Written by Luca Costiglio)o Making a corset was my first sewing experience. I was fourteen and it was 1991. I wanted
Cooperative Extension Service College of Agricultural, Consumer and Environmental Sciences
 Pattern Alteration 1 Guide C-228 Revised by Wendy Hamilton 2 Cooperative Extension Service College of Agricultural, Consumer and Environmental Sciences A comfortable, attractive garment fits properly.
Tag #PatternOrchard on social media when sharing photos of items made from a Pattern Orchard pattern to spread the word about this free resource.
 GARMENTS PERMIT Fitting fabric to the human body This tutorial is provided for free. It is for personal use, but may be shared in a social sewing group or public school to teach others. It is not to be
Issue 87 August issue 2016 MOTIFS & TEMPLATES. Use these guides to get started today. MAXI DRESS By Melissa Mora
 Issue 87 August issue 2016 MOTIFS & TEMPLATES PRINT OUT & KEEP Use these guides to get started today MAXI DRESS By Melissa Mora On page 18 of Sew Magazine August Issue When printing from Acrobat, be sure
CHAPTER 12 Children's Clothing Analysis of the Sizing of Children's Clothing
 CONTENTS: CHAPTER 1 Pattern Designing Description of Pattern Designing Equipment Model Forms and How to Use Them Analysis of the Feminine Silhouette Explanation of Patterns Procedure Used to Make a Pattern
WEE WEKA INSTRUCTIONS FOR SEWING A POCKET NAPPY WITH LEG GUSSETS
 WEE WEKA INSTRUCTIONS FOR SEWING A POCKET NAPPY WITH LEG GUSSETS Leg gussets help to guard against mushy whoopsies from escaping through the leg holes. They are also handy if you are running short of pockets/covers
PatternMaker Software Hats & Caps Pattern Collection Designer: Leena Lähteenmäki
 PatternMaker Software Hats & Caps Pattern Collection Designer: Leena Lähteenmäki INTRODUCTION This is a collection of patterns (not a macro) for twelve different styles of hats and caps. Most of the hats/caps
Big Cat Costumes. Dress like a lion, lynx, or cheetah this Halloween and Trick-or-Treat for Big Cats!
 Big Cat Costumes Dress like a lion, lynx, or cheetah this Halloween and Trick-or-Treat for Big Cats! It s easy to make these simple costumes. You just need some easy-to-use tools, a few materials, and
Battery compartment 2AA To Reach Stibbar for supplies on your Tattooer:
 are from the manufacturer and may not last very long depending on how long they have sat on the shelf. We just ship them as they come to us, we don t guarantee them. Many people have used the rechargeable
Clothing showcase INFORMATION ON. Clothing and Textile Showcase OBJECTIVES
 INFORMATION ON Clothing and Textile Showcase D E L A W A R E 4 - H Clothing showcase The 4-H Clothing and Textiles Showcase is a contest open to all 4-H members currently enrolled in the Clothing or Exploring
EC Guides to Buying Women's Ready Made Dresses
 University of Nebraska - Lincoln DigitalCommons@University of Nebraska - Lincoln Historical Materials from University of Nebraska- Lincoln Extension Extension 1972 EC72-421 Guides to Buying Women's Ready
METHODS TO MASTER: Skirt Fitting
 METHODS TO MASTER: Skirt Fitting { by Ryliss Bod } A skirt is one of the most versatile and cost-effective garments to sew. Learn how to create a well-fitting and flattering skirt, no matter your sewing
District WRITING post-test ASSESSMENT SENIOR HIGH SCHOOL
 Miami-Dade County Public Schools Office of Academics and Transformation Department of English Language Arts- Secondary Education Transformation Office (ETO) District WRITING post-test ASSESSMENT SENIOR
Garments Abdominal Binders
 Abdominal Binders K1083: Deluxe 3 Panel 9 Inches K1084: Deluxe 4 Panel 12 Inches Designed to provide superior support after abdominoplasty or liposuction, the 1083 (9 ) and the 1084 (12 ) abdominal binders
Formal Sporran Pattern
 Formal Sporran Pattern This pattern was developed from an older sporran I wear on formal and semi-formal occasions. I built another one for less-formal occasions which incorporated several changes to make
Flared Skirt Mood Board
 SPECTACULAR Skirts At a Glance Flared Skirt Mood Board Spectacular Skirts At a Glance Flared Skirt Answer Key There are three options for this skirt design, each progressively more flared. Student Questions
VOCABULARY. Fashion Marketing
 VOCABULARY Fashion Marketing End-of-Month Quiz Dates Thursday, September 29 (B) Friday, September 30 (A) Friday, October 28 (A) Monday, October 31 (B) WRITE THESE DATES IN YOUR PLANNER! Tuesday, November
Maxi Dress. 44/45 (112cm) 58/60 (150cm) 4.1/4 yards 4.1/4 yards
 58/60 (150cm) 4.1/4 yards 4.1/4 yards") The Fine Print All patterns, photos, and information contained in this pattern are the property of Melissa Mora. All rights reserved. Reproduction and redistribution by any means are not permitted. No
The Fine Print All patterns, photos, and information contained in this pattern are the property of Melissa Mora. All rights reserved. Reproduction and redistribution by any means are not permitted. No
ES 838 June 1979 CREWE THE LOOK YOU. Like-WITH LINE. Oregon State University Extension Service
 ES 838 June 1979 CREWE THE LOOK YOU Like-WITH LINE Oregon State University Extension Service Becky Culp* Becoming clothes influence the way you look and feel. Visible lines in your clothes create illusions
BRAS SHAPEWEAR POST-SURGERY MATERNITY
 BRAS SHAPEWEAR POST-SURGERY MATERNITY GLOBALLY RECOGNISED, THE ANNETTE BRAND IS THE RESULT OF 35 YEARS OF HARD WORK, PASSION AND VISION OF A PROFESSIONAL TEAM COMMITTED TO THE DEVELOPMENT OF INTIMATE AND
HOW TO CHOOSE PATTERNS
 HOW TO CHOOSE PATTERNS Choose patterns intelligently Choosing the right pattern requires much thought. The pattern must not only be suitable to the material but it must also be suitable to the individual
Replace a pattern s straight skirt with a full, pleated one, and turn a classic dress into a party frock.
 Replace a pattern s straight skirt with a full, pleated one, and turn a classic dress into a party frock. Pattern: Style Arc Layla Dress (modified). Fabric: stretch cotton sateen, MoodFabrics.com. 44 THREADS
A Brief History of Fashion. By Valerie Broeckelman
 A Brief History of Fashion By Valerie Broeckelman Ancient up to 400 A.D. In general, clothing from the ancient Greek and Roman times was based more on function rather than style. Clothing was loose and
A few notes about PDF patterns from Designs by Jude...
 A few notes about PDF patterns from Designs by Jude.... This PDF pattern requires legal size paper (8.5 x 14 ) or A4 size paper (8.27 x 11.69, 210mm x 297mm). It will not print on standard letter. Patterns
EXEMPLAR FOR ACHIEVED
 Level 3 Technology 91612 (3.5) Title Demonstrate understanding of how technological modelling supports technological development and implementation Credits 4 EXEMPLAR FOR ACHIEVED THIS PDF ALSO CONTAINS
Wild Ginger Software Presents Say Yes To The Fit Dress And Pants. Hosted by Karen Campbell
 Wild Ginger Software Presents Say Yes To The Fit Dress And Pants Hosted by Karen Campbell Definitions Fit Dress or Sloper A close fitting wearable dress with minimal ease used to check measurements. There
Sporran. Belt. Hose. Flashes. ers Pin. Don t Bonnet.
 Removing the basting If I have mailed the kilt to you, I have left the white basting threads in to hold the pleats during shipping. To remove them, slip a blunt-tipped tool such as a knitting needle, crochet
Apparel Merchandising Study Guide Circle the correct answer for each question below
 Day 1 1. Textile production is the creation of. a. designs b. fabric c. clothing d. sewing machines 2. At the retail level, merchandise is. a. designed b. sold to fashion buyers c. sold to the public d.
LADIES' SAFETY WEAR SAFETY WEAR SAFETY WEAR
 LADIES' SAFETY WEAR 2018 E N G I N E E R E D W I T H P U R P O S E SAFETY WEAR 2018 SAFETY WEAR MANUFACTURING STANDARDS All garments are manufactured in ISO 9001 accredited facilities SHAPED F O R WOMEN
A few notes about PDF patterns from Designs by Jude...
 A few notes about PDF patterns from.... This PDF pattern requires legal size paper (8.5 x 14 ) or A4 size paper (8.27 x 11.69, 210mm x 297mm). It will not print on standard letter. Patterns containing
Nobody needs 4 white t-shirts and 17 pairs of black trousers.
 Hi, Welcome to The Ultimate Wardrobe Checklist, the secret to no-brainer mornings. Imagine being able to open your wardrobe, pull out a great outfit and leave your house without leaving a trail of discarded
ITC (HS), 2017 SCHEDULE 1 IMPORT POLICY CHAPTER 62 ARTICLES OF APPAREL AND CLOTHING ACCESSORIES, NOT KNITTED OR CROCHETED
, 2017 SCHEDULE 1 IMPORT POLICY CHAPTER 62 ARTICLES OF APPAREL AND CLOTHING ACCESSORIES, NOT KNITTED OR CROCHETED") i.e xe CHAPTER 62 ARTICLES OF APPAREL AND CLOTHING ACCESSORIES, NOT KNITTED OR CROCHETED NOTES: 1. This Chapter applies only to made up articles of any textile fabric other than wadding, excluding knitted
i.e xe CHAPTER 62 ARTICLES OF APPAREL AND CLOTHING ACCESSORIES, NOT KNITTED OR CROCHETED NOTES: 1. This Chapter applies only to made up articles of any textile fabric other than wadding, excluding knitted
Helpful Hints [How to Complete this Form] 4-H Awardrobe Clothing Event Report Form Iowa State Fair
![Helpful Hints [How to Complete this Form] 4-H Awardrobe Clothing Event Report Form Iowa State Fair](/thumbs/85/91535212.jpg "Helpful Hints [How to Complete this Form] 4-H Awardrobe Clothing Event Report Form Iowa State Fair") Helpful Hints [How to Complete this Form] 4-H Awardrobe Clothing Event Report Form Iowa State Fair FASHION REVUE Please Note: All Iowa State Fair 4-H Awardrobe Clothing Event participants are required
Helpful Hints [How to Complete this Form] 4-H Awardrobe Clothing Event Report Form Iowa State Fair FASHION REVUE Please Note: All Iowa State Fair 4-H Awardrobe Clothing Event participants are required
Environmental Living Program Period Clothing Information
 Environmental Living Program Period Clothing Information Introduction The Environmental Living Program allows students to simulate life at Sutter s Fort in the 1840s. Wearing period-appropriate clothing
My Financial Future, Beginner
 My Financial Future, Beginner A. General knowledge of consumer ed concepts B. Ability to explain decisions made or results shown C. Self-evaluation of project D. Understanding of Consumer Education Activities
PatternMaker Outerwear Garment Macros
 Home page Svensk manual Suomeksi PatternMaker dealers Counter started 2000-01-01 Site Map December 5th, 2001 PatternMaker Pattern Drafting Sofware for PC Versions & prices Download & buy Demo version Macro
Part 10: Chapter 17 Pleated Buttoning
 Part 10: Chapter 17 Pleated Buttoning OUR last chapter covered the upholstering of one of the commonest forms of chair frames. The same chair may be upholstered with deeper buttoning, but instead of indenting
Cheerleader Apron. for Seahawk Fans Designed by Anna-Beth at our Northgate store. Making the Bib. What You ll Need. First, Some Cutting
 Cheerleader Apron for Seahawk Fans Designed by Anna-Beth at our Northgate store Every Hawk Hostess needs a Seahawks Cheerleader Apron! Be the envy of the neighborhood in this cheer-y team colors kick-pleat
EC Easy Fashions for You
 University of Nebraska - Lincoln DigitalCommons@University of Nebraska - Lincoln Historical Materials from University of Nebraska- Lincoln Extension Extension 1966 EC66-2208 Easy Fashions for You Alice
the Bone Student Pages Produced by Regenerative Medicine Partnership in Education Duquesne University Director john A. Pollock
 Classroom Ac tivities the Bone Student Pages Produced by Regenerative Medicine Partnership in Education Duquesne University Director john A. Pollock (pollock@duq.edu) Designers Brianne Miller, Molly Bugaile
Balenciaga Exhibit Paris, 2006
 Balenciaga Exhibit Paris, 2006 A Study of Cristóbal Balenciaga by Aiko T. Beall Professor, Otis Fashion Design A Study of Cristóbal Balenciaga, Paris 2006 By Aiko T. Beall Professor, Otis Fashion Design
LADIES' SAFETY WEAR 2018
 E N G I N E E R E D W I T H P U R P O S E LADIES' SAFETY WEAR 2018 SAFETY VOL 02 WEAR 2018 SAFETY WEAR MANUFACTURING STANDARDS All garments are manufactured in ISO 9001 accredited facilities SHAPED F O
PatternMaker Software Men s/women s Outerwear Collection Designer: Leena Lähteenmäki
 Men s/women s Outerwear Collection Designer: Leena Lähteenmäki INTRODUCTION Welcome to the PatternMaker Outerwear Collection! This macro collection contains two individual macros: jacket and trousers,
Galactic City Costume Club B-Wing Pilot (Episode VI) Standard
 Standard") Galactic City Costume Club B-Wing Pilot (Episode VI) Standard FLIGHT SUIT The flight suit is long-sleeved, Chinese red or a medium to dark red. The suit fits the costumer with the waist at the costumer
Galactic City Costume Club B-Wing Pilot (Episode VI) Standard FLIGHT SUIT The flight suit is long-sleeved, Chinese red or a medium to dark red. The suit fits the costumer with the waist at the costumer
Pin your patterns to prevent them from moving and cut even with [the patterns ] edge, because the drawing includes the seams.
![Pin your patterns to prevent them from moving and cut even with [the patterns ] edge, because the drawing includes the seams.](/thumbs/75/72111686.jpg "Pin your patterns to prevent them from moving and cut even with [the patterns ] edge, because the drawing includes the seams.") 1908 #26 Summer Dress [With Cape] -- Costume d Ete This pretty dress is made in linen and it is trimmed with fine binding. You will select the combination to your taste, either blue linen with white or
1908 #26 Summer Dress [With Cape] -- Costume d Ete This pretty dress is made in linen and it is trimmed with fine binding. You will select the combination to your taste, either blue linen with white or
elements of ancient costume
 elements of ancient costume Examples of different articles of clothing characteristic of a period, country, condition or occasion. peplos In ancient times, a rectangle of woolen fabric wrapped around the
GRADE NINE. The Readings: CLOTHING OVER TIME
 GRADE NINE WEEK OF MARCH 21-25 WRITING Below are three readings and one Extended Response/Writing Prompt that you can use for the Problem of the Day initiative. The prompt asks students to write an informative/explanatory
Style 202: Body Proportion
 Style 202: Body Proportion Understanding your body proportion will help you create visual balance. When we see something that is balanced we feel calm and we consider it more attractive. Creating balance
Body Double. Tools of the Trade
 Body Double Once used almost exclusively by tailors and clothing designers, dress forms at a variety of price points are now readily available for home sewers by Beth Baumgartel How often have you wished
Organza This delicate fabric adds weightless support to your garments without increasing bulk
 The Secret Strength of Silk Organza This delicate fabric adds weightless support to your garments without increasing bulk B y M a r l a K a z e l l ( f r o m i s s u e # 1 2 4 ) If you envision frilly
Hats. Tube hats (like top hats, boaters, jester hats, and crowns)
") Top it off Hats can be costumes of their own. Put a red helmet on your puppet, and poof! You ve got a firefighter! A police officer, a cab driver, a sailor, a painter, a chef the list goes on and on. After
Top it off Hats can be costumes of their own. Put a red helmet on your puppet, and poof! You ve got a firefighter! A police officer, a cab driver, a sailor, a painter, a chef the list goes on and on. After
14th Century London Hood Elen verch Phellip (Courtney Pritchard)
") 14th Century London Hood Elen verch Phellip (Courtney Pritchard) This hood was patterned after a 14th century hood found in Baynard s Castle, London in 1972, but drew inspiration from several manuscripts
14th Century London Hood Elen verch Phellip (Courtney Pritchard) This hood was patterned after a 14th century hood found in Baynard s Castle, London in 1972, but drew inspiration from several manuscripts
Wide-Brim Sun Visor. by Vicki Welsh. A free project, compliments of...
 A free project, compliments of... Wide-Brim Sun Visor by Vicki Welsh All information provided herein is done so in good faith. Three Creative Studios takes no responsibility for problems or issues encountered
What the shirts tell us
 What the shirts tell us LOGO Looking closely at the Blackfoot shirts with a museum conservator and a curator Heather Richardson, Laura Peers, Charlotte Ridley Pitt Rivers Museum, Oxford In museums, conservators
Rizena. by DANA. Fall AMERICAN MINIATURIST Tutorial Column
 Rizena by DANA Fall AMERICAN MINIATURIST Tutorial Column Greetings and Welcome to our Noble Lady with Falcon tutorial. Each month I strive to expand your dollmaking skills with new techniques - and a little
What Every Woman Needs To Know About Breast Augmentation
 SPECIAL REPORT What Every Woman Needs To Know About Breast Augmentation Here s your chance to finally get some straight talk about breast augmentation. Find out all the risks and benefits of the procedure
Fit and Cut Dictionary
 Designer s Guide: Fit and Cut Dictionary Your Reference Guide for Researching Silhouettes and Techniques Brought to you by A A-line - Describing a dress or skirt, this style fits at the waist and flares
THE ART OF WIGGING. (advanced level 1) Dana Burton.
 Dana Burton.") THE ART OF WIGGING (advanced level 1) Dana Burton http://www.miniatureart.com/ 1 Advanced Hair Techniques page 3 50 s Hair page 4 Highlighted Hair and Headdress page 5 Waves with Curls page 7 Techniques
THE ART OF WIGGING (advanced level 1) Dana Burton http://www.miniatureart.com/ 1 Advanced Hair Techniques page 3 50 s Hair page 4 Highlighted Hair and Headdress page 5 Waves with Curls page 7 Techniques
Extending Your Wardrobe Investment
 COOPERATIVE EXTENSION SERVICE UNIVERSITY OF KENTUCKY COLLEGE OF AGRICULTURE, LEXINGTON, KY, 40546 FCS2-843 Becoming Body Wise Weight - The Reality Series Extending Your Wardrobe Investment Building a wardrobe
Zip Attachments and Fasteners. Introduction to Zips.(Refer to Single Page Visual) Types of zips
 Types of zips") Zip Attachments and Fasteners. Introduction to Zips.(Refer to Single Page Visual) Types of zips There are three basic types of zips: conventional, opened, and concealed. Conventional zips are closed at
Zip Attachments and Fasteners. Introduction to Zips.(Refer to Single Page Visual) Types of zips There are three basic types of zips: conventional, opened, and concealed. Conventional zips are closed at
Floyd's Coin Purse. This is my little stuffed monkey, Floyd. Yes, his name is Floyd, and he's pink. Pink Floyd.
 Floyd's Coin Purse This is my little stuffed monkey, Floyd. Yes, his name is Floyd, and he's pink. Pink Floyd. Floyd likes cute things, especially cute things involving pink. I'm not usually a big pink
make it yours! 9900 Westpoint Drive Suite 132 Indianapolis, IN phone fax International rivars.
 make it yours! 9900 Westpoint Drive Suite 132 Indianapolis, IN 46256 phone 1-800-775-4829 fax 317-841-9313 International +1-317-841-8952 rivars.com BILL TO: School/Organization Contact Person Street Address
Curvy. Women 2.0 The Little Known Shopping Secrets For Curvy Women
 Curvy Women 2.0 The Little Known Shopping Secrets For Curvy Women F R E E R E P O R T It s pretty interesting to assume that most women love clothes shopping. A study was done in the UK in 2011 and they
Model A Ford Club of America
 Fashion Entrant Information Model A Ford Club of America FJPM3 Entrant.doc Page 1 Rev. 3/23/07 Welcome. We are so glad you have chosen to share your enthusiasm for Model A era fashions. We want you to
Regimental Coat, Commander In Chief s Guard
 Regimental Coat, Commander In Chief s Guard Guide for Construction Compiled by Judith Wicker, Revised May 1989 PLEASE READ ALL DIRECTIONS BEFORE CUTTING FABRIC! Make the lining first to check proper fit.
make it yours! 9900 Westpoint Drive Suite 132 Indianapolis, IN phone fax International rivars.
 make it yours! 9900 Westpoint Drive Suite 132 Indianapolis, IN 46256 phone 1-800-775-4829 fax 317-841-9313 International +1-317-841-8952 rivars.com BILL TO: School/Organization Contact Person Street Address
Creative, Low-Cost Costuming Ideas Reference for high school students
 Costuming is a fascinating area of theatre to work in, and if money is tight (and it often is) the challenges are exciting. Here are some ideas to help get your started with your own productions or ones
Sears Holdings Management Corporation FLOOR READY GUIDELINES
 Sears Holdings Management Corporation FLOOR READY GUIDELINES 2007 Sears Brands, LLC April 2007 ACCESSORIES Headwear - Hats, Visors, Caps All Categories ACC.HTS.CPS.VSR.01 HATS: Insert MAIN label into interior