Guide to Basic Post Process Applications - Objet line of 3D Printers. Learn how to save time and cost to ensure successful product development
|
|
|
- Shanon Wheeler
- 5 years ago
- Views:
Transcription


1 Guide to Basic Post Process Applications - Objet line of 3D Printers Learn how to save time and cost to ensure successful product development


2
3 Copyright Copyright 2013 Stratasys Ltd. All rights reserved. This documentation contains proprietary information belonging to Stratasys Ltd (formerly Objet). This information is supplied solely to assist authorized users of this Stratasys 3D printing system. No part of this document may be used for other purposes, and it may not be disclosed to other parties. The specifications on which this document is based are subject to change without notice. No part of this book may be reproduced in any form or by any means, nor stored in a database or retrieval system, without prior permission in writing from Stratasys Ltd. If this document is distributed as a PDF file, you may print it for internal use. Trademarks The following are registered trademarks of Stratasys Ltd.: Stratasys, Objet, FullCure. Microsoft and Windows are trademarks of Microsoft Corporation. All names of products and services cited in this book are trademarks or registered trademarks of their respective companies. Warnings Wear protective gloves when handling printed models before they are washed. Caustic soda may cause chemical burns, scarring and blindness. Mixing it with water generates heat that could ignite other materials. Take adequate safety precautions; always use nitrile gloves when handling caustic soda and models soaked in it. Stratasys Ltd. objet-info@stratasys.com Web:
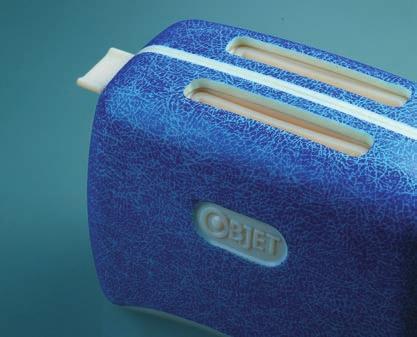
4 Introduction About this Guide Objet 3D Printers can print high-quality, accurate models in a wide variety of materials. Often, printed models are ready immediately after printing and cleaning. However, you may wish to further enhance the appearance and functionality of your printed models. This guide describes a number of post-process applications that enable you to create attractive 3D models and product prototypes. Who Should Use this Guide? This guide is intended for users of Objet 3D Printers. Experience with printing and handling 3D models is advantageous. For More Information Visit for more details about Stratasys, its technologies, products and applications. Guide to Basic Post Process Applications
5 Post Process Applications Contents Safety Information...6 Cleaning Models with Sodium Hydroxide...6 Painting 3D Printed Models...8 Creating Clear or Translucent Models...10 Dyeing Translucent Models...12 Photobleaching Transparent Models Printed with Objet VeroClear...14 Gluing Printed Parts...16 Thermal Treatment
6 Safety Information Sodium Hydroxide 1. Do not let sodium hydroxide come in contact with your eyes or skin. It may cause chemical burns, scarring and blindness. 2. Use protective goggles and nitrile gloves when handling sodium hydroxide and models soaked in it. 3. In case of direct contact with sodium hydroxide, clean the affected area immediately with running water and then seek medical attention. 4. Mixing sodium hydroxide with water generates heat that could ignite other materials. Paints and Primers 1. Paints, primers and similar substances can cause skin irritation. Use protective gloves when handling these substances. 2. Inhaling paint or primer can be dangerous to your health. When spraying paint or primer, always wear a spray mask. 3. Always spray paints and primer in a well-ventilated area. Aniline Dyes Aniline dyes are toxic and the stains they leave on material are extremely difficult to remove. Before working with aniline dyes, protect your skin, eyes, clothing and your work area. Handling Hot Parts Always wear oven gloves when handling hot parts. Cleaning Models with Sodium Hydroxide Introduction Sodium hydroxide can be used as a surface preparation for models that require a smoother, more refined feel, or for models to be painted or used as silicone molds. Benefits Cleaning models with sodium hydroxide eliminates support material residue not removed by the WaterJet. improves transparency of models printed in VeroClear. Guide to Basic Post Process Applications
7 Required Tools and Materials Sodium hydroxide (also known as NaOH, lye, or caustic soda) Protective goggles Nitrile gloves 1.5 liter plastic or glass container Running tap water A stirring tool Disposable paper towels Isopropanol (also known as IPA or isopropyl alcohol) Fine sandpaper Safety See Safety Information on page 6. Caution Models with walls less than 1 mm thick may deform slightly if soaked for more than one hour. Soak the model in sodium hydroxide for between half-an-hour and several hours, depending on how delicate the model is and how much support material needs to be removed. NOTE: Soaking most models in sodium hydroxide will not affect their mechanical properties. Preparing a Sodium Hydroxide Solution 1. Pour 20 grams of sodium hydroxide into a 1.5 liter plastic or glass container. 2. Slowly pour about 980 ml of water into the container. 3. Gently stir until the sodium hydroxide is completely dissolved. This process produces heat. 4. Allow the solution cool to room temperature. Cleaning the Model 1. Using the WaterJet, remove the support material from the model as thoroughly as possible. 2. Immerse the model in the sodium hydroxide solution for up to two hours, depending on the model size and type (see Caution above ). 3. Remove the model from the solution and immediately rinse the model under running tap water. 4. Using the WaterJet, remove any remaining support material from the model. 5. Wipe down the model with a disposable paper towel and wait until the model is completely dry. (For faster drying, immerse the model in isopropyl for a few seconds and let the model dry for at least half an hour). 6. For a glossy finish, see Polishing and Buffing on page 17. 7

 Paint (spray can or paint sprayer) Sandpaper (220 and 400-grit wet/dry) Body-filler (optional) Sodium hydroxide solution Tack cloth")
8 Painting 3D Printed Models Introduction You can paint printed models to look like the finished product. Models printed on Objet 3D Printers have smooth surfaces and crisp details. This minimizes the need for sanding and filling, which can be time-consuming. Benefits Painting printed models produces a compellingly realistic preview of your product, which can be used as sales samples and photographic models. Required Tools and Materials Primer (spray can or paint sprayer) Paint (spray can or paint sprayer) Sandpaper (220 and 400-grit wet/dry) Body-filler (optional) Sodium hydroxide solution Tack cloth Nitrile gloves Spray mask Safety See Safety Information on page 6. Preparation Cleaning the Model Removing support material from the model enhances paint adherence and appearance and ensures a uniform feel. For details, see Cleaning Models with Sodium Hydroxide on page 7. Sandblasting the model will achieve a similar effect, although it is not recommended because it can create small pits that are difficult to polish. Priming the Model Applying primer to printed models provides a bond for paint. It also highlights areas on the model where additional finishing may be needed. 1. Spray fast-drying primer. Lacquer-based primers dry quickly and can be sanded easily. 2. To prevent drips and puddles, spray two light coats of primer, instead of one thick coat. Cleaning a model with the WaterJet Applying primer Guide to Basic Post Process Applications


9 TIP Before sanding, apply a red or white primer as the first coat and then apply a grey primer. When sanding, the color difference indicates when you are getting close to the model s surface. Sanding and Filling Blemishes Depending on the results of the primer coat, you may wish to do some additional finishing work before painting. 1. Sanding is best done with 400-grit sand paper. Stop sanding if the Inkjetmaterial begins to show through the primer. Rinse and dry the model. 2. If small blemishes show on the primed model, you can easily fill them with a dab of auto-body putty. Use fast-curing putty, which is easily sanded, such as Freeman TUF-Carv or premixed glazing putty, such as 3MTM Acryl-Blue. 3. After the putty has dried, begin sanding the area with 220-grit sandpaper, finishing with 400-grit wet-sandpaper. 4. Rinse the model with water and then dry it thoroughly. 5. Apply another coat of primer, if necessary. Painting the Model 1. Make sure that the model is clean and dry. Use a tack cloth or compressed air to remove dust. 2. Apply several thin coats of paint, allowing the paint to dry between each coat. Applying a Clear Finish Clear lacquer can provide additional protection against scratches, chipping and marks. Apply at least two thin coats of clear lacquer. Allow the lacquer to dry between coats. Dry sanding Cleaning a model with the WaterJet Applying filler Applying paint Painted model 9

10 Creating Clear or Translucent Models Introduction Objet technology and VeroClear (RGD810) model material make it possible and practical to print both clear and translucent models. With a little post-processing, you can manipulate the transparency of your model. The clarity of VeroClear parts improves considerably over time. To improve the clarity of parts more quickly, consider photobleaching (see page 21). Printing Models To ensure maximum clarity of your clear or translucent model, make sure your Objet 3D Printer is clean and that Objet Studio is properly configured. Cleaning the Objet 3D Printer Traces of previous materials affect the clarity of VeroClear parts. Before printing with VeroClear: 1. Replace one or both of the currently installed cartridges with Objet VeroClear. 2. Run the Material Replacement Wizard and select the flushing option appropriate for your printer. See the VeroClear Application Note for details. 3. Clean the print heads, wiper, and roller waste collector thoroughly. Objet Studio Properly adjusting Objet Studio settings helps to increase model clarity and reduce post-processing. 1. In Objet Studio, orient the model so that the critical surface faces upwards. 2. For maximum clarity, choose a matte surface finish. UV Radiation Properly oriented models Exposure of VeroClear parts to UV radiation results in a yellowish tint. To reduce the number of print-head and UV-lamp passes: 1. Set Objet Studio to High Speed printing mode (on supported printers). 2. Arrange glossy parts so they have similar heights. Parts with similar heights Guide to Basic Post Process Applications


 For an exceptional finish, sand the model with 1500-grit micro-mesh sandpaper.")
11 Treating Transparent Models You can enhance the transparency of printed models using the following procedures. 1. WaterJet For most models, the most efficient way to remove support material is to use a high-pressure water jet. 2. Sandblasting Sandblasting is not generally recommended because it can create small pits in the model surface. However, for a frosted surface finish, mask off the parts of the model you do not want to look frosted and then sandblast the unprotected area. Removing support material 3. Dry-Sanding Make sure that the model is completely dry and sand all surfaces with 200-grit sandpaper. Light sanding is all that is required to remove surface imperfections and unwanted layering. To improve the clarity even further, sand it again with 320-grit sandpaper. Removing support material 4. Wet-Sanding Dry sanding may leave scratches on the model. To remove them, lightly wetsand the model with 400-grit, then 600-grit and finally 1000-grit sandpaper. Rinse the model between each sanding to remove any dust or debris. TIP To lubricate the model s surface while wet-sanding, use soapy water, mineral oil or vegetable oil. Wet-sanding 5. Micro-Mesh-Sanding (Optional) For an exceptional finish, sand the model with 1500-grit micro-mesh sandpaper. You can continue sanding with 1800-grit, 2400-grit, 3600-grit and 4000-grit micro-mesh sandpaper. Rinse the model between each sanding to remove dust and debris. 6. Polishing and Buffing Apply a polishing compound, such as 3M Plastic Polish, to a buffing wheel or a polishing tool. Work the polishing compound onto all surfaces of the model then buff off the compound with a soft cloth or clean buffing pad. Sanding with micro-mesh sandpaper Finished transparent model 11

12 Dyeing Translucent Models Introduction Painting models can greatly enhance their impact, but it also makes them opaque. Dying adds color and life to your printed models while retaining translucency. Benefits Dying your models is faster and easier than painting. Translucency of models printed in Objet FullCure is preserved because the dye is absorbed into the model material. Dyed models retain their original dimensions. Required Tools and Materials alcohol-based aniline dye Note: Water-based aniline dye does not penetrate the model surface. Use only alcohol-based aniline dye. isopropyl alcohol sodium hydroxide solution stiff-bristled brush spray bottle paper towels protective gloves Safety See Safety Information on page 6. Aniline dye Preparation IMPORTANT: Aniline dyes are toxic and the stains they leave on material are extremely difficult to remove. Before working with aniline dyes, protect your skin, eyes, clothing and your work area. Preparing the Model 1. Thoroughly remove the support material from the model and immerse the model in a sodium hydroxide solution (see Cleaning Models with Sodium Hydroxide on page 7). 2. If necessary, sand the model (see Dry-Sanding on page 16). Guide to Basic Post Process Applications


13 Customizing Aniline Dye (Optional) Aniline dye comes in a variety of colors. You can also combine aniline dyes to create custom colors. To lighten the color, add alcohol to the dye, but do not exceed a ratio of one part alcohol to three parts dye. Applying the Aniline Dye Aniline dye penetrates the model in a few seconds, so you need to work quickly. Brush or spray a light coat of the aniline dye onto the model. You can spread the dye evenly over the model by wiping it with a paper towel. Models dyed with a variety of colors IMPORTANT: Distribute the dye evenly. To darken the color or correct uneven tinting, apply a second coat. If the color is too dark or is blotchy, wipe the surface with alcohol. Allow the dye to dry for at least 15 minutes. Rinse the model and then dry it. Applying aniline dye Applying a Protective Coat (Optional) Spray on a clear lacquer or polyurethane coat to give luster to the model and protect the finish. Model treated with aniline dye 13
 have a slightly yellow tint.")


14 Photobleaching Transparent Models Printed with Objet VeroClear Introduction Photobleaching is the process of exposing printed models to intense florescent lighting to improve the transparency of the model. Models printed in Objet VeroClear (FullCure 810) have a slightly yellow tint. The yellow tint fades naturally over time, but you can greatly accelerate the process by photobleaching. Photobleaching can reduce the yellow tint by 70% in only six hours, and by over 90% in 24 hours. Final clarity depends on the model geometry. Photobleaching Methods There are two methods of photobleaching, both of which are suitable for all model geometries Illumination chamber Enables controlling temperature and light intensity. Assures predictable results. Costs approximately US$1,300. Illumination chamber Table lamps Results vary due to lack of precise control over temperature and light intensity. Self-assembled from readily available parts. Low cost solution Applying aniline dye Before photobleaching After photobleaching in an illumination chamber After photobleaching with table lamps CAUTION: With both methods, ensure that the model temperature is 40 C (104 F). Higher temperatures may cause model distortion; lower temperatures may not produce satisfactory results. Guide to Basic Post Process Applications
15 Illumination Chamber Use a 150 liter illumination chamber. Make sure that the fluorescent lamps are 45 W, 6500K. 1. Arrange the printed models inside the illumination chamber with enough distance between them to allow light to reach all sides of the model. 2. After photobleaching the model for six hours, inspect them. If necessary, continue for up to 18 hours more. Table Lamps Required Materials large container aluminum foil at least two 45 W, 6500K table lamps Using the Table Lamps 1. Cover the inside of a container with aluminum foil. 2. Arrange the printed models inside the container with enough distance between them to allow light to reach all sides of the model. 3. Position the lamps approximately 10 cm (4 in) above the models and turn them on. 4. After photobleaching the model for six hours, inspect them. If necessary, continue for up to 18 hours more. 15
16 Gluing Printed Parts Introduction Although large models can be printed, it may be more practical to print individual parts that can be glued together. Required Tools and Materials Protective gloves Protective goggles Sodium hydroxide solution Glue for rigid parts, such as: Super-glue (ciano acrylate) Alteco-ACE-D and an activator spray LOCTITE 401 (medium viscosity) Al-fix and an activator Kleiberit Glue for flexible parts, such as: Sico Met 8300 and Accelerator Spray (for elastomers) Permabond Black Magic 737 (for flexible parts) Preparing the CAD or STL File Carefully consider where to separate the model s parts so that you can easily connect them after printing. You can do this with your CAD software or STL-file manipulation software. To maintain dimensional integrity, add clearance between parts to account for the space required for the glue. This varies depending on the type of glue used, but the typical space required is 0.1 mm. Safety See Safety Information on page 6. Preparing Parts for Gluing Before gluing, it is important to thoroughly clean the model. For details, see Cleaning Models with Sodium Hydroxide on page 7. Gluing the Parts Apply the glue on the desired surface and spray it with an accelerator or activator, if necessary. Guide to Basic Post Process Applications

17 Thermal Treatment Introduction Models printed with Objet High-Temperature (RGD525) and ABS-like materials (RGD5160-DM) can be treated to increase their resistance to heat. Benefits Thermal treatment is useful for models used with hot air or water. for models exposed to strong lighting conditions, such as at an exhibition or trade show. Required Tools and Materials A programmable oven with the following recommended specifications: Despatch LBB programmable oven Maximum operating temperature Temperature stability (PID controller On/Off) C ( F) ±0.1/±0.2 degrees Temperature uniformity At 300 C ± 5 (at 570 F ± 10 ) Heat-up time to maximum temperature Recovery time to maximum temperature Dimensions Volume (liters) Air changes per hour Maximum power Holding power Controller features 25 minutes 4 minutes as required as required (depends on oven size) 750 W for a 28-liter oven 300 W for a 28-liter oven stores 4 programs and up to 16 segments 17
 of Objet RGD525 (High-Temperature Material) from 65")
18 Safety See Safety Information on page 6. Thermal Treatment for Models Made of Objet High Temperature material - RGD525 Thermal treatment can increase the heat-deflection temperature (HDT) of Objet RGD525 (High-Temperature Material) from 65 C (149 F) to 80 C (176 F). Procedure Model printed with Objet RGD After cleaning the models place them in a programmable oven, using the following guidelines: Place models on a flat surface and not on an oven rack. Make sure models are not too close together. Support parts with thin walls or overhangs. 2. Set the ramp-up rate to 1 C (1.8 F) per minute. 3. Set the temperature to 50 C (122 F). 4. Turn on the oven. The oven temperature reaches 50 C (122 F) after approximately 35 minutes. 5. Maintain the temperature at 50 C (122 F) for two hours. 6. Increase the temperature to 60 C (140 F). The oven temperature reaches 60 C (140 F) after approximately 10 minutes. 7. Maintain the temperature at 60 C (140 F) for two hours. 8. Increase the temperature to 70 C (158 F). The oven temperature reaches 70 C (158 F) after approximately 10 minutes. 9. Maintain the temperature at 70 C (158 F) for one hour. 10. Cool the model in the oven. 11. When the oven temperature is lower than 35 C (95 F) remove the part. WARNING: Always wear oven gloves when handling hot parts. Guide to Basic Post Process Applications
. Method B increases the HDT to 100 C (212 F). Method A 1. Clean the part and remove the support material. 2.")
19 Thermal Treatment for Models Made of Objet ABS - like materials - Objet RGD5160-DM The heat-deflection temperature (HDT) of models made of Objet RGD5160- DM (ABS-like Material) is C ( F). The HDT can be increased. Method A increases the HDT to 90 C (194 F). Method B increases the HDT to 100 C (212 F). Method A 1. Clean the part and remove the support material. 2. Place the part in a programmable oven. 3. Set the ramp-up rate to 1 C (1.8 F) per min. 4. Set the temperature to 60 C (140 F). 5. Turn on the oven. The oven temperature reaches 60 C (140 F) after 35 minutes. 6. Maintain the temperature at 60 C (140 F) for two hours. 7. Increase the temperature to 70 C (158 F). The oven temperature reaches 70 C (158 F) after approximately 10 minutes. 8. Maintain the temperature at 70 C (158 F) for two hours. 9. Increase the temperature to 80 C (176 F) and maintain for one hour. 10. Cool the model in the oven. 11. When the oven temperature is lower than 35 C (95 F), remove the model. CAUTION: Always wear oven gloves when handling hot parts. Model printed with Objet RGD5160-DM Method B This procedure may cause greater distortion to unsupported thin walls and overhangs. If this is a concern, use Method A. 1. Clean the part and remove the support material. 2. Place the part in a programmable oven. 3. Set the ramp-up rate to 1 C (1.8 F) per min. 4. Set the temperature to 60 C (140 F). 5. Turn on the oven. The oven temperature reaches 60 C (140 F) after 35 minutes. 6. Maintain the temperature at 60 C (140 F) for two hours. 7. Increase the temperature to 70 C (158 F). The oven temperature reaches 70 C (158 F) after approximately 10 minutes. 8. Maintain the temperature at 70 C (158 F) for two hours. 9. Increase the temperature to 80 C (176 F) and maintain for one hour. 10. Increase the temperature to 100 C (212 F) and maintain for one hour. 11. Cool the model in the oven. 12. When the oven temperature is lower than 35 C (95 F) remove the part. CAUTION: Always wear oven gloves when handling hot parts. 19
20 Stratasys Ltd. All rights reserved. Stratasys, Stratasys logo, Objet, For a 3D World, Objet24, Objet 30 Pro, Objet30 Scholar, Objet Studio, Quadra, QuadraTempo, FullCure, SHR, Eden, Eden250, Eden260,Eden260V, Eden 330, Eden350, Eden350V, Eden500V, Jo Manager, CADMatrix, Connex, Objet260 Connex, Connex350, Connex500, Objet1000, Alaris, Alaris30, PolyLog, TangoBlack, TangoGray, TangoPlus,TangoBlackPlus, VeroBlue, VeloBlack, VeroBlackPlus, VeroClear, VeroDent, VeroGray, VeroWhite,VeroWhitePlus, Durus, Digital Materials, PolyJet, Polyjet Matrix, ABS-like and ObjetGreen are trademarks or registered trademarks of Stratasys Ltd. and/or its subsidiaries or affiliates and may be registered in certain jurisdictions. All other trademarks belong to their respective owners. USG Rev. D
Guide to B a s i c Post-Printing Processes for PolyJet 3D Models. How to save time and expense during product development
 Guide to B a s i c Post-Printing Processes for PolyJet 3D Models How to save time and expense during product development USG-00010 Rev. F Copyright Copyright 2016 Stratasys Ltd. All rights reserved. This
Bio-compatibility Requirements
 Bio-compatibility Requirements Printing Bio-compatible Parts on PolyJet 3D Printers with MED610 TM The methods and conditions described in this document were tested at Stratasys for printing parts from
POST-PROCESSING YOUR 3D PRINTS
 MAKERBOT EDUCATORS GUIDEBOOK GOING FURTHER: POST-PROCESSING GOING FURTHER POST-PROCESSING YOUR 3D PRINTS PAGE 160 SANDING YOUR 3D PRINTS 3D printing can bring your ideas to life, but sometimes your ideas
General Finishes
 General Finishes 2017 Flippin Furniture Expo Classic Oil Finishes: Everything You Ever Wanted to Know Presenter: Rob Szwedo, General Finishes Preparing Raw Wood Sand with progressively finer grits: #100,
Via-Bond Nail Enhancement Systems
 Product Name: SPEED TOP Part Number: 4020160 Speed Coat is a fast-drying, non-yellowing topcoat with excellent flow properties. The topcoat finishes to a high shine and can be used over polish or artificial
SOLVENT SMOOTHING SOFTWARE/PRODUCT/FINISHING OVERVIEW 1. OPTIONS FDM BEST PRACTICE:
 SOFTWARE/PRODUCT/FINISHING OVERVIEW The normal surface finish of FDM parts is suitable for most purposes, but in applications where a smoother surface is required, solvent smoothing is an alternative to
About Tools 6. Would you buy your tools on-line and have them delivered to your Home or Business? Yes No If Not, why?
 Showroom Shine Just as a quality paint job lies in the preperations, color-sanding and polishing the right way takes some time and finesse to achieve shiny results. If it s done throroughly and in a systematic
POP ACRYLIC NAILS. user guide
 POP ACRYLIC NAILS user guide POP ACRYLIC NaILS Pop Acrylic Nails make professional results even quicker and easier to achieve. The traditional method of applying acrylic nails can be difficult to master.
Making a Bangle Bracelet using a Metal Core from Arizona Silhouette
 Making a Bangle Bracelet using a Metal Core from Arizona Silhouette Supplies needed: Metal Core (stainless steel (BG200SS) or copper (BG201CU), bangle core blanks made from stabilized wood or acrylic material
Big Sky Product Information Sheet. CRV21 Crystal Clear 2.1 VOC Universal Clearcoat
 Big Sky Product Information Sheet Technical Support (800) 328-4892 P.I. Sheet #1066 CRV21 Crystal Clear 2.1 VOC Universal Clearcoat READ ENTIRE PRODUCT INFORMATION SHEET PRIOR TO USE. IF ANY QUESTIONS
TECHNICAL INFORMATION OMEGA-PRINT Fuming Catalog Nos. CNA102, CNA103, CNA104, CNA105, CNA106, CNA108A, CNA109A
 Copyright 2017 by SIRCHIE All Rights Reserved. TECHNICAL INFORMATION OMEGA-PRINT Fuming Catalog Nos. CNA102, CNA103, CNA104, CNA105, CNA106, CNA108A, CNA109A INTRODUCTION A latent fingerprint is a residue
TECHNICAL INFORMATION Adhesive-Side Powder Development Catalog Nos. ASP150, ASP50D, ASP50L, TRA20
 Copyright 2017 by SIRCHIE All Rights Reserved. TECHNICAL INFORMATION Adhesive-Side Powder Development Catalog Nos. ASP150, ASP50D, ASP50L, TRA20 INTRODUCTION Adhesive-Side Powder is used to develop latent
Masonite. The Beautiful Door. STAINING INSTRUCTIONS FOR MASONITE FIBERGLASS ENTRY SYSTEMS. Staining made easy. 1. Prepare. 2. Stain. 3.
 Masonite. The Beautiful Door. STAINING INSTRUCTIONS FOR MASONITE FIBERGLASS ENTRY SYSTEMS Staining made easy 1. Prepare 2. Stain 3. Top-Coat Fiberglass Door Staining Instructions How to Stain Masonite
Project Application Guide Waterlox True Tone Color-Infused Tung Oil Stain & Waterlox Buff-in Tung Oil Finish
 Project Application Guide Waterlox True Tone Color-Infused Tung Oil Stain & Waterlox Buff-in Tung Oil Finish As with any finish, special care and attention should be used when applying it. Waterlox delivers
Series7. Series 7. trimmer. Series 7. off. sensitive. intensive. clean. high. low. empty. reset
 on Series7-3 & dry fast sensitive off intensive reset www.braun.co.jp 2 3 4 5 6 7 on on sensitive off off intensive reset 8 off Series Series & dry fast sensitive on on reset intensive 9 on sensitive off
DuPont StoneTech Professional Stone And Tile Care Resource Guide 2008/2009 EDITION
 Stone And Tile Care Resource Guide 2008/2009 EDITION Table of Contents Click on a product name below to go directly to that page. Care Instructions by Surface Type Marble Granite Limestone Travertine Slate
UPHOLSTERY CLEANING - COMMON QUESTIONS & ANSWERS
 UPHOLSTERY CLEANING - COMMON QUESTIONS & ANSWERS COLOUR CHANGE I ve cleaned a sofa in the usual way and now there are pink patches in various places. What can I do? The dyes in the fabric have reacted
Dulon Polish Application Guide
 Dulon Polish Application Guide www.dulon.com.au Dulon Polish Application Guide for Boats This guide is intended to assist in the application of Dulon products and assumes that the users have basic knowledge
Series7. Series 7. trimmer. Series cc. off. sensitive. intensive. clean. high. low. empty. reset
 on Series7 Series 7 Series 7 760 cc start trimmer sensitive off intensive reset www.braun.co.jp 2 3 4 5 6 reset off on reset on on Series 7 760 cc Series Series Series 7 3 4 Series 7 8 9 start ing 10 5
Application Manual HOT GUARD HOT GUARD SC Coat. Standard Coating Procedures
 Application Manual HOT GUARD HOT GUARD SC Coat Standard Coating Procedures Standard Coating Procedures (HOT GUARD& HOT GUARD SC) 1. Safety Preparations 2. Confirming Conditions and Photographing Site 3.
BRISA Gel Enhancements Sculpted on a Tip
 Step-by-Step Guide BRISA Gel Enhancements Sculpted on a Tip 90 MIN A service designed for problem nails with no natural-nail extension edge, requiring length and re-design. STEP 1: P.R.E.P. f. Apply a
REVOLUTION M SERIES MANUAL & PARTS GUIDE
 HP-M1 HP-M2 REVOLUTION M SERIES MANUAL & PARTS GUIDE NEED ASSISTANCE? If you have any issues with this product, call Iwata-Medea before returning to your place of purchase. 503-253-7308 Congratulations
PE2600 2:1 Acrylic Urethane Clear 4.3VOC
 Big Sky Product Information Sheet Technical Support (800) 328-4892 P.I. Sheet #1093 PE2600 2:1 Acrylic Urethane Clear 4.3VOC COMPONENTS SPECIALTY COMPONENTS (OPTIONAL) 1. PE2600 Clear 1. CR22ACC Accelerator
ROBOT PIN TOOL CLEANING AND LIQUID SAMPLE TRANSFER
 OVERVIEW TECHNICAL NOTE 67B ROBOT PIN TOOL CLEANING AND LIQUID SAMPLE TRANSFER There are several key steps in the successful use of pin tools: 1. The first and most important step is to start with clean
Surface Finishing November 3, Reference: Understanding Wood Finishing by Bob Flexner American Woodturner, Summer 2005
 Surface Finishing November 3, 2012 Reference: Understanding Wood Finishing by Bob Flexner American Woodturner, Summer 2005 CLEAN SURFACE A. Tack rag B. Compressed air C. Clean with mineral spirits SEALING-must
PVC Pipe Cleaning Guide a FORMUFIT field manual
 PVC Pipe Cleaning Guide a FORMUFIT field manual www.formufit.com 1 PVC Pipe Cleaning Guide 2 Welcome. This guide is designed to be friendly, knowledgable and to provide options for different people from
Sutherland Welles Ltd.
 Sutherland Welles Ltd. INSTRUCTIONS STAINING WOOD Helpful Hint! The Sutherland Welles Ltd Old World Concentrated Stains are the most versatile stains on the market. The high percentage of aniline dye allows
PrecisionCut Hair Clipper
 PrecisionCut Hair Clipper HC5900 Register online for 10,000 prize draw EXTRA year guarantee FREE rewards gallery Visit www.remington.co.uk/productregister You must register within 28 days of purchase.
Application Guide. Manual Applicators 16 Floor Coating Foam Pad, 18 Paint Tray, NylFoam Stain Pad, Foam Brush, Wiping Rags, Sponges.
 Application Guide Optional Tools & Supplies Professional Mechanical Equipment High Volume Low Pressure (HVLP) Sprayer, Airless Paint Sprayer w/#11 Tip, Wood Sander, Floor Buffer, Pressure Washer, Commercial
Technical Data Sheet.
 Technical Data Sheet. Permahyd Base Coat 280. Permahyd Base Coat 280 is a high-grade waterborne base coat system based on a special technology of PU dispersions. It produces high-grade two-stage solid
Liquid & Powder Enhancements Sculpted on a Tip
 Step-by-Step Guide Liquid & Powder Enhancements Sculpted on a Tip 90 MIN A service designed for problem nails with no natural nail extension edge, requiring length and re-design. STEP 1: P.R.E.P. f. Apply
SHELLAC Brand Application & Removal
 Step-by-Step Guide SHELLAC Brand & Removal 45 MIN SHELLAC Brand 14+ Day Nail Color combines the ease of polish with high-performance wear and stunning shine. A true innovation in chip-resistant, long-lasting
CREATIVE PLAY Gel Polish Application & Removal
 Step-by-Step Guide Gel Polish & Removal 45 MIN CREATIVE PLAY Gel Polish delivers vibrant, ultra-intense color across multiple finishes that evokes the client to be unique and self-expressive. : STEP 1:
Prosonic BS washable clean. trimmer. off. eco. normal. intensive. high. auto select. low. empty. reset
 on ActivePower Prosonic 9795 ing 9795 off reset BS 9795 www.braun.co.jp 2 3 STOP 4 5 6 7 8 9000 Series reset reset on off on off ing 3 4 6 5 1 2 4a 9 8 10 11 12 13 14 15 16 17 7 18 9795 9 10 11 on tr reset
Series 7. Series7. trimmer. Series 7. off. sensitive. intensive. clean. high. low. empty. reset
 on Series7-3 start ing sensitive intensive reset www.braun.co.jp 2 3 4 5 6 7 on on sensitive intensive reset 8 S start ing sensitive on on reset intensive 9 on sensitive intensive reset 10 charge mid charge
Use & Care Tips and hints for the care of your product. Natural Acrylic Stone TM
 www.himacs.eu Use & Care Tips and hints for the care of your product. Natural Acrylic Stone TM We ve outlined a few simple ways to care for and maintain your HI-MACS Solid Surface to ensure it retains
Coverings care guide PB
 Coverings care guide This symbol signifies important information and is used throughout the manual. Contents 1 Warnings 2 Donning i-limb skin active 3 Doffing i-limb skin active 6 Donning i-limb skin natural
Operating Instructions
 Operating Instructions (Household) Rechargeable Shaver Model No. ES LF71 Before operating this unit, please read these instructions completely and save them for future use. ES-LF71_AUS.indb 1 2011/02/25
Prosonic TM. 790 cc. Type trimmer. off. eco. normal. clean. intensive. high. auto select. low. empty. reset
 on Prosonic TM Prosonic TM 790 cc off reset Type 5671 Braun GmbH Frankfurter Straße 145 61476 Kronberg/Germany 5-671-363/00/IV-07/M China/GB on reset 3 4 4a 8 5 9 10 2 1 6 11 12 off reset 13 7 14 15 18
Coverings care guide 1
 Coverings care guide This symbol signifies important information and is used throughout the manual. Contents 1 Warnings 2 Donning i-limb skin active 3 Doffing i-limb skin active 4 Donning i-limb skin natural
3-D Printed Parts (Part 2)
") 3-D Printed Parts (Part 2) Post-processing 3-D printing with ABS plastic provides tremendous versatility when it comes to post-processing of your part. When we refer to post-processing, we are simply talking
3-D Printed Parts (Part 2) Post-processing 3-D printing with ABS plastic provides tremendous versatility when it comes to post-processing of your part. When we refer to post-processing, we are simply talking
GUIDE WALLS AND DOORS GENERAL CARE & CLEANING OF SOLUTIONS
 GUIDE WALLS AND DOORS GENERAL CARE & CLEANING OF SOLUTIONS Care & Cleaning DIRTT Products_v1-6 - 10May2017 1. CARE AND CLEANING OF EXTRUSIONS Introduction DIRTT s high quality powder coated, veneer wrapped
This bulletin gives specific instructions for application of Avery Dennison translucent film to recommended flexible-face signage material.
 Application of Avery Dennison Translucent Pressure Sensitive Films to Avery Dennison Approved, Flexible-Faced Signage Material #4.01 (Revision 10) Dated: 12/31/14 1.0 Scope This bulletin gives specific
Odorless gel nail enhancement products for a more appealing salon environment
 Sales Information Odorless gel nail enhancement products for a more appealing salon environment Jim and Lezlie McConnell began Light Elegance in 1999 in Eugene, Oregon. Lezlie owned an up scale salon and
Sculpt Nouveau. Patinas and Metal Finishes
 Sculpt Nouveau Patinas and Metal Finishes SOLVENT DYE SOLVENT DYE INSTRUCTIONS INSTRUCTIONS SOLVENT DYE INSTRUCTIONS SAFETY MEASURES Personal protective equipment is extremely important when working with
Prosonic TM. trimmer. off. eco. normal. clean. intensive. high. auto select. low. empty. reset
 on Prosonic TM Prosonic TM ing off reset Braun GmbH Frankfurter Straße 145 61476 Kronberg / Germany 5-673-363/00/IV-07/M China/GB on reset 3 4 8 9 ing 10 2 1 5 6 11 12 off reset 13 7 14 15 18 16 17 4 STOP
4950S ULTRA PRODUCTIVE ADDITIVE
 4950S ULTRA PRODUCTIVE ADDITIVE GENERAL DESCRIPTION A flex additive designed to improve the adhesion, chip resistance and flexibility of Cromax ultra productive primer over rigid, semi-flexible and fully-flexible
Ember 3D Printer. Created by Ruiz Brothers. Last updated on :00:07 PM EDT
 Ember 3D Printer Created by Ruiz Brothers Last updated on 2015-03-11 03:00:07 PM EDT Guide Contents Guide Contents Overview How DLP SLA Works Print setup Orientation Tip diameter Resolution Fixing the
Big Sky Product Information Sheet. System 10 Acrylic Enamel Color System
 Big Sky Product Information Sheet Technical Support (800) 328-4892 P.I. Sheet #1031 System 10 Acrylic Enamel Color System READ ENTIRE PRODUCT INFORMATION SHEET PRIOR TO USE. IF ANY QUESTIONS ARISE, PLEASE
MAKERBOT METHOD PAGE 1
 WWW.MAKERBOT.COM/METHOD MAKERBOT METHOD PAGE 1 MAKERBOT METHOD PAGE 2 The First Performance 3D Printer Bridging the gap between industrial and desktop 3D printing. MAKERBOT.COM/METHOD PAGE 3 MAKERBOT METHOD
Series cc. Series 7. Type Series 7. trimmer. Series cc. off. sensitive. intensive. clean. high. low. empty.
 on Series 5 790 cc 790 cc ing sensitive intensive reset Type 5692 on on Ser Ser 3 4 4a 8 9 ing 10 2 1 5 6 790 cc 11 sensitive reset intensive 12 13 14 15 7 16 17 20 18 19 sensitive on on reset intensive
Using the Cyclo Polisher
 Using the Cyclo Polisher What follows is a polishing primer. Many variations of the basic technique presented here are possible. You will develop your own personal method over time. The Cyclo polisher
i-twin Trim Dual Blade Rechargeable Trimmer
 i-twin Trim Dual Blade Rechargeable Trimmer Model VSM2A SAFETY CAUTIONS WARNING! Polythene bags over the product or packaging may be dangerous. To avoid danger of suffocation, keep away from babies and
PLAS-STICK A-2330S POLYOLEFIN ADHESION PROMOTER
 PLAS-STICK A-2330S POLYOLEFIN ADHESION PROMOTER GENERAL DESCRIPTION A green-gray polyolefin adhesion promoter designed to enhance the performance of products on unprimed polyolefin or non-polyolefin plastic
Cordless Ceramic Hair Cutting Set
 Cordless Ceramic Hair Cutting Set Instruction Booklet HC4900 Please read these instructions carefully and retain for future reference. Contents Sunbeam s Safety Precautions 3 Features of your Cordless
Galleria area. North. West Richmond Ave. Houston, TX P. (713) F. (832) E.
 F. (832) E.") C a r e & M a i n t e n a n c e Galleria area 5807 Richmond Ave. Houston, TX 77057 P. (713) 977-4455 F. (832) 834-5480 E. richmond@patio1.com North 3105 Cypress Creek Pkwy Houston TX, 77068 P. (281) 893-9700
C a r e & M a i n t e n a n c e Galleria area 5807 Richmond Ave. Houston, TX 77057 P. (713) 977-4455 F. (832) 834-5480 E. richmond@patio1.com North 3105 Cypress Creek Pkwy Houston TX, 77068 P. (281) 893-9700
Intermediate Project. Designer Inspiration
 WINDOWS Easy OF Project WONDER By Tallulah does the Hula This adorable Valentines Day bangle by Tali Iserles from Tallulah does the Hula combines sweet pastels with funky sparkle and vivid hues. Windows
DETAILING SOLUTIONS FOR PAINT & BODY SHOPS
 DETAILING SOLUTIONS FOR PAINT & BODY SHOPS STEP 1 After wet sanding, first use CP-1012 with a cutting wool pad @ 1000-1400 rpm to remove sand marks. Buff Out Sanding Marks Product Description CP-1012 Item#
Prototype Formulations. Household Care Products
 Prototype Formulations Household Care Products Solvent-Free Cream Formulation for Furniture Care Polishes Solvent-Free Cream A low-active-level formulation that gives a cost-efficient product with good
Congratulations on your purchase of a. airbrush.
 NEO SERIES MANUAL Congratulations on your purchase of a airbrush. CN GRAVITY-FEED DUAL-ACTION AIRBRUSH BCN SIPHON-FEED DUAL-ACTION AIRBRUSH 2 3 ASSEMBLY 1. Screw the airhose onto the airbrush (Iwata airhose
Procedures and Practices for Flexo News Inks
 Procedures and Practices for Flexo News Inks SAFETY RULES RAW INK PRESS-READY INK DILUTING THE INK TO PRESS VISCOSITY FALSE VISCOSITY (THIXOTROPY) AUTOMATIC VISCOSITY CONTROL PRESS-READY INK STORAGE INK
SNS DIPPING POWDERS INSTRUCTIONS
 SNS DIPPING POWDERS INSTRUCTIONS Healthy, Beautiful Nails in 3 Simple Steps. SNS is the world leader in dipping powders, and was the first to create a pink & white dipping system. SNS dipping powders not
Bleaching Water Stains from Furniture OVERVIEW
 Bleaching Water Stains from Furniture OVERVIEW Introduction When restoring older wood furniture you will probably encounter dark rings and black spots, which are caused by water stains. Oxalic acid is
BodyBare AquaSmooth. Instruction Booklet. wet & dry epilator AP17SR. Please read these instructions carefully and retain for future reference.
 BodyBare AquaSmooth wet & dry epilator Instruction Booklet AP17SR Please read these instructions carefully and retain for future reference. Contents Emjoi s Safety Precautions 4 Features of your BodyBare
Shellac. Application & Removal. Fingernails. Step-by-Step
 Step-by-Step Color Shellac & Removal Shellac new, patent-pending UV 3 Technology combines the ease of polish with the performance of gels. A true innovation in chip-free, extended-wear nail color. Fingernails
SPA COSMETIC REPAIR WITH THE QUICK-GLAZE SYSTEM (GRANITE, PEARL, METAL, or MARBLE COLORS)
") SPA COSMETIC REPAIR WITH THE QUICK-GLAZE SYSTEM (GRANITE, PEARL, METAL, or MARBLE COLORS) DESCRIPTION The QUICK-GLAZE repair system has been formulated for repairing marble and solid color spas. It is
SPA COSMETIC REPAIR WITH THE QUICK-GLAZE SYSTEM (GRANITE, PEARL, METAL, or MARBLE COLORS) DESCRIPTION The QUICK-GLAZE repair system has been formulated for repairing marble and solid color spas. It is
Stone & Tile Care Resource Guide
 2006/2007 EDITION 2005/2006 EDITION Stone & Tile Care Resource Guide Interactive CD To jump directly to a specific topic: 1 Click on the topic title on the Table of Contents page. 2 Alternatively, the
Color Stain 250 System APPLICATION INSTRUCTIONS
 Color Stain 250 System APPLICATION INSTRUCTIONS SUPER-KRETE PRODUCTS REQUIRED: S-12000 Heavy Duty Degreaser S-1300 Pene-Krete S-9500 Color Stain SK-P250 Clear Gloss or Clear Satin or SK-P250 VOC Clear
Circuit Cookie Roller
 Circuit Cookie Roller Created by Ruiz Brothers Last updated on 2018-01-23 08:50:41 PM UTC Guide Contents Guide Contents Overview Filament for 3D Printers in Various Colors and Types Ultimaker 2+ 3D Printer
CORIAN SOLID SURFACE CARE AND MAINTENANCE FOR FACILITY MANAGERS
 CORIAN SOLID SURFACE CARE AND MAINTENANCE FOR FACILITY MANAGERS INTRODUCTION Corian Solid Surface meets the demanding needs of today s commercial surfacing applications. As a solid, nonporous surface,
8-in-1 All Over Grooming Kit
 8-in-1 All Over Grooming Kit Model 7056CU 8-in-1 All Over Grooming Kit The BaByliss For Men 8-in-1 All Over Grooming Kit is a professional grade rechargeable trimmer with 4 interchangeable cutting heads
HOW TO CLEAN AND CARE FOR MARBLE
 HOW TO CLEAN AND CARE FOR MARBLE CONTENTS 3 GET TO KNOW YOUR STONE 4 STAIN AND SCRATCH PREVENTION 6 SEALING 7 STAIN INDENTIFICATION AND REMOVAL 9 FINAL THOUGHTS MARBLE CARE GUIDE 2 GET TO KNOW YOUR STONE
Q&A CND SHELLAC BRAND 14+ DAY NAIL COLOR SYSTEM
 POSITIONING FORMULA /APPLICATION 1. What are the benefits of the SHELLAC Brand 14+ Day Nail Color System? 2. Is the SHELLAC Brand 14+ Day Nail Color System patented? 3. Does XPRESS5 Top Coat have the same
Operating Instructions. Model No. ES-LF70. (Household) AC/Rechargeable Shaver. English 17
 AC/Rechargeable Shaver. English 17") Operating Instructions (Household) AC/Rechargeable Shaver Model No. ES-LF70 2 English 17 Before operating this unit, please read these instructions completely and save them for future use. 2 3 4 1 2 3
Operating Instructions (Household) AC/Rechargeable Shaver Model No. ES-LF70 2 English 17 Before operating this unit, please read these instructions completely and save them for future use. 2 3 4 1 2 3
Disposable Cartridge NOSE Piercing System
 Disposable Cartridge NOSE Piercing System Operators Manual FINAL A001 Innovative. Safe. Professional. You have purchased the, the most innovative nose piercing system available today. Our engineers have
Vasari LLC products as listed above are composed of the following materials:
 Material Safety Data Sheet Manufacturer : Vasari Plaster & Stucco llc 624 E. Haley St. Santa Barbara, CA, 93103 Telephone: (805) 845-2497 Prepared 12-03-09 by Vasari Plaster & Stucco LLC 24 hour emergency
Nail Tips. and Wraps. Chapter. Chapter Outline. Why Study Nail Tips and Wraps? Nail Tips. Nail Wraps. Nail Wrap Maintenance, Repair, and Removal
 Chapter Nail Tips and Wraps Chapter Outline Why Study Nail Tips and Wraps? Nail Tips Nail Wraps Nail Wrap Maintenance, Repair, and Removal s Learning Objectives After completing this chapter, you will
VALUE, QUALITY & PERFORMANCE distinguish these airbrushes!
 BS If it s quality your looking for then Iwata will deliver straight from the box with no tweaking required with absolute excellence that comes from the Iwata product. What about parts, Airbrush Megastore
Series 5. Series cc. Type Series 7. trimmer. Series 7. off. 760 cc. sensitive. intensive. clean. reset
 on Series 5 760 cc 760 cc ing sensitive intensive reset Type 5693 on Series 3 4 8 9 ing 10 2 1 5 6 760 cc 11 sensitive intensive 12 13 14 reset 15 7 16 17 20 18 19 760 cc sensitive on on reset intensive
UNICORN SPIT GEL STAIN AND GLAZE IN ONE!
 PRODUCT DESCRIPTION Eclectic Products LLC Manufacturing Facility 101 Dixie Mae Drive Pineville, Louisiana eclecticproducts.com 800.349.4667 ISO 9001:2015 Compliant Quality Management Systems Administration
UNICORN SPIT GEL STAIN AND GLAZE IN ONE!
 PRODUCT DESCRIPTION Eclectic Products LLC Manufacturing Facility 101 Dixie Mae Drive Pineville, Louisiana eclecticproducts.com 800.349.4667 ISO 9001:2008 Compliant Quality Management Systems Administration
BIODEGRADABLE SCREEN PREPARATION CHEMICALS
 BIODEGRADABLE SCREEN PREPARATION CHEMICALS 160 Fenmar Drive, Weston, Ontario, Canada, M9L 1M6, Tel: 877-465-6362, Fax: 416-743-1511 12180 Boul.Industriel, Montreal, Quebec, H1B 5R7, Tel: 514-644-4404,
mixing. It should be used for bonding any intersection of PVC where possible separation is a concern or additional
 ROYAL CELLULAR PVC ADHESIVE is a permanent, structural, two-component adhesive formulated for installing and fabricating Royal cellular PVC. SC allows an extended work life of 20-25 minutes at 75 F after
Vacuum 5 in 1 Grooming Kit
 Vacuum 5 in 1 Grooming Kit PG6070 Register online for 10,000 prize draw EXTRA year guarantee FREE rewards gallery Visit www.productregister.co.uk/remington. You must register within 28 days of purchase.
lamp operating instructions care and maintenance
 UV NAILS PROFESSIONAL contents 7 5 6 0 8! 9 @ $ ^ & * % (. 9 W UV Bulbs (in boxes) x. UV Lamp. Nail Glue x (in bag). White Sanding Block (in bag) 5. Nail Clippers (in bag) 6. Step-by-step DVD 7. Instruction
Caring for Staron Solid Surfaces
 Caring for Staron Solid Surfaces Congratulations on your Staron Purchase! Staron was created over 20 years ago and is a premium, quality solid surface backed by a 10- Year Warranty for peace of mind. Staron
Cleaning Instructions
 Cleaning Instructions Although Tarimatec no maintenance, if that should be cleaned periodically installation to keep it looking good. It is necessary to clean the space between the slats of organic debris
Acid Or Alkali? Testing With Cabbage
 Acid Or Alkali? Testing With Cabbage Topic Using vegetables as an acid/base indicator Introduction Forensic scientists need to discover if someone has tampered with liquids (e.g., cosmetics, cleaning products,
TECHNICAL INFORMATION
 TECHNICAL INFORMATION TURCO DY-CHEK INDUSTRIAL PENETRANT (STEP 2) BY THE HAND WIPE OR SOLVENT REMOVAL METHOD DESCRIPTION: TURCO DY-CHEK INDUSTRIAL PENETRANT INSPECTION is a method of non-destructive testing
CHM111 Lab Physical Separations Grading Rubric
 CHM111 Lab Physical Separations Grading Rubric Name Team Name Criteria Points possible Points earned Lab Performance Printed lab handout and rubric was brought to lab 3 Safety and proper waste disposal
Wilsonart Contract Laminate
 Wilsonart Contract Laminate Designed specifically to meet the decor needs of commercial projects, this collection features colorways, finishes, and patterns that coordinate easily with the other materials
EX-408 PRIMERS TECHNICAL DATA SHEET PRODUCT DESCRIPTION PRODUCTS SUBSTRATES & PREPARATION
 TECHNICAL DATA SHEET EX-408 PRIMERS PRODUCT DESCRIPTION Commercial Performance Coatings EX-408 Primer is a zinc phosphate containing, polyamide cured epoxy primer, that provides a tough abrasion resistant
MANICURE. Before preparing client for manicure, look for any nail disorders or infections like:
 Practical 1 MANICURE Objectives At the end of this session, you will be able to: clean and shape the nails using manicure tools clean and massage the hands apply nail polish Tools, Equipments and Materials
CoolTec. CT6cc CT5cc CT4cc CT4s CT3cc CT2cc CT2s. Type 5676
 CoolTec CT6cc CT5cc CT4cc CT4s CT3cc CT2cc CT2s Type 5676 www.braun.com/jp 2 3 4 5 6 CoolTec CoolTec CoolTec CT6cc STOP 7 8 + CoolTec 2 CoolTec 2 1 1 9 10 12 CoolTec CoolTec 2 1 new 14 2 1 15 16 new
Experiment #3. Physical Separations Candy Chromatography
 Experiment #3. Physical Separations Candy Chromatography Goals 1. To physically separate and identify dyes in candy by comparison to commercial food dyes using paper chromatography. 2. To become familiar
Rittel s EZ-100 TANNING INSTRUCTIONS
 Rittel s EZ-100 TANNING INSTRUCTIONS RITTEL S EZ-2000 Kit Using EZ-100 the newest and highest quality tanning agent available and only from RITTEL S and our authorized Distributors! This is a powdered
Stone & Tile Care Resource Guide
 2005/2006 EDITION 2005/2006 EDITION Stone & Tile Care Resource Guide KEEPING STONE & TILE BEAUTIFUL Table of Contents CARE INSTRUCTIONS BY SURFACE TYPE Marble Granite Limestone Travertine 1 3 5 7 9 11
Remove the battery cover using the. underside of the unit, ensuring that the +/- symbols match the diagram inside the unit. Re-fit the battery cover.
 fitting BATTERIES Remove the battery cover using the finger clip. Fit the x AA batteries in the underside of the unit, ensuring that the +/- symbols match the diagram inside the unit. Re-fit the battery
Product Data 342 Spraying Enamel
 Product Data 342 Spraying Enamel PRODUCTS 342 Spraying Enamel Colour 342 Reducer R303-Normal Conditions, R203-Hot Conditions Product Description A premium air dry spraying enamel based on the latest alkyd
Professional Manicure & Pedicure Kit
 ELM-MAN200-0214-01_Layout 1 28/02/2014 15:17 Page 1 Professional Manicure & Pedicure Kit 2 Year Guarantee Instruction Manual By ELM-MAN200- ELM-MAN200-0214-01_Layout 1 28/02/2014 15:17 Page 2 Thank you