Crickit Powered Mini Chair Swing Ride!
|
|
|
- Marjorie Pearl Jefferson
- 5 years ago
- Views:
Transcription

1 Crickit Powered Mini Chair Swing Ride! Created by Isaac Wellish Last updated on :18:17 PM UTC
2 Guide Contents Guide Contents Overview Adafruit Parts Materials and Tools Swing Structure First up, we'll build the structure of the swing ride, starting with the circular top. Prepare and measure circular top Make the swing tops Finish the swings Attach cylinder and motor base wheel Mounting Prepare the mounting box Mount the motor! Now attach the swing structure to the motor on the base! LOOKIN' GOOD. Leveling Wiring Getting there! Code MakeCode What is MakeCode? Install the MakeCode CRICKIT Extension Create a New Project with MakeCode The Code Uploading the code Power up CRICKIT CircuitPython Full Code Import Libraries and Initialize Values Adding Music Function for playing.wav files Main Loop Troubleshooting: Decorations and Characters! Glitter Greatness Bedazzled Adding Characters to Ride! Look at those Hooligans! Adding Fruit Power Final Touch: Orient the Swings Enjoy your new swing ride & cardboard buddies! Swing awaaaaaayyyyy! Adafruit Industries Page 2 of 40
 to lift you up and up as you spin faster! We get to make one with lights, music and more with the help of CRICKIT and cardboard.")
3 Overview The swing ride or "chair o planes" is a popular and famous ride at carnivals and amusement parks. The ride uses centrifugal force ( to lift you up and up as you spin faster! We get to make one with lights, music and more with the help of CRICKIT and cardboard. Prerequisite guides: Reading or at least skimming through these guides before beginning will save you a lot of headache in the future. You can always refer back to them if you need help! Cardboard Fundamentals ( Guide to CRICKIT ( Guide to Circuit Playground Express ( Adafruit Parts 1 x Adafruit CRICKIT for Circuit Playground Express Crickit: Creative Robotics and Interactive Construction Kit is an add-on to Circuit Playground Express OUT OF STOCK 1 x Circuit Playground Express Circuit Playground Express is a great introduction to electronics and programming ADD TO CART 1 x TT Motor DC Gearbox 200 RPM 3 to 6VDC ADD TO CART 1 x USB Cable USB A to Micro-B Adafruit Industries Page 3 of 40
4 ADD TO CART 1 x Mini Metal Speaker w/ Wires 8 ohm 0.5W ADD TO CART 1 x Thin White Wheel for TT DC Gearbox Motors 65mm Diameter ADD TO CART 1 x Switching power supply for CRICKIT 5V 2A (2000mA) - UL Listed ADD TO CART 3 x M3 Screws - 25mm long Mounting screws for mounting motor to base BUY NOW 3 x M3 Hex Nuts For mounting motor to base BUY NOW Materials and Tools Paper towel or aluminum foil roll cylindrical cardboard center Medium-sized cardboard box - need at least one face of box to be 25 x 25 cm (to make the circle top) Scrap pieces of cardboard (to make swings and character cutouts) Small cardboard box for mounting components to (Adafruit one works well) Pencil Ruler Hobby knife Scissors Twine or string Thumb tack Hot glue gun sticks of glue Phillips head screwdriver Tape Optional but recommended: Cutting mat (for cutting cardboard) Level (for leveling ride, reducing wobbles) Glue stick (for character cut outs) Glitter glue Popsicle stick (to spread glitter glue) Plastic jewels Other decorations! Peel and stick hoop and loop fasteners (Velcro) - For attaching characters to swings Print out of characters Adafruit Industries Page 4 of 40
5 Adafruit Industries Page 5 of 40

6 Swing Structure First up, we'll build the structure of the swing ride, starting with the circular top. Cut out one of the faces from your medium-sized cardboard box. The face should be at least 25 x 25 cm. Cut a piece of twine or string about 18cm long, tie it to the thumb tack, tie the other end of the string to a pencil. The distance from the tack to the pencil should be roughly 10 cm. Use the string, tack and pencil to draw a circle on the cardboard. (Note: you may need to put an extra piece of cardboard under the thumb tack to make more steady when drawing circle) Use a ruler to draw perpendicular lines going through the center of the circle. Use a hobby knife to cut out the circle. Adafruit Industries Page 6 of 40


7 Prepare and measure circular top Measure the diameter of your cylindrical base. The paper towel roll piece I used was roughly 4.4 cm in diameter. Adafruit Industries Page 7 of 40


8 From the center of the circle top, draw a mark that is half the diameter of your cylindrical base on all 4 lines. Take your cylindrical base and make sure it fits right in with the marks you drew. Lastly measure the distance from the edge of the circle top to the mark you just drew, divide by two and place a mark. Repeat on 3 other lines. Adafruit Industries Page 8 of 40
 2X4cm pieces of cardboard.")


9 Make the swing tops Cut (4), 5 cm pieces of string. Cut (8), 20 cm pieces of string. Cut out (4) 2X4cm pieces of cardboard. Make a mark in the center of each of piece of cardboard on one side and two marks equidistant from each other on the other side. Use a glue gun to glue the shorter strings to the marks made on the circle top. Now glue the cardboard pieces to the string using the center mark you drew. Glue the long strings to the equidistant marks you Adafruit Industries Page 9 of 40


10 drew on the cardboard pieces. * Tip: when gluing string or twine, it helps to bend the end you are gluing then glue down the entire bent portion of the string Adafruit Industries Page 10 of 40
 4 x 4 x ~5.")


11 Finish the swings Cut out (4) 4 x 8 cm cardboard pieces Cut out (4) 4 x 4 cm cardboard pieces, then cut each one diagonally so you have (8) 4 x 4 x ~5.66 cm pieces Score one side of the larger pieces to fold at 90 degree angle. Glue one of the smaller pieces on each side of the bent piece. Glue string ends to chairs. * Note: when gluing string ends to chairs, be aware of differing string lengths which may how upright each chair might sit naturally. Adafruit Industries Page 11 of 40


12 Attach cylinder and motor base wheel Center the cylinder in the middle of marks drawn earlier and glue in place. Adafruit Industries Page 12 of 40


13 Center the motor wheel on the other end and glue in place. Reenforce glue along the wheel and cylinder for a strong, sturdy connection. Adafruit Industries Page 13 of 40

14 Adafruit Industries Page 14 of 40
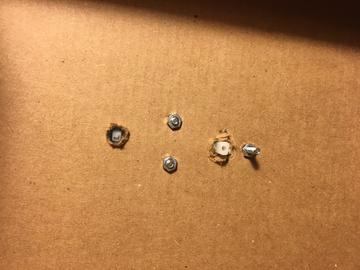
. Take a pencil or pen and create a hole. Place the motor down on hole with cables facing up.")

15 Mounting Prepare the mounting box Find the center of mounting box and draw a mark (if using Adafruit box, use the bottom of the box for mounting). Take a pencil or pen and create a hole. Place the motor down on hole with cables facing up. Place some pressure on the motor. Create another hole where the cardboard is imprinted from the bottom piece of the motor. * Note: These holes will be used to stabilize the motor to make it easier to mount in place. Adafruit Industries Page 15 of 40


16 Mount the motor! Screw in one of the M3 screws to one side of the motor. Adafruit Industries Page 16 of 40
.")


17 Fasten with hex nut on the back (inside of box). Repeat with other side and end of motor. * Tip: a pair of pliers is a big help when fastening a small hex nut Adafruit Industries Page 17 of 40

18 Now attach the swing structure to the motor on the base! LOOKIN' GOOD. Leveling Use a level on the circle top to see how level the swing ride is. If it needs some adjusting, you can toss a small piece of cardboard under the motor to counterbalance the tilt. You may have to temporarily unscrew some of the mounting screws to insert the cardboard piece. Adafruit Industries Page 18 of 40


19 Adafruit Industries Page 19 of 40

20 Adafruit Industries Page 20 of 40
 from the motor to the inside pin on motor terminal 1.")

21 Wiring Attach the red wire (5V) from the motor to the outside pin on motor terminal 1. Attach the black wire (GND) from the motor to the inside pin on motor terminal 1. Wire the speaker to the CRICKIT (wire orientation doesn't matter here). Use a small knife like a multi-tool to screw in screws and secure wires in terminals. Orient CRICKIT so that the capacitive touch pads are facing you. Use tape to secure the speaker and CRICKIT in place on box base. Adafruit Industries Page 21 of 40


22 Getting there! Adafruit Industries Page 22 of 40

23 Adafruit Industries Page 23 of 40
24 Code Now that we have everything built and wired up, it's time to make it spin! If you are new to programming I suggest using MakeCode which is an awesome introductory platform for learning to program, If you have some experience or are up for a challenge try out the CircuitPython code! Adafruit Industries Page 24 of 40

25 MakeCode What is MakeCode? MakeCode is a web based code editor for physical computing made by Microsoft. What does that mean for you? It means you can program your Circuit Playground Express to do almost anything you can dream up right from a website! You can code with blocks similar to the language Scratch, or you can do more advanced coding with Javascript. We'll be sticking to the block-based programming for this project. More on MakeCode for Adafruit boards here ( Install the MakeCode CRICKIT Extension Before we start programming, let's make sure you have the CRICKIT extension installed in MakeCode. Detailed instructions on how to do that can be found in this guide ( Create a New Project with MakeCode Head over to ( and create a new project. The Code What's going on in the code above? When button A is clicked: the brightness of the NeoPixels is set to a value of 134 all NeoPixels are set to a magenta color the motor is selected for motor pin 1 and is set to 13% When button B is clicked Adafruit Industries Page 25 of 40
26 the brightness of the NeoPixels is set to a value of 134 all NeoPixels are set to a blue color the motor is set to stop with 0% *Note: the % value of the motor can be negative if you wish for the swings to rotate the opposite direction. Switching the wiring of the motor will have the same effect. Uploading the code Now that we have the code for the project, we need to upload it to the Circuit Playground Express. Let's name our file and download it. Choose a name at the bottom of the page. Then click the pink Download button. Follow the directions and connect your Circuit Playground Express to your computer via the usb cable. Click the Circuit Playground Express Reset button once to go into programming mode (all NeoPixels will turn green). In some cases, you may need to press the reset button twice to get into programming mode. Next, look for the file in your downloads folder and drag it onto your CPLAYBOOT drive that should have showed up in your file manager/finder when you plugged in your board and entered programming mode. You should now see the CPLAYBOOT drive disappear. Power up CRICKIT Connect CRICKIT to power with the 5V DC power cable The code should now be running so try it out! If you are having issues getting things to work check out this extended guide here ( Try changing the % value of the motor to various values and see what happens! Adafruit Industries Page 26 of 40
27 CircuitPython Are you new to using CircuitPython? No worries, there is a full getting started guide here. ( If using MakeCode previously, you'll have to go back to switch to CircuitPython mode. Find out how to do that here ( To edit the CircuitPython code and receive realtime feedback in the REPL, Adafruit suggests using the Mu Editor. You can learn about Mu and installation in this tutorial. ( If you haven't used Circuit Playground Express with CRICKIT before, make sure you've updated it with the latest special 'seesaw' version of the CPX firmware. This guide will show you how ( Open up the Mu editor or an editor of your choice with a REPL. Full Code Download the code below or copy and paste into Mu and save as code.py on the CIRCUITPY drive. # Isaac Wellish # Code adapted from Mike Barela's Hello World of Robotics and # Make it Move with Crickit guides at learn.adafruit.com # Power must be plugged into right side of motor 1 on CRICKIT # to turn counter clock wise import time import audioio import board import neopixel from digitalio import DigitalInOut, Pull, Direction from adafruit_crickit import crickit # Set audio out on speaker speaker = audioio.audioout(board.a0) # Two onboard CPX buttons for input (low level saves memory) button_a = DigitalInOut(board.BUTTON_A) button_a.direction = Direction.INPUT button_a.pull = Pull.DOWN button_b = DigitalInOut(board.BUTTON_B) button_b.direction = Direction.INPUT button_b.pull = Pull.DOWN # Create one motor on seesaw motor port #1 motor = crickit.dc_motor_1 # NeoPixels on the Circuit Playground Express Light Blue pixels = neopixel.neopixel(board.neopixel, 10, brightness=0.7) # Fill them with our favorite color "#0099FF light blue" -> 0x0099FF # (see for more colors and find your fav!) # set pixels to blue on start up pixels.fill(0x0099ff) motorinc = 0 Adafruit Industries Page 27 of 40
28 # Start playing the file (in the background) def play_file(wavfile): audio_file = open(wavfile, "rb") wav = audioio.wavefile(audio_file) speaker.play(wav,loop = True) while True: if button_a.value: pixels.fill(0xfc4044) play_file("circus_chair.wav") # play WAV file motor.throttle = time.sleep(0.2) motor.throttle = motorinc # increase speed motorinc -= 0.01 if button_b.value: speaker.stop() pixels.fill(0x0099ff) # magenta i = motor.throttle while i < -0.05: i += motor.throttle = i # slow down! time.sleep(0.1) motor.throttle = 0 # stop motorinc = 0 Import Libraries and Initialize Values We'll begin the program by importing the necessary libraries and initialize the variables we'll be using. If you think you might be missing a library, you'll be covered by installing the whole library package. Find out how in the CircuitPython Essentials Guide on CircuitPlayground Libraries. ( Adafruit Industries Page 28 of 40
29 import time import audioio import board import neopixel from digitalio import DigitalInOut, Pull, Direction from adafruit_crickit import crickit # Set audio out on speaker speaker = audioio.audioout(board.a0) # Two onboard CPX buttons for input (low level saves memory) button_a = DigitalInOut(board.BUTTON_A) button_a.direction = Direction.INPUT button_a.pull = Pull.DOWN button_b = DigitalInOut(board.BUTTON_B) button_b.direction = Direction.INPUT button_b.pull = Pull.DOWN # Create one motor on seesaw motor port #1 motor = crickit.dc_motor_1 # NeoPixels on the Circuit Playground Express Light Blue pixels = neopixel.neopixel(board.neopixel, 10, brightness=0.7) # Fill them with our favorite color "#0099FF light blue" -> 0x0099FF # (see for more colors and find your fav!) #set pixels to blue on start up pixels.fill(0x0099ff) motorinc = 0 Set up and initialize speaker, buttons, motor and NeoPixels. Adding Music The music for this project ( was provided by robcro6010 on freesound.org a "huge collaborative database of audio snippets, samples, recordings, bleeps,... released under Creative Commons licenses that allow their reuse" CircuitPython needs sound files formatted a certain way to play them. See this guide for ensuring your sound files are in the correct format ( Here is a properly formatted.wav file of the music we are using. Click to download: Once you have the file, place it in the top level (root) directory in your Circuit Playground Express CIRCUITPY drive. Function for playing.wav files Adafruit Industries Page 29 of 40
30 # Start playing the file (in the background) def play_file(wavfile): audio_file = open(wavfile, "rb") wav = audioio.wavefile(audio_file) speaker.play(wav,loop = True) This code searches for a.wav file on the drive, plays and loops it. Main Loop while True: if button_a.value: pixels.fill(0xfc4044) # magenta play_file("circus_chair.wav") # play WAV file motor.throttle = time.sleep(0.2) motor.throttle = motorinc # increase speed! motorinc -= 0.01 if button_b.value: speaker.stop() pixels.fill(0x0099ff) # blue i = motor.throttle while i < -0.05: i += motor.throttle = i # slow down! time.sleep(0.1) motor.throttle = 0 # stop motorinc = 0 The while True: loop will be running forever once the program has entered it. When Button A is pressed: NeoPixels turn magenta start the music set the motor to value of -20 to get torque needed to start moving quickly set motor to which will be slowest speed decrement motorinc by 0.01 each time Button A is pressed again, the motor will increase in speed by 0.01 When Button B is pressed: stop the music turn NeoPixels blue decrement motor speed over time until motor stops * Note the values for the motor are negative because I wanted the ride to spin counter-clock wise. I could have also changed the orientation of the motor wires in CRICKIT. There you have it! Adafruit Industries Page 30 of 40
31 Troubleshooting: If the music isn't playing, make sure the file is formatted correctly and that the file is in the top level (called the root) directory of the CIRCUITPY drive. Use the REPL in Mu ( to tackle code related issues. More CircuitPython help here. ( If having motor problems, check that you have a 5V power supply attached to the DC jack on your CRICKIT board and that the on/off switch next to the power jack is in the on position. Adafruit Industries Page 31 of 40


32 Decorations and Characters! Glitter Greatness Glob the glitter glue all over the cylinder. Use a popsicle stick to uniformly transfer the glitter all over the cylinder. Follow the swirl of the cylinder with another color of glitter glue to create a "barber shop" effect. Let the glue and glitter dry overnight. Adafruit Industries Page 32 of 40


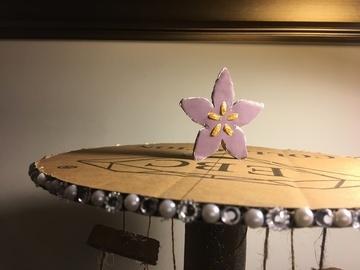
33 Bedazzled Attach some plastic jewels or other decorations to the perimeter of the circle top. Create a pattern and repeat all the way around the top. Adding Characters to Ride! Click the button below to download a pdf of the characters used in the project. Or make your own! Adafruit Industries Page 33 of 40
 2 x 3 cm pieces of cardboard to glue to bottom of characters as a stand.")

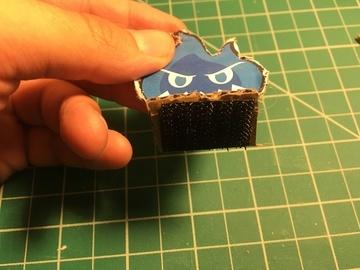
34 Cut out character with scissors and glue to cardboard. Cut out character from cardboard with hobby knife. Cut out (4) 2 x 3 cm pieces of cardboard to glue to bottom of characters as a stand. Cut out (8) 2 x 3 cm pieces of hook and loop tape (4 pieces of hook and 4 pieces of loop). Place one hook piece on bottom of character. Place the loop piece on a chair. Repeat for all characters. * Tip: Cut out character with scissors completely before glueing to cardboard and cutting out with hobby knife. Will end up more clean looking. Adafruit Industries Page 34 of 40


35 Adafruit Industries Page 35 of 40


36 Look at those Hooligans! Adding Fruit Power Cut out Adafruit logo using method from above. Glue upright to center of circle top. Add some glittery goodness! Adafruit Industries Page 36 of 40


37 Adafruit Industries Page 37 of 40

38 Final Touch: Orient the Swings Adafruit Industries Page 38 of 40


39 You may find the swings do not all face one direction when done. If you want to orient the swings to all face one direction: Use a hot glue gun to put some glue on the small string at the top of the swing. Twist and hold swing until the orientation is just right. Enjoy your new swing ride & cardboard buddies! Adafruit Industries Page 39 of 40
40 Swing awaaaaaayyyyy! Adafruit Industries Last Updated: :18:16 PM UTC Page 40 of 40
Crickit Powered Holiday Diorama
 Crickit Powered Holiday Diorama Created by Isaac Wellish Last updated on 2018-12-04 12:49:07 AM UTC Guide Contents Guide Contents Overview Prerequisite Guides Adafruit Parts Tools and Materials Wiring
Hammer Time Mini Golf Hazard with Crickit
 Hammer Time Mini Golf Hazard with Crickit Created by John Park Last updated on 2018-07-09 06:47:53 AM UTC Guide Contents Guide Contents Overview Please Hammer, Don't Hurt Em Parts Materials & Tools Program
Stumble-Bot. Created by Dano Wall. Last updated on :04:06 AM UTC
 Stumble-Bot Created by Dano Wall Last updated on 2018-09-06 05:04:06 AM UTC Guide Contents Guide Contents Overview Simply Stumbling We Have the Technology Other Supplies Leg Assembly Front Legs Back Legs
Crickit Carnival Bumper Bot
 Crickit Carnival Bumper Bot Created by John Park Last updated on 2018-08-22 04:08:52 PM UTC Guide Contents Guide Contents Overview Parts Materials and Tools Build the Bumper Bot Cut the Cardboard Chassis
Crickit Dancing Marionette Kit Created by Dano Wall. Last updated on :03:11 PM UTC
 Crickit Dancing Marionette Kit Created by Dano Wall Last updated on 2019-04-04 07:03:11 PM UTC Overview This project demonstrates how to build a robotic marionette that is controlled with four arcade-style
Crawling Baby Sea Turtle Robot
 Crawling Baby Sea Turtle Robot Created by Dano Wall Last updated on 2018-08-22 04:10:26 PM UTC Guide Contents Guide Contents Overview Save the Wee Turtles Household Materials Adafruit Electronics Create
Paper Airplane Launcher
 Paper Airplane Launcher Created by Dano Wall Last updated on 2018-08-27 08:36:14 PM UTC Guide Contents Guide Contents Overview A Launching Platform The Electronics Materials Build the Launcher Attach Motors
Trash Panda. Created by Dano Wall. Last updated on :30:46 AM UTC
 Trash Panda Created by Dano Wall Last updated on 2018-06-06 02:30:46 AM UTC Guide Contents Guide Contents Overview Amazon's playful boxes We have the technology Other supplies you will need Create your
Ping Pong Ball Launcher
 Ping Pong Ball Launcher Created by Dano Wall Last updated on 2019-01-25 03:19:13 AM UTC Guide Contents Guide Contents Overview Electronic Parts Circuit Playground Express USB cable - USB A to Micro-B Alkaline
Slider Crank Mechanism -- from Cardboard and Craft Sticks
 Slider Crank Mechanism -- from Cardboard and Craft Sticks Created by John Park Last updated on 2018-08-22 04:07:21 PM UTC Guide Contents Guide Contents Overview Materials Tools Build the Slider Crank Build
Adabot Operation Game
 Adabot Operation Game Created by John Park Last updated on 2018-08-22 04:11:17 PM UTC Guide Contents Guide Contents Overview Parts Materials & Tools Build the Operating Table Print the Board and Pieces
The Scream: Interactive Screaming Painting
 The Scream: Interactive Screaming Painting Created by John Park Last updated on 2018-08-22 04:10:47 PM UTC Guide Contents Guide Contents Overview Parts & Materials Optional Build the Interactive Painting
Mini Golf Course with Circuit Playground and Crickit
 Mini Golf Course with Circuit Playground and Crickit Created by Dano Wall Last updated on 2018-08-22 04:09:31 PM UTC Guide Contents Guide Contents Overview Materials & Tools Adafruit Parts CRICKIT Assembly
Crawling Animatronic Hand
 Crawling Animatronic Hand Created by Dano Wall Last updated on 2018-12-03 06:39:35 PM UTC Guide Contents Guide Contents Overview Parts Used Tools & Materials Prepare the Hand Your hand is now ready to
Pushrod Garage. Created by John Park. Last updated on :07:30 PM UTC
 Pushrod Garage Created by John Park Last updated on 2018-08-22 04:07:30 PM UTC Guide Contents Guide Contents Overview Parts & Materials Tools Pushrod Mechanism Code it with MakeCode Functions On Start
Snake Charmer Box. Created by Dano Wall. Last updated on :07:25 PM UTC
 Snake Charmer Box Created by Dano Wall Last updated on 2018-08-22 04:07:25 PM UTC Guide Contents Guide Contents Overview Materials Circuit Playground Express Standard servo - TowerPro SG-5010 Small Alligator
Milk Jug Glow Skull. Created by John Park. Last updated on :28:36 PM UTC
 Milk Jug Glow Skull Created by John Park Last updated on 2018-09-14 09:28:36 PM UTC Guide Contents Guide Contents Overview Parts Materials & Tools Optional Skull/Sculpting Stand Build the Skull Prep the
Android GBoard Morse Code Control with Circuit Playground Express
 Android GBoard Morse Code Control with Circuit Playground Express Created by Dave Astels Last updated on 2018-08-22 04:10:30 PM UTC Guide Contents Guide Contents Overview Parts Materials for the box Installing
BLE Light Switch with Feather nrf52840 and Crickit
 BLE Light Switch with Feather nrf52840 and Crickit Created by John Park Last updated on 2019-02-15 07:06:19 PM UTC Guide Contents Guide Contents Overview Parts Adafruit Feather nrf52840 Express Adafruit
Bunny Ears with MakeCode
 Bunny Ears with MakeCode Created by Erin St Blaine Last updated on 2018-08-22 04:05:47 PM UTC Guide Contents Guide Contents Introduction Tools & Other Materials Programming with MakeCode Set Up the Light
Neon LED Signs. Created by John Park. Last updated on :11:09 PM UTC
 Neon LED Signs Created by John Park Last updated on 2018-08-22 04:11:09 PM UTC Guide Contents Guide Contents Overview Parts Materials Tools Build the Sign Driver Preparation Solder the Circuit Solder the
Infinity Mirror Valentine's Candy Box
 Infinity Mirror Valentine's Candy Box Created by Kathy Ceceri Last updated on 2019-02-07 09:44:54 PM UTC Guide Contents Guide Contents Overview Parts List -- Mini Box Version Chibitronics Color LEDs Add-On
CPX Mystery Dreidel. Created by Kathy Ceceri. Last updated on :51:40 PM UTC
 CPX Mystery Dreidel Created by Kathy Ceceri Last updated on 2018-12-04 02:51:40 PM UTC Guide Contents Guide Contents Overview Parts List -- Electronics Circuit Playground Express USB cable - USB A to Micro-B
Circuit Playground Express Head-Tilt Ears
 Circuit Playground Express Head-Tilt Ears Created by Dave Astels Last updated on 2018-10-09 04:07:03 PM UTC Guide Contents Guide Contents Overview Parts Circuit Playground Express Micro servo Lithium Ion
Reindeer Mask with Animated Eyes
 Reindeer Mask with Animated Eyes Created by Dano Wall Last updated on 2018-12-05 10:50:10 PM UTC Guide Contents Guide Contents Overview Parts Adafruit HalloWing M0 Express Convex Plastic Lens with Edge
UFO Flying Saucer with Circuit Playground Express
 UFO Flying Saucer with Circuit Playground Express Created by John Park Last updated on 2018-08-31 08:42:17 PM UTC Guide Contents Guide Contents Overview Code the UFO with CircuitPython Build the Flying
Wind Blowing Emoji Prop
 Wind Blowing Emoji Prop Created by John Park Last updated on 2018-08-22 04:05:17 PM UTC Guide Contents Guide Contents Overview Code it with MakeCode Start Up Variables On Loud Sound If - Else Iterate Debounce
Con Badge with Circuit Playground Express
 Con Badge with Circuit Playground Express Created by Sophy Wong Last updated on 2018-04-11 05:00:16 PM UTC Guide Contents Guide Contents Overview Tools & Materials Laser Cutting Program the Circuit Playground
3D Printed 20w Amplifier Box
 3D Printed 20w Amplifier Box Created by Ruiz Brothers Last updated on 2018-02-26 06:48:02 PM UTC Guide Contents Guide Contents Overview Prerequisite Guide Tools & Supplies Parts 3D Printing Print in your
NeoPixie Dust Bag with Circuit Playground Express
 NeoPixie Dust Bag with Circuit Playground Express Created by John Park Last updated on 2017-12-20 10:00:29 PM UTC Guide Contents Guide Contents Overview Code It Setup Animation Color Touch Variable Color
HalloWing Jump Scare Trap
 HalloWing Jump Scare Trap Created by John Park Last updated on 2018-10-16 04:38:42 PM UTC Guide Contents Guide Contents Overview Parts Materials Build the Jump Scare Trap Circuit Mounting Sensor Lens Blocker
Sword & Wand Prop Effects with Circuit Playground
 Sword & Wand Prop Effects with Circuit Playground Created by John Park Last updated on 2018-01-13 05:32:54 AM UTC Guide Contents Guide Contents Overview Circuit Playground Express with MakeCode Lots of
Adafruit Capacitive Touch Sensor Breakouts
 Adafruit Capacitive Touch Sensor Breakouts Created by Bill Earl Last updated on 2018-08-22 03:36:13 PM UTC Guide Contents Guide Contents Overview Momentary Toggle 5-Pad Momentary Assembly and Wiring Installing
Circuit Playground Express Laser Tag
 Circuit Playground Express Laser Tag Created by John Park Last updated on 2017-11-14 01:56:23 AM UTC Guide Contents Guide Contents Build a Laser Tag Game Code the Laser Tag Game MakeCode Transmitting IR
Steven Universe Cosplay Shirt & Gem Created by Erin St Blaine. Last updated on :54:25 PM UTC
 Steven Universe Cosplay Shirt & Gem Created by Erin St Blaine Last updated on 2019-04-04 06:54:25 PM UTC Overview Make yourself a Steven Universe costume that will light up the world. This guide will show
Glowing Smokey Skull. Created by Ruiz Brothers. Last updated on :03:40 PM UTC
 Glowing Smokey Skull Created by Ruiz Brothers Last updated on 2018-08-22 04:03:40 PM UTC Guide Contents Guide Contents Overview Easy DIY Halloween Props Electronic Halloween! Circuit Playground NeoPixels
PyPortal NeoPixel Color Picker Created by Kattni Rembor. Last updated on :42:41 PM UTC
 PyPortal NeoPixel Color Picker Created by Kattni Rembor Last updated on 2019-03-27 10:42:41 PM UTC Overview This simple project adds a little color to your life with CircuitPython, PyPortal and NeoPixels.
Solar Boost Bag. Created by Becky Stern. Last updated on :44:55 PM UTC
 Solar Boost Bag Created by Becky Stern Last updated on 2018-08-22 03:44:55 PM UTC Guide Contents Guide Contents Overview 3D Design Files Customize Design Assemble Circuit Prepare Solar Panel Enclosure
3D Printed 20w Amplifier Box
 3D Printed 20w Amplifier Box Created by Noe & Pedro Ruiz Last updated on 2014-04-22 03:01:38 PM EDT Guide Contents Guide Contents Overview Prerequisite Guide Tools & Supplies Parts 3D Printing Print in
NeoPixel Fairy Crown. Created by Erin St Blaine. Last updated on :22:47 AM UTC
 NeoPixel Fairy Crown Created by Erin St Blaine Last updated on 2018-12-31 02:22:47 AM UTC Guide Contents Guide Contents Overview Adafruit NeoPixel LED Dots Strand - 20 LEDs at 2" Pitch Adafruit GEMMA M0
Trellis 3D Printed Enclosure
 Trellis 3D Printed Enclosure Created by Ruiz Brothers Last updated on 2018-08-22 03:39:07 PM UTC Guide Contents Guide Contents Overview Parts Tools & Supplies Modeling 123D Design Customize Measuring Parts
No-Sew LED Wristband. Created by Kathy Ceceri. Last updated on :23:40 PM UTC
 No-Sew LED Wristband Created by Kathy Ceceri Last updated on 2018-11-13 09:23:40 PM UTC Guide Contents Guide Contents Overview Playing with LED Options Suggested Parts List -- Electronics Suggested Materials
Feather Weather Lamp. Created by Ruiz Brothers. Last updated on :54:26 PM UTC
 Feather Weather Lamp Created by Ruiz Brothers Last updated on 2018-08-22 03:54:26 PM UTC Guide Contents Guide Contents Overview Weather Reactive Pixels Prerequisite Guides Parts Tools & Supplies Circuit
NeoPixel Bike Light. Created by Ruiz Brothers. Last updated on :43:46 PM UTC
 NeoPixel Bike Light Created by Ruiz Brothers Last updated on 2018-11-15 07:43:46 PM UTC Guide Contents Guide Contents Overview 3D Printed Headlight Adafruit's Feather Platform Circuit Python Powered Parts
CircuitPython Media Dial
 CircuitPython Media Dial Created by Ruiz Brothers Last updated on 2018-02-07 05:00:25 AM UTC Guide Contents Guide Contents Overview Prerequisite Guides Adafruit Trinket M0 - for use with CircuitPython
NeoMatrix 8x8 Word Clock
 NeoMatrix 8x8 Word Clock Created by Andy Doro Last updated on 2017-10-10 04:10:51 AM UTC Guide Contents Guide Contents Overview Parts List Parts Tools Circuit Assembly Overview Uploading Code Understanding
Adafruit VL53L0X Time of Flight Micro-LIDAR Distance Sensor Breakout
 Adafruit VL53L0X Time of Flight Micro-LIDAR Distance Sensor Breakout Created by lady ada Last updated on 2017-12-28 11:56:14 PM UTC Guide Contents Guide Contents Overview Sensing Capablities Pinouts Power
Spinning Disc Step Sequencer
 Spinning Disc Step Sequencer Created by John Park Last updated on 2019-01-09 06:27:17 PM UTC Guide Contents Guide Contents Overview How it Works Parts Materials Feather M4 and Crickit Prep Crickit FeatherWing
Interior Purse Light. Created by Becky Stern. Last updated on :41:08 PM UTC
 Interior Purse Light Created by Becky Stern Last updated on 2018-08-22 03:41:08 PM UTC Guide Contents Guide Contents Overview Circuit Diagram Stitch Sequins Add Tape Arduino Code CircuitPython Code Use
FLORA TV-B-Gone. Created by Becky Stern. Last updated on :32:57 PM UTC
 FLORA TV-B-Gone Created by Becky Stern Last updated on 2018-08-22 03:32:57 PM UTC Guide Contents Guide Contents Overview Parts Tutorials Transistors Resistors LEDs Pushbutton Program it Power Fabric pinwheel
Easy Sparkle Pocket T-Shirt
 Easy Sparkle Pocket T-Shirt Created by Erin St Blaine Last updated on 2018-10-18 06:45:05 PM UTC Guide Contents Guide Contents Overview Parts Materials Needed Code with MakeCode Vinyl Cutting Sizing and
3D Printed Google AIY Voice Kit
 3D Printed Google AIY Voice Kit Created by Ruiz Brothers Last updated on 2018-01-09 12:47:26 AM UTC Guide Contents Guide Contents Overview 3D Print a DIY AI enclosure for the Raspberry PI! Parts, Tools
NeoPixel Ring Bangle Bracelet
 NeoPixel Ring Bangle Bracelet Created by Becky Stern Last updated on 2017-09-28 11:14:48 PM UTC Guide Contents Guide Contents Overview Circuit Diagram Build it! Arduino Code CircuitPython Code Planning
CircuitPython Snow Globe
 CircuitPython Snow Globe Created by John Park Last updated on 2018-08-22 04:04:24 PM UTC Guide Contents Guide Contents Overview Materials and Parts Code with CircuitPython Get Ready! Download the Snow
Jewel Hair Stick. Created by Leslie Birch. Last updated on :47:17 PM UTC
 Jewel Hair Stick Created by Leslie Birch Last updated on 2018-08-22 03:47:17 PM UTC Guide Contents Guide Contents Overview Tools & Supplies Prepare Chopstick Circuit Diagram Solder Circuit Arduino Code
Clockwork Goggles. Created by John Park. Last updated on :03:10 PM UTC
 Clockwork Goggles Created by John Park Last updated on 2018-08-22 04:03:10 PM UTC Guide Contents Guide Contents Overview Assemble Circuit and Goggles CircuitPython Setup and Code Rock the Goggles 2 3 6
Prophet 600 GliGli mod
 Prophet 600 GliGli mod Created by Collin Cunningham Last updated on 2018-08-22 04:04:56 PM UTC Guide Contents Guide Contents Overview What you'll need Program the Teensy++ Modify the Teensy++ Prep header
Trinket NeoPixel LED Longboard
 Trinket NeoPixel LED Longboard Created by Ruiz Brothers Last updated on 2017-10-02 06:00:32 PM UTC Guide Contents Guide Contents Overview Parts Tools & Supplies Prerequisite Guides 3D Printing PLA Material
Interactive Gift Box. Created by codingpro. Last updated on :47:40 AM UTC
 Interactive Gift Box Created by codingpro Last updated on 2018-01-10 01:47:40 AM UTC Guide Contents Guide Contents Overview Adafruit GEMMA M0 - Miniature wearable electronic platform Lithium Ion Polymer
Adafruit TPL5110 Power Timer Breakout
 Adafruit TPL5110 Power Timer Breakout Created by lady ada Last updated on 2017-12-11 06:28:19 AM UTC Guide Contents Guide Contents Overview Pinouts Power Pins Control Pins Assembly Prepare the header strip:
7 Portable Multitouch Raspberry Pi Tablet
 7 Portable Multitouch Raspberry Pi Tablet Created by Ruiz Brothers Last updated on 2017-02-27 04:13:53 PM UTC Guide Contents Guide Contents Overview Portable Raspberry Pi Tablet 7" Multitouch Display Parts
Joy Featherwing. Created by Dean Miller. Last updated on :03:07 PM UTC
 Joy Featherwing Created by Dean Miller Last updated on 2018-08-22 04:03:07 PM UTC Guide Contents Guide Contents Overview Pinouts Power and Reset Pins I2C Data Pins I2C Addressing Optional Interrupt Pin
Boomy The Boombox. Created by Ruiz Brothers. Last updated on :52:13 PM UTC
 Boomy The Boombox Created by Ruiz Brothers Last updated on 2017-09-05 08:52:13 PM UTC Guide Contents Guide Contents Overview Boomy The Boombox AdaBox 004 Parts 3D Printing 3D Printed Parts Enclosure Design
Making Adabot: Part 1
 Making Adabot: Part 1 Created by Rick Winscot Last updated on 2018-08-22 03:37:47 PM UTC Guide Contents Guide Contents Overview Tools / Materials Chassis Fantastic Easy Hardware Classic Connectors Magnificent
Adafruit LED Sequins. Created by Becky Stern. Last updated on :02:00 AM UTC
 Adafruit LED Sequins Created by Becky Stern Last updated on 2018-03-02 04:02:00 AM UTC Guide Contents Guide Contents Overview Sewing with conductive thread Circuit Diagram GEMMA sequin hat Arduino Code
LED Lightbox. Created by Sam Clippinger. Last updated on :50:00 AM UTC
 LED Lightbox Created by Sam Clippinger Last updated on 2016-09-03 01:50:00 AM UTC Guide Contents Guide Contents Overview TL;DR Skill Level Parts List Yellow sticker reads: "Bad planning on your part does
Sewable NeoPixels. Created by Becky Stern. Last updated on :50:14 PM EDT
 Sewable NeoPixels Created by Becky Stern Last updated on 2015-08-25 07:50:14 PM EDT Guide Contents Guide Contents Overview Prerequisite guides Lots of Pixels? Hook up alligator clips Run pixel test code
Light-Up Angler Fish Embroidery
 Light-Up Angler Fish Embroidery Created by Becky Stern Last updated on 2018-08-22 03:35:36 PM UTC Guide Contents Guide Contents Overview Tools & Supplies Layout & Circuit Diagram Sew Circuit Code Hand
Circuit Playground Yoyo
 Circuit Playground Yoyo Created by Ruiz Brothers Last updated on 2018-01-13 05:56:02 AM UTC Guide Contents Guide Contents Overview 3D Printed NeoPixel Yoyo History of the Yo-Yo Expectations Parts Tools
Adafruit PowerBoost 500 Shield
 Adafruit PowerBoost 500 Shield Created by lady ada Last updated on 2018-08-22 03:43:27 PM UTC Guide Contents Guide Contents Overview Pinouts DC/DC Boost section Indicator LEDs Charging section Power Switch
DIY Circuit Playground Shields
 DIY Circuit Playground Shields Created by Dave Astels Last updated on 2018-08-22 04:05:06 PM UTC Guide Contents Guide Contents Overview Small Alligator Clip Test Lead (set of 12) Small Alligator Clip to
Mystical LED Halloween Hood
 Mystical LED Halloween Hood Created by Becky Stern Last updated on 2017-09-28 11:13:20 PM UTC Guide Contents Guide Contents Overview NeoPixel GEMMA circuit Arduino Code NeoPixel Überguide: Arduino Library
PyPortal View Master Created by Ruiz Brothers. Last updated on :51:28 AM UTC
 PyPortal View Master Created by Ruiz Brothers Last updated on 2019-03-13 11:51:28 AM UTC Overview In this project we re building a view master inspired device using Adafruit s PyPortal. The eyepiece makes
Adafruit 1.27" and 1.5" Color OLED Breakout Board
 Adafruit 1.27" and 1.5" Color OLED Breakout Board Created by Bill Earl Last updated on 2017-11-17 05:54:22 PM UTC Guide Contents Guide Contents Overview Board Technical Details Assembly Prepare the header
NeoPixel Manicure. Created by Sophy Wong. Last updated on :50:38 PM UTC
 NeoPixel Manicure Created by Sophy Wong Last updated on 2018-04-11 05:50:38 PM UTC Guide Contents Guide Contents Overview Parts & Supplies Tools Circuit Diagram Build the Circuit Measure Your Circuit Prepare
Zelda Thunder Helm. Created by Ruiz Brothers. Last updated on :46:52 PM UTC
 Zelda Thunder Helm Created by Ruiz Brothers Last updated on 2017-08-23 02:46:52 PM UTC Guide Contents Guide Contents Overview Zelda: Breath Of The Wild Parts, Tools and Supplies Proto-Pasta - Aromatic
Adafruit DRV2605 Haptic Controller Breakout
 Adafruit DRV2605 Haptic Controller Breakout Created by lady ada Last updated on 2018-08-20 03:28:51 PM UTC Guide Contents Guide Contents Overview Pinouts Power Pins I2C Pins Other! Assembly Prepare the
Guardian Shield+ Zelda Breath of the Wild
 Guardian Shield+ Zelda Breath of the Wild Created by Ruiz Brothers Last updated on 2018-08-22 04:01:50 PM UTC Guide Contents Guide Contents Overview Articulating Handle Rechargeable Prerequisite Guides
Cup o' Sound. Created by Becky Stern. Last updated on :30:06 PM EST
 Cup o' Sound Created by Becky Stern Last updated on 2015-02-18 01:30:06 PM EST Guide Contents Guide Contents Overview Circuit Diagram Load Sound and Prepare Components Solder Circuit and Assemble Use it!
Toy Car Speed Timer. Created by Kirby Griese. Last updated on :13:49 PM UTC
 Toy Car Speed Timer Created by Kirby Griese Last updated on 2017-03-20 09:13:49 PM UTC Guide Contents Guide Contents Overview Parts needed Prerequisites 3D Printing Assembly Wiring Software Use It 2 3
Tent Lantern. Created by Timothy Reese. Last updated on :17:25 AM UTC
 Tent Lantern Created by Timothy Reese Last updated on 2017-07-14 05:17:25 AM UTC Guide Contents Guide Contents Overview Things you'll need: What You'll Learn: 3D Printing Code Assembly Wiring Diagram Soldering
Overwatch Prop Gun: Lucio's Blaster Pt. 3
 Overwatch Prop Gun: Lucio's Blaster Pt. 3 Created by John Park Last updated on 2017-11-24 09:48:21 PM UTC Guide Contents Guide Contents 3D Printing Circuit Building Assembly Front Assembly Rear Assembly
Portable Apple Watch Charger
 Portable Apple Watch Charger Created by Ruiz Brothers Last updated on 2017-10-22 09:58:04 PM UTC Guide Contents Guide Contents Overview Smart Charging Prerequisite Guides Parts, Tool & Supplies Circuit
Secret Hollow Book Intrusion Detector
 Secret Hollow Book Intrusion Detector Created by John Park Last updated on 2018-08-22 04:05:48 PM UTC Guide Contents Guide Contents Overview Materials & Tools Optional Android Hollowing the Book Preparation
Data Logging with Feather and CircuitPython
 Data Logging with Feather and CircuitPython Created by Kattni Rembor Last updated on 2018-04-30 09:58:20 PM UTC Guide Contents Guide Contents Overview Things You'll Need Adafruit Feather M0 Express - Designed
3D Printed Case for Adafruit Feather
 3D Printed Case for Adafruit Feather Created by Ruiz Brothers Last updated on 2018-08-22 03:59:38 PM UTC Guide Contents Guide Contents Overview Adafruit Feather Box New Update! Check out the TFT Feather
Trinket-Powered Conference Room Occupancy Display
 Trinket-Powered Conference Room Occupancy Display Created by Mike Barela Last updated on 2018-08-22 03:38:56 PM UTC Guide Contents Guide Contents Overview Build Wiring Diagrams Populating the Board Code
i2c/spi LCD Backpack Created by lady ada Last updated on :11:04 PM UTC
 i2c/spi LCD Backpack Created by lady ada Last updated on 2017-08-16 05:11:04 PM UTC Guide Contents Guide Contents Overview Which LCD to Use? Wait - the backpack has 16 holes, but my LCD only has 14 pins!
Punk LED Collar. Created by Becky Stern. Last updated on :02:45 PM EST
 Punk LED Collar Created by Becky Stern Last updated on 2015-02-20 01:02:45 PM EST Guide Contents Guide Contents Overview Tools & Supplies Circuit Diagram Install LEDs Solder Components Test & Finish Wear
Circuit Playground Kaleidoscope
 Circuit Playground Kaleidoscope Created by Mike Barela Last updated on 2016-08-30 11:10:51 PM UTC Guide Contents Guide Contents Overview Materials Inside Program Assemble and Play Fancy It Up 2 3 3 6 6
Circuit Playground Combadge
 Circuit Playground Combadge Created by Ruiz Brothers Last updated on 2017-10-22 10:42:02 PM UTC Guide Contents Guide Contents Overview What's a Combadge? DIY Combadge How Does It Work? Make It How You
7" Portable HDMI Monitor
 7" Portable HDMI Monitor Created by Ruiz Brothers Last updated on 2017-05-29 05:47:14 PM UTC Guide Contents Guide Contents Overview DIY Monitor Connect to a Raspberry pi Use as a second monitor Camera
Simple LED Unicorn Horn
 Simple LED Unicorn Horn Created by Ruiz Brothers Last updated on 2018-08-22 03:56:14 PM UTC Guide Contents Guide Contents Overview 3D Printed Unicorn Horn Want More Magic/Colors? Great For Beginners Parts
Adafruit CCS811 Air Quality Sensor
 Adafruit CCS811 Air Quality Sensor Created by Dean Miller Last updated on 2018-01-15 11:03:58 PM UTC Guide Contents Guide Contents Overview Pinouts Power Pins: Logic pins: Arduino Wiring & Test I2C Wiring
LED Eyes. Created by Ruiz Brothers. Last updated on :50:55 AM UTC
 LED Eyes Created by Ruiz Brothers Last updated on 2018-01-13 05:50:55 AM UTC Guide Contents Guide Contents Overview Parts, Tools and Supplies Enameled Copper Magnet Wire 11 meters / 0.1mm diameter Adafruit
Audio Prank Gift Box. Created by Becky Stern. Last updated on :46:15 PM UTC
 Audio Prank Gift Box Created by Becky Stern Last updated on 2018-08-22 03:46:15 PM UTC Guide Contents Guide Contents Overview Circuit Diagram Prepare Components Build Circuit Wrap and Give 2 3 5 6 12 14
3D Printed LED Buckle
 3D Printed LED Buckle Created by Ruiz Brothers Last updated on 2018-08-22 03:38:02 PM UTC Guide Contents Guide Contents Overview Customize the Buckle Artwork, Design and Text Scale, Adjust and Combine
Adafruit MCP9808 Precision I2C Temperature Sensor Guide
 Adafruit MCP9808 Precision I2C Temperature Sensor Guide Created by lady ada Last updated on 2017-11-12 06:09:49 PM UTC Guide Contents Guide Contents Overview Pinouts Power Pins I2C Data Pins Optional Pins
FLORA Pixel Brooch. Created by Becky Stern. Last updated on :19:07 PM EST
 FLORA Pixel Brooch Created by Becky Stern Last updated on 2015-02-20 01:19:07 PM EST Guide Contents Guide Contents Overview Connect first signal wire Connect power and ground wires Add more pixels Program
Adafruit Si7021 Temperature + Humidity Sensor
 Adafruit Si7021 Temperature + Humidity Sensor Created by lady ada Last updated on 2017-11-12 06:14:07 PM UTC Guide Contents Guide Contents Overview Pinouts Power Pins: I2C Logic pins: Assembly Prepare